Introduction
🌞 Summer is here, and what better way to beat the heat than with a cool, creamy, and indulgent dessert? Imagine transforming everyday ingredients into a show-stopping treat that will make your family and friends go wild. Look no further than this amazing Oreo Ice Cream Cake recipe, perfect for hot summer days and nights. With its simplicity, flavor, and fun, it’s a comfort food dream come true. On https://us.ratemyrecipes.com, we’re all about sharing delicious, easy-to-make recipes that bring people together, and this Oreo Ice Cream Cake is sure to become a new favorite.
Why This Works
🤩 This Oreo Ice Cream Cake recipe stands out for its perfect balance of flavors and textures, combined with ease of preparation. The crunch of the Oreos, the creaminess of the ice cream, and the richness of the chocolate all come together to create a dessert that’s both refreshing and decadent. Plus, it’s incredibly accessible, requiring minimal baking and no advanced cooking techniques, making it perfect for anyone looking to create a stunning dessert without the fuss.
Key Ingredients
🍪 1 1/2 cups Oreo cookies, crushed
🍦 1 1/2 quarts vanilla ice cream, softened
🥛 1 cup heavy cream
🍫 1 cup powdered sugar
🧈 1/2 cup unsalted butter, softened
🌰 2 teaspoons vanilla extract
🍫 1 cup semi-sweet chocolate chips
Instructions
1️⃣ Start by preparing your crust. In a medium bowl, mix together the crushed Oreos and melted butter until well combined. Press this mixture into the bottom of a 9-inch springform pan. Refrigerate for at least 30 minutes to set.
2️⃣ Next, soften your ice cream by leaving it at room temperature for about 10-15 minutes. You want it to be easy to scoop and mix but still hold its shape.
3️⃣ In a large bowl, combine the softened ice cream, heavy cream, and vanilla extract. Mix until smooth and creamy. Be careful not to overmix.
4️⃣ Pour the ice cream mixture over the Oreo crust and smooth the top. Cover with plastic wrap and freeze for at least 2 hours or overnight.
5️⃣ To make the chocolate ganache, melt the chocolate chips in a double boiler or in the microwave in 30-second increments, stirring between each interval until smooth. Allow the ganache to cool slightly.
6️⃣ Remove the cake from the freezer and pour the chocolate ganache over the top. Return to the freezer for another 30 minutes to set the ganache.
7️⃣ To serve, remove the cake from the freezer about 10-15 minutes before serving to allow it to soften slightly. Release the springform pan sides and slice.
Handy Tips
💡 Always use high-quality ingredients, like real vanilla extract, for the best flavor.
💡 If you find your ice cream is too hard to mix, let it sit at room temperature for a few more minutes. Conversely, if it’s too soft, pop it back into the freezer for a bit.
💡 Experiment with different types of ice cream flavors to create unique variations of this cake.
Heat Control
❄️ Since this recipe involves freezing, it’s essential to control the temperature of your freezer to ensure the cake sets properly. Most home freezers are set between 0°F and 5°F, which is perfect for this recipe.
☀️ When serving, consider the outside temperature. If it’s particularly hot, you may want to keep the cake in the freezer until just before serving to prevent melting.
Crunch Factor
🍞 The crunch from the Oreo crust provides a delightful contrast to the smooth ice cream and chocolate ganache. To enhance the crunch, you can also sprinkle some crushed Oreos on top of the ganache before it sets.
Pro Kitchen Tricks
🔥 For a shortcut, use a pre-made Oreo crust or even a chocolate sandwich cookie crust for a different twist.
🌿 Add some fresh mint leaves or a sprinkle of sea salt on top of the cake for a pop of color and extra flavor.
🎂 Consider using this recipe as a base and customizing it with your favorite ice cream flavors or mix-ins, like nuts, candy pieces, or fruit.
Storage Tips
📦 Store any leftovers in an airtight container in the freezer. It’s best to cover the cake with plastic wrap or aluminum foil to prevent freezer burn. When you’re ready to serve again, simply remove from the freezer and let thaw for a few minutes at room temperature.
Gift Packaging Ideas
🎁 If you’re gifting this cake, consider placing it in a decorative tin or a sturdy cardboard box lined with parchment paper. You can also add a personal touch with a handwritten note or a ribbon around the box.
👫 For a fun twist, make individual mini cakes using muffin tins and top each with a dollop of whipped cream and an Oreo cookie.
Flavor Variations
🌟 Try using cookies and cream ice cream and adding extra cookies on top for a fun twist.
🌟 Substitute the vanilla ice cream with strawberry or mint chocolate chip for a different flavor profile.
🌟 Add some caramel sauce drizzled over the top of the cake for a salty-sweet contrast.
🌟 Use peanut butter cups or another favorite candy mixed into the ice cream for added flavor and texture.
Troubleshooting
🤔 If your crust doesn’t set, it might be because the butter wasn’t melted enough or the mixture wasn’t pressed firmly enough into the pan. Try refrigerating it for a longer period or re-melting the butter and re-applying.
🤔 ICE CREAM TOO HARD? Let it sit at room temperature for a bit longer. If it’s too soft, return it to the freezer to firm up.
🤔 If the ganache doesn’t set, it could be due to the chocolate not being melted properly or the temperature being too high. Try cooling the ganache in the refrigerator for a few minutes.
FAQ
Q: Can I make this cake ahead of time?
A: Yes, you can prepare the components (crust, ice cream mixture, ganache) ahead of time, but it’s best to assemble and freeze the cake close to the serving time for optimal freshness and texture.
Q: How do I prevent the cake from melting when serving?
A: Keep the cake in the freezer until just before serving. If it’s a particularly hot day, consider serving it in a cooler or air-conditioned space.
Q: Can I use different types of cookies for the crust?
A: Absolutely! While Oreos provide a classic flavor, you can experiment with other cookies like chocolate sandwich cookies, peanut butter cookies, or even wafers for a different taste.
Q: Is this recipe suitable for large gatherings?
A: Yes, this recipe can easily be doubled or tripled to serve a larger crowd. Just ensure you have enough freezer space to store the cake as it freezes.
Conclusion
🍴 This Oreo Ice Cream Cake is a game-changer for any dessert lover. It’s easy, customizable, and sure to impress. Whether you’re a seasoned baker or a beginner in the kitchen, this recipe is a must-try. So go ahead, give it a spin, and enjoy the ooohs and ahhhs from your family and friends. Don’t forget to share your creations and tag us on https://us.ratemyrecipes.com. Happy cooking, and let’s get this dessert party started! 🎉
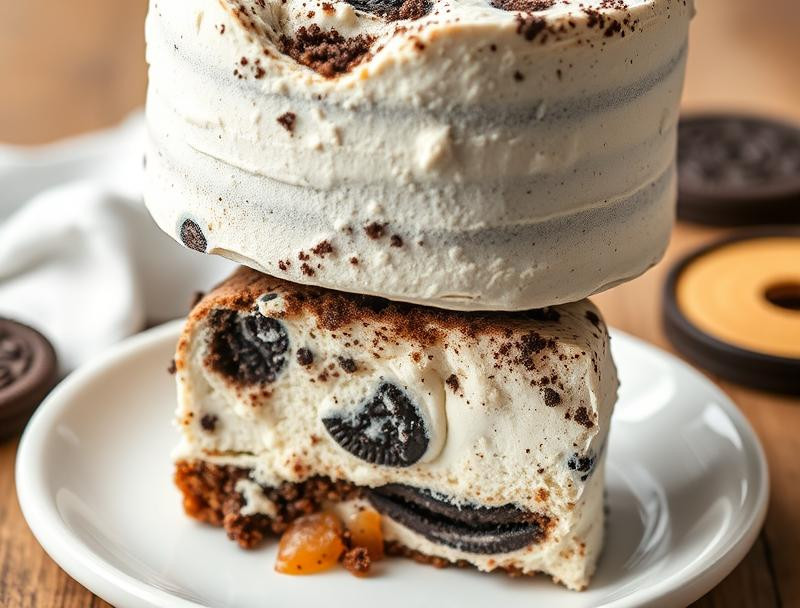
Oreo Ice Cream Cake Perfect for Hot Summer Days
A deliciously creamy ice cream cake layered with crushed Oreos, perfect for cooling off on a hot summer day.
Ingredients
- 1 package Oreo cookies (about 14.3 ounces)
- 1 cup heavy cream
- 1 cup vanilla ice cream
- 1/2 cup chocolate syrup
- 1/2 cup whipped cream (for topping)
- Additional Oreos for decoration
Instructions
- Step 1: Crush the Oreo cookies in a zip-lock bag until they are fine crumbs.
- Step 2: In a bowl, mix the crushed Oreos with the heavy cream until well combined.
- Step 3: Spread half of the Oreo mixture into the bottom of a 9-inch springform pan to create the first layer.
- Step 4: Scoop the vanilla ice cream on top of the Oreo layer and spread it evenly.
- Step 5: Drizzle half of the chocolate syrup over the ice cream layer.
- Step 6: Add the remaining Oreo mixture on top of the ice cream and press down gently.
- Step 7: Cover the pan with plastic wrap and freeze for at least 1 hour, or until set.
- Step 8: Once set, remove the cake from the springform pan and top with whipped cream and additional crushed Oreos for decoration.
- Step 9: Serve immediately or return to the freezer until ready to serve.
Tips
- For a richer flavor, use chocolate ice cream instead of vanilla.
- Let the cake sit at room temperature for a few minutes before slicing for easier serving.