Cheesy Cauliflower Rice – Creamy Keto Side Dish
Introduction
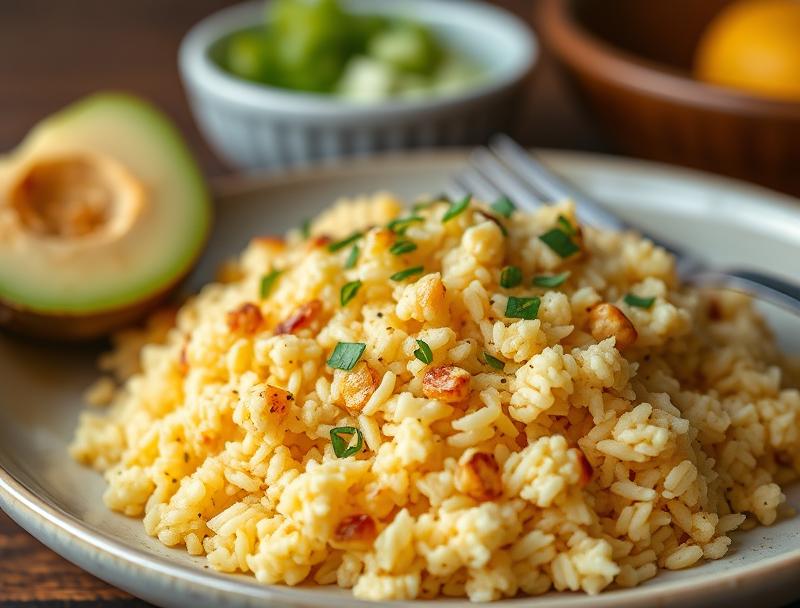
Imagine a side dish that’s not only delicious but also incredibly easy to make, using everyday ingredients that you might already have in your kitchen. Look no further than our Cheesy Cauliflower Rice, a creamy keto side dish that’s perfect for anyone looking for a flavorful and healthy meal option. This dish is a game-changer for those on a keto diet, as it’s low in carbs and rich in nutrients. With its rich, creamy sauce and tender cauliflower, this recipe is sure to become a staple in your household. The best part? It’s ready in just 30 minutes, making it a great option for busy weeknights or special occasions.
Why This Works
- Flavor balance and ingredient accessibility: This recipe combines the natural sweetness of cauliflower with the richness of cheese, creating a perfectly balanced flavor profile. Plus, the ingredients are easy to find and affordable.
- Ease of preparation: With just a few simple steps, you can have this dish ready in no time. The cauliflower is quickly pulsed into “rice” in a food processor, and then sautéed with garlic and cheese for added flavor.
- Impressive results with minimal effort: Despite its simplicity, this recipe yields impressive results. The creamy cheese sauce and tender cauliflower make for a dish that’s sure to impress your family and friends.
Ingredients
- 1 head of cauliflower
- 2 tablespoons butter
- 1 clove garlic, minced
- 1 cup grated cheddar cheese
- 1/2 cup grated Parmesan cheese
- 1/2 cup heavy cream
- Salt and pepper, to taste
- Fresh parsley, chopped (for garnish)
Instructions
- Step 1: Rinse the cauliflower and remove the leaves and stem. Cut it into florets and pulse in a food processor until it resembles rice.
- Step 2: In a large skillet, melt the butter over medium heat. Add the garlic and cook for 1-2 minutes, until fragrant.
- Step 3: Add the cauliflower “rice” to the skillet and cook for 5-7 minutes, until it’s tender and lightly browned.
- Step 4: Stir in the cheddar and Parmesan cheese until melted and creamy. Add the heavy cream and cook for an additional 2-3 minutes, until the sauce has thickened. Season with salt and pepper to taste.
Handy Tips
- To ensure that your cauliflower “rice” is dry and not soggy, make sure to squeeze out as much moisture as possible after pulsing it in the food processor. You can do this by wrapping it in a clean dish towel and squeezing it over the sink.
- If you prefer a lighter sauce, you can reduce the amount of heavy cream or substitute it with a lower-fat alternative, such as half-and-half or whole milk.
- To add some extra flavor to your dish, try adding some diced ham or bacon to the skillet with the garlic and cauliflower.
Heat Control
When cooking the cauliflower “rice,” it’s essential to keep an eye on the heat to prevent it from burning or becoming too brown. Medium heat is ideal, as it allows for a gentle browning and tenderizing of the cauliflower. If you notice the cauliflower starting to brown too quickly, reduce the heat to low and continue cooking until it’s tender.
Crunch Factor
The texture of this dish is largely dependent on the cauliflower “rice.” To achieve the perfect texture, make sure to not over-process the cauliflower in the food processor, as this can result in a mushy or soggy consistency. Instead, aim for a texture that’s similar to cooked rice, with a slight crunch and tender bite.
Pro Kitchen Tricks
- To take your Cheesy Cauliflower Rice to the next level, try adding some grated nutmeg or paprika to the cheese sauce for added depth of flavor.
- If you’re short on time, you can also make this recipe in a microwave-safe dish. Simply cook the cauliflower “rice” in the microwave for 3-4 minutes, then stir in the cheese sauce and cook for an additional 30-60 seconds, until the cheese is melted and bubbly.
- To make cleanup easier, line your food processor with a paper towel or clean dish cloth before pulsing the cauliflower. This will help absorb any excess moisture and prevent the cauliflower from sticking to the processor.
Storage Tips
- This recipe is best served fresh, but it can be stored in the refrigerator for up to 3 days. Simply reheat it in the microwave or oven until warmed through.
- To freeze, transfer the cooled Cheesy Cauliflower Rice to an airtight container or freezer-safe bag. It will keep for up to 2 months in the freezer. When you’re ready to serve, simply thaw overnight in the refrigerator and reheat as desired.
- When storing leftovers, make sure to press out as much air as possible from the container or bag to prevent the growth of bacteria and other microorganisms.
Gift Packaging Ideas
While this recipe is perfect for a quick weeknight dinner, it’s also a great option for gift-giving. Consider transferring the cooled Cheesy Cauliflower Rice to a decorative ceramic dish or glass container, then topping it with a sprinkle of paprika or chopped parsley. You could also add a few slices of cooked bacon or a sprinkle of grated cheese on top for added flavor and visual appeal. Wrap the dish in plastic wrap or aluminum foil, then tie with a ribbon or twine for a beautiful and delicious gift.
Flavor Variations
- Different spices: Try adding some dried or fresh herbs, such as thyme, rosemary, or parsley, to the cheese sauce for added flavor.
- Creative toppings: Consider adding some diced ham, bacon, or cooked vegetables, such as broccoli or bell peppers, to the top of the Cheesy Cauliflower Rice for added texture and flavor.
- Ingredient swaps: If you’re looking for a dairy-free alternative, you could try substituting the cheddar and Parmesan cheese with a non-dairy cheese substitute, such as soy cheese or vegan mozzarella.
Troubleshooting
- Texture problems: If your Cheesy Cauliflower Rice is too soggy or mushy, it may be due to over-processing the cauliflower in the food processor. Try pulsing it less next time, or adding a little more cheese to absorb excess moisture.
- Ingredient replacements: If you’re missing an ingredient, such as the heavy cream, you could try substituting it with a lower-fat alternative, such as half-and-half or whole milk.
- Over/undercooking signs: If your cauliflower “rice” is undercooked, it may be too crunchy or raw-tasting. Try cooking it for a few more minutes, until it’s tender and lightly browned. If it’s overcooked, it may be too soft or mushy. Try reducing the cooking time next time, or adding a little more cheese to absorb excess moisture.
FAQs
- Can I freeze it? Yes, you can freeze the Cheesy Cauliflower Rice for up to 2 months. Simply transfer the cooled dish to an airtight container or freezer-safe bag, then thaw overnight in the refrigerator when you’re ready to serve.
- Is it gluten-free? Yes, this recipe is gluten-free, making it a great option for those with gluten intolerance or sensitivity.
- Can I double the recipe? Yes, you can easily double or triple this recipe to feed a larger crowd. Simply multiply the ingredients accordingly, and adjust the cooking time as needed.
Conclusion
In conclusion, our Cheesy Cauliflower Rice is a delicious and easy-to-make side dish that’s perfect for anyone looking for a healthy and flavorful meal option. With its rich, creamy sauce and tender cauliflower, this recipe is sure to become a staple in your household. Whether you’re a keto dieter, a foodie, or just someone who loves good food, this recipe is a must-try. So go ahead, give it a try, and enjoy the creamy, cheesy goodness of our Cheesy Cauliflower Rice!