Classic Yellow Cake Recipe
Introduction
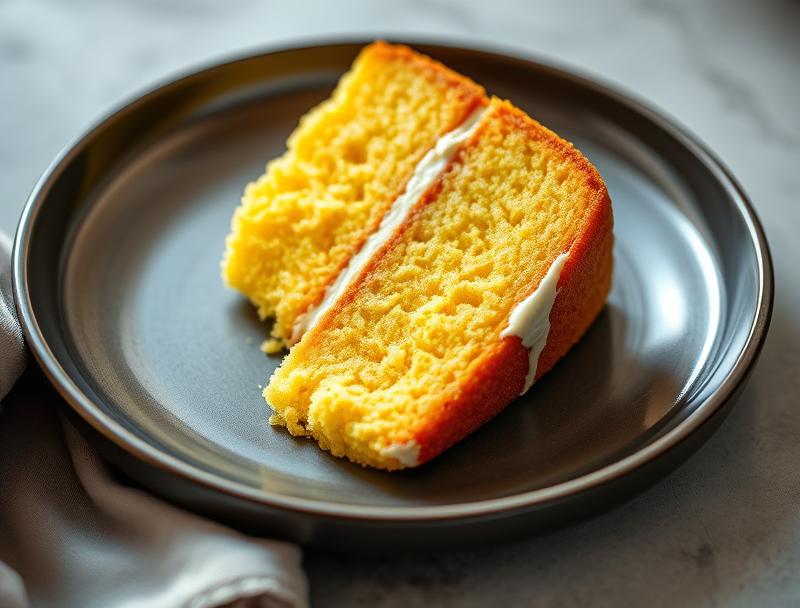
Welcome to the world of classic baking with our timeless Classic Yellow Cake Recipe. This cake is a staple for any occasion, whether it’s a birthday, anniversary, or just a sweet treat for the family. What makes this recipe truly special is its ease of preparation, the perfect balance of flavors, and the creativity it allows with everyday ingredients. The combination of tender crumbs, moist texture, and a hint of sweetness will make this cake a favorite among both beginners and seasoned bakers. With its versatility in decoration and serving options, you can tailor it to fit any theme or event, making it a versatile addition to your baking repertoire.
Why This Works
- Flavor balance and ingredient accessibility: The recipe strikes a perfect balance between simplicity and flavor, using ingredients that are readily available in most kitchens.
- Ease of preparation: Despite its impressive results, the cake is surprisingly easy to make, requiring minimal effort and expertise.
- Impressive results with minimal effort: The end result is a beautifully presented cake that looks and tastes like it was made by a professional, perfect for impressing friends and family without spending hours in the kitchen.
Ingredients
- 2 ¾ cups all-purpose flour
- 2 teaspoons baking powder
- 1 teaspoon salt
- 1 cup unsalted butter, at room temperature
- 1 ¾ cups granulated sugar
- 3 large eggs, at room temperature
- 2 teaspoons pure vanilla extract
- 1 cup whole milk, at room temperature
Instructions
- Step 1: Preheat and Prep – Preheat your oven to 350°F (180°C). Grease two 9-inch round cake pans and line the bottoms with parchment paper. In a medium bowl, whisk together flour, baking powder, and salt; set aside.
- Step 2: Mix the Batter – In a large mixing bowl, use an electric mixer to beat the butter until creamy, about 2 minutes. Add the sugar gradually and continue beating until light and fluffy, about 3 minutes. Beat in the eggs one at a time, then beat in the vanilla extract.
- Step 3: Combine Wet and Dry Ingredients – With the mixer on low speed, gradually add the flour mixture to the wet ingredients in three parts, alternating with the milk, beginning and ending with the flour mixture. Beat just until combined.
- Step 4: Bake the Cakes – Divide the batter evenly between the prepared pans. Smooth the tops and bake for 30-35 minutes or until a toothpick inserted in the center comes out clean. Let the cakes cool in the pans for 10 minutes, then transfer them to a wire rack to cool completely.
Handy Tips
- Ensure all ingredients are at room temperature for a lighter and fluffier texture.
- Don’t overmix the batter, as this can lead to a dense cake.
- For an extra moist cake, try adding a teaspoon of baking soda or substituting buttermilk for regular milk.
Heat Control
When baking, it’s crucial to maintain the correct oven temperature. An oven that’s too hot can cause the cake to burn on the outside before it’s fully cooked on the inside, while an oven that’s too cool can result in a cake that doesn’t rise properly. Use an oven thermometer to ensure your oven is at the correct temperature. The cakes are done when they’re golden brown, springy to the touch, and a toothpick inserted into the center of each cake comes out clean.
Crunch Factor
This Classic Yellow Cake is designed to be moist and tender, not crunchy. To achieve the perfect texture, avoid overbaking and don’t open the oven door too frequently during the baking time, as this can cause the cakes to sink. If you’re looking for a crunch, consider topping the cake with nuts, caramelized sugar, or a crunchy buttercream frosting.
Pro Kitchen Tricks
- Use high-quality ingredients for the best flavor and texture.
- Don’t overfill the cake pans, as this can cause the batter to spill over during baking.
- For a professional finish, level the cakes once they’re completely cool and use a turntable to decorate.
Storage Tips
- Once the cakes are completely cool, they can be stored in airtight containers at room temperature for up to 3 days.
- For longer storage, wrap the cakes tightly in plastic wrap or aluminum foil and freeze for up to 2 months. Thaw frozen cakes at room temperature or reheat them in the microwave.
- Always store the cake in a cool, dry place away from direct sunlight.
Gift Packaging Ideas
This cake makes a wonderful gift for friends, family, or coworkers. Consider decorating the cake with a personalized message or the recipient’s favorite colors. Package the cake in a decorative cake box or wrap it in cellophane and tie with a ribbon for a beautiful and thoughtful gift. If you’re gifting a slice or two, place them in cute containers or jars and top with a decorative lid or a sprinkle of powdered sugar.
Flavor Variations
- Different spices: Add a pinch of cinnamon, nutmeg, or cardamom to give the cake a unique twist.
- Creative toppings: Top the cake with fresh fruits, caramel sauce, or a dollop of whipped cream for added flavor and texture.
- Ingredient swaps: Substitute almond milk for regular milk or use gluten-free flour to make the cake more inclusive for guests with dietary restrictions.
Troubleshooting
- Texture problems: If the cake turns out too dense, it might be due to overmixing the batter. If it’s too dry, it could be overbaked.
- Ingredient replacements: If you’re missing an ingredient, look for substitutions online or in cookbooks. However, keep in mind that substituting ingredients can affect the final texture and flavor.
- Over/undercooking signs: Keep an eye on the cake while it’s baking. If the top starts to brown too quickly, cover it with foil. If it’s not done after the recommended baking time, check it every 5 minutes until it’s cooked through.
FAQs
- Can I freeze it? Yes, the cake can be frozen for up to 2 months. Wrap it tightly in plastic wrap or aluminum foil and thaw at room temperature when you’re ready to serve.
- Is it gluten-free? No, this recipe uses all-purpose flour and is not gluten-free. However, you can experiment with gluten-free flours as a substitute.
- Can I double the recipe? Yes, you can double the recipe to make a larger cake. Just ensure you have enough pans and adjust the baking time accordingly.
Conclusion
With its timeless appeal and versatility, the Classic Yellow Cake Recipe is a must-have in every baker’s arsenal. Whether you’re a beginner looking for a simple yet impressive dessert or a seasoned baker seeking a reliable recipe, this cake is sure to please. Don’t be afraid to experiment with different flavors and decorations to make it your own. Share your creations with friends and family, and enjoy the joy of baking and giving. Happy baking!
Classic Yellow Cake Recipe
A moist and flavorful classic yellow cake recipe perfect for any occasion, made with simple ingredients and requiring minimal effort.
🥘 Ingredients
👩🍳 Instructions
-
1Preheat the oven to 350°F (180°C). Grease two 9-inch round cake pans and line the bottoms with parchment paper.
-
2Whisk together flour, baking powder, and salt; set aside.
-
3Beat the butter until creamy, then gradually add the sugar and continue beating until light and fluffy.
-
4Beat in the eggs one at a time, then beat in the vanilla extract.
-
5With the mixer on low speed, gradually add the flour mixture to the wet ingredients in three parts, alternating with the milk, beginning and ending with the flour mixture.
-
6Divide the batter evenly between the prepared pans. Smooth the tops and bake for 30-35 minutes or until a toothpick inserted in the center comes out clean.
-
7Let the cakes cool in the pans for 10 minutes, then transfer them to a wire rack to cool completely.