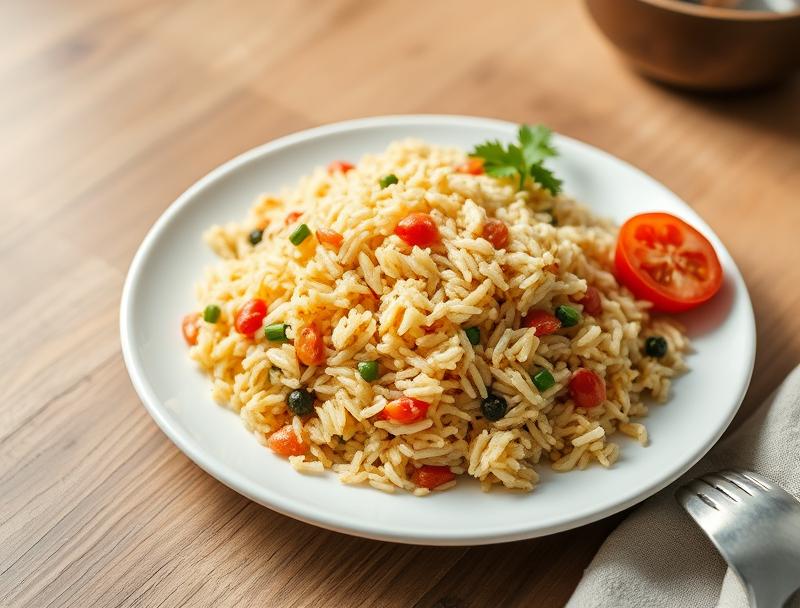
Flavorful Homemade Rice Pilaf
Introduction
Creating a delicious and flavorful homemade rice pilaf is easier than you think, and it’s a perfect dish for any occasion, whether it’s a weeknight dinner or a special gathering. With just a few simple ingredients and some basic cooking techniques, you can whip up a pilaf that’s not only tasty but also visually appealing. The best part is that you can customize it to your taste preferences and dietary needs, making it a versatile option for everyone. In this article, we’ll guide you through the process of making a flavorful homemade rice pilaf that’s sure to become a staple in your kitchen.
Why This Works
- Flavor balance and ingredient accessibility: This recipe achieves a perfect balance of flavors using everyday ingredients that are easily accessible in most supermarkets.
- Ease of preparation: The steps involved in preparing this pilaf are straightforward and simple, requiring minimal cooking experience.
- Impressive results with minimal effort: Despite the simplicity of the recipe, the end result is a dish that’s impressive in both flavor and presentation, making it perfect for serving to guests or enjoying as a family meal.
Ingredients
- 2 cups of uncooked white or brown rice
- 4 cups of chicken or vegetable broth, warmed
- 1 tablespoon of olive oil
- 1 small onion, diced
- 2 cloves of garlic, minced
- 1 cup of mixed vegetables (e.g., peas, carrots, corn)
- 1 teaspoon of dried thyme
- Salt and pepper, to taste
- Optional: other spices or herbs of your choice (e.g., paprika, rosemary)
Instructions
- Step 1: Preparation – Start by rinsing the rice in a fine-mesh sieve until the water runs clear. Drain and set aside. Chop the onion and mince the garlic. If using other vegetables, prepare them according to your preference (e.g., slicing, dicing).
- Step 2: Cooking the Rice – In a large saucepan, heat the olive oil over medium heat. Add the diced onion and cook until it’s translucent, about 3-4 minutes. Add the minced garlic and cook for another minute, stirring constantly to prevent burning.
- Step 3: Adding Rice and Broth – Add the rinsed rice to the saucepan and stir to coat the rice with oil and mix with the onion and garlic. Cook for about 2 minutes. Then, add the warmed broth to the saucepan, one cup at a time, stirring constantly and allowing each portion to absorb before adding the next. Bring the mixture to a boil, then reduce the heat to low, cover, and simmer.
- Step 4: Final Touches – After about 18-20 minutes of simmering, or when the rice is cooked and the liquid has been absorbed, fluff the pilaf with a fork. Add the mixed vegetables, dried thyme, salt, and pepper. Stir gently to combine. If the pilaf seems too dry, you can add a bit more broth. Taste and adjust the seasoning as needed.
Handy Tips
- Use a variety of vegetables to add color and texture to your pilaf. Consider using leftover vegetables to reduce waste and make the dish more economical.
- For a vegetarian or vegan version, use vegetable broth and add plant-based protein sources like tofu, tempeh, or seitan.
- Avoid overmixing the rice, as this can make it sticky and clumpy. Instead, use a gentle folding motion to combine ingredients.
Heat Control
Maintaining the right heat is crucial for cooking the perfect rice pilaf. Start with medium heat to sauté the onion and garlic, then reduce to low heat once you add the rice and broth. This helps in gradual and even cooking of the rice. If using a rice cooker, follow the manufacturer’s instructions for the correct water ratio and cooking time.
Crunch Factor
To achieve a nice texture, ensure that the rice is cooked until it’s tender but still retains a bit of crunch. Adding mixed vegetables towards the end of cooking helps preserve their texture and color, contributing to the overall crunch factor of the dish.
Pro Kitchen Tricks
- To enhance flavor, use aromatic spices like saffron, cinnamon, or cardamom, especially when cooking the onion and garlic.
- For a crispy top, called a “crust” in some pilaf recipes, cook the pilaf in a skillet on the stovetop or under the broiler for a few minutes after it’s cooked. This step adds a satisfying crunch to the dish.
- Experiment with different types of rice, such as basmati or jasmine, for unique flavor profiles and textures.
Storage Tips
- Leftover pilaf can be stored in an airtight container in the refrigerator for up to 3 days. Reheat it in the microwave or on the stovetop with a bit of broth or water to prevent drying out.
- For longer storage, cool the pilaf to room temperature, then freeze it in airtight containers or freezer bags for up to 3 months. Reheat frozen pilaf by thawing it overnight in the fridge and then reheating it as you would leftovers.
- When reheating, always check the pilaf for any signs of spoilage, such as off smells or slimy texture, and discard it if you’re unsure of its safety.
Gift Packaging Ideas
If you’re considering gifting your homemade rice pilaf, perhaps for a potluck or as a care package, you can package it in decorative containers or jars. Add a personal touch with a handwritten recipe card or a packet of spices. For a more rustic look, use parchment paper or a linen bag and tie it with a ribbon. This not only makes the gift more visually appealing but also adds a touch of warmth and thoughtfulness.
Flavor Variations
- Different spices: Try adding cumin for a Middle Eastern flavor, smoked paprika for a smoky taste, or dried oregano for a Mediterranean twist.
- Creative toppings: Top your pilaf with toasted nuts, dried fruits, or a dollop of yogurt for added texture and flavor contrast.
- Ingredient swaps: Substitute chicken broth with beef or vegetable broth, or use quinoa instead of rice for a protein-packed version.
Troubleshooting
- Texture problems: If the rice is too sticky, it may be overcooked. Try reducing cooking time or using less broth. If it’s too dry, add a bit more broth or water.
- Ingredient replacements: If you’re missing an ingredient, look for substitutes that offer similar flavor profiles. For example, you can use lemon juice instead of vinegar for a brighter taste.
- Over/undercooking signs: Check the rice regularly during cooking. If it’s undercooked, it will be hard and crunchy. If it’s overcooked, it will be mushy and sticky. Adjust cooking time accordingly.
FAQs
- Can I freeze it? Yes, you can freeze cooked rice pilaf for up to 3 months. Cool it to room temperature, then transfer it to airtight containers or freezer bags.
- Is it gluten-free? This recipe is naturally gluten-free, making it a great option for those with gluten intolerance or sensitivity. However, always check the ingredients of your broth and spices to ensure they are gluten-free.
- Can I double the recipe? Yes, you can easily double or triple this recipe to feed a larger crowd. Just remember to adjust the cooking time slightly, as larger quantities may take a bit longer to cook.
Conclusion
Making a flavorful homemade rice pilaf is a rewarding culinary experience that offers endless possibilities for creativity and customization. With its ease of preparation, impressive results, and versatility, this dish is sure to become a favorite in your household. Don’t be afraid to experiment with different ingredients and spices to make the recipe your own, and enjoy the process of cooking and sharing a delicious meal with others. Whether you’re a seasoned chef or a beginner in the kitchen, this recipe is a great starting point for exploring the world of pilafs and discovering the joy of homemade cooking.