Heavenly Peaches and Cream Pie Bars
Introduction
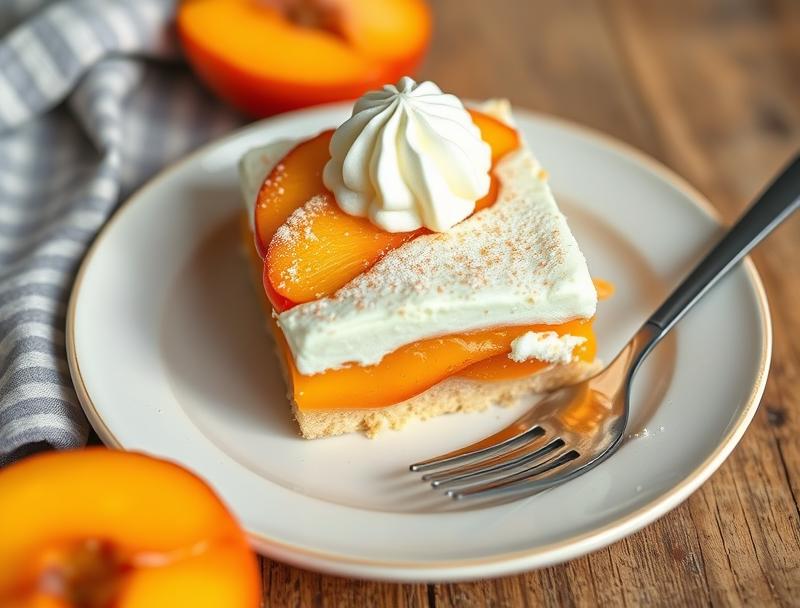
Imagine a dessert that combines the sweetness of peaches with the richness of cream, all wrapped up in a delightful bar form that’s as easy to make as it is to devour. The Heavenly Peaches and Cream Pie Bars are a creative twist on traditional desserts, requiring only everyday ingredients and minimal effort. This recipe is perfect for those looking to impress with a dessert that’s both flavorful and visually appealing, without spending hours in the kitchen. With its balance of juicy peaches, creamy filling, and a crumbly crust, these bars are sure to become a favorite at any gathering or family dinner.
Why This Works
- Flavor balance and ingredient accessibility: The combination of peaches and cream offers a delicious and well-balanced flavor profile that is hard to resist. The ingredients are easily found in most grocery stores, making this recipe accessible to everyone.
- Ease of preparation: Despite their impressive appearance, these pie bars are surprisingly easy to make. The steps are straightforward, and the ingredients are simple to work with, even for those who are new to baking.
- Impressive results with minimal effort: The end result looks and tastes like it came from a professional bakery, but the actual work involved is minimal. This makes the Heavenly Peaches and Cream Pie Bars perfect for last-minute desserts or when you want to impress without the hassle.
Ingredients
- 2 cups all-purpose flour
- 1/2 cup granulated sugar
- 1/4 cup packed brown sugar
- 1/2 cup cold unsalted butter, cut into small pieces
- 1/2 cup confectioners’ sugar
- 1/2 cup heavy cream
- 1 large egg
- 1 teaspoon vanilla extract
- 3 cups sliced peaches (fresh or canned, drained)
- 1 tablespoon cornstarch
- Salt to taste
- Optional: whipped cream or vanilla ice cream for serving
Instructions
- Step 1: Prepare the Crust – Preheat your oven to 350°F (180°C). In a medium bowl, whisk together the flour, granulated sugar, and brown sugar. Add the cold butter and use a pastry blender or your fingers to work it into the dry ingredients until the mixture resembles coarse crumbs. Press this mixture into a 9×9-inch baking dish lined with parchment paper. Bake for 20-25 minutes, or until lightly golden. Let cool completely.
- Step 2: Prepare the Filling – In a large bowl, whisk together the confectioners’ sugar, heavy cream, egg, and vanilla extract until smooth. Arrange the sliced peaches over the cooled crust. In a small bowl, mix the cornstarch with a little water until smooth, then add it to the cream mixture and whisk until combined. Pour the cream mixture over the peaches.
- Step 3: Bake the Bars – Bake the bars for an additional 25-30 minutes, or until the filling is set and the top is lightly golden. Avoid overbaking, as the filling should still be slightly jiggly in the center.
- Step 4: Cool and Serve – Let the bars cool completely in the pan before refrigerating them for at least 4 hours or overnight. Cut into bars and serve chilled, optionally topped with whipped cream or a scoop of vanilla ice cream.
Handy Tips
- For a firmer crust, bake it for an additional 5 minutes. Keep an eye on it to prevent overbrowning.
- Use fresh peaches when in season for the best flavor, but canned peaches are a great alternative when fresh ones are not available.
- Don’t overmix the cream filling, as it can become too stiff and separate during baking.
Heat Control
When baking the crust and the bars, it’s crucial to keep an eye on the temperature and the baking time. The oven should be preheated to 350°F (180°C), and the baking times provided are guidelines. Check the crust and bars periodically to ensure they do not overcook. The crust should be lightly golden, and the filling should be set but still slightly jiggly in the center.
Crunch Factor
The crunch factor in these bars comes from the crust, which should be baked until it’s lightly golden and firm to the touch. Avoid overbaking, as it can become too hard. The contrast between the crunchy crust and the soft, creamy filling is part of what makes these bars so delightful.
Pro Kitchen Tricks
- To ensure the crust doesn’t become too brown, you can cover the edges with foil or a pie shield during the last 10 minutes of baking.
- For a glossy top, brush the bars with a little bit of heavy cream or beaten egg before baking.
- Letting the bars cool and chill as directed is crucial for them to set properly and be easy to cut and serve.
Storage Tips
- These bars can be stored in the refrigerator for up to 3 days. Keep them covered with plastic wrap or aluminum foil to maintain freshness.
- For longer storage, the bars can be frozen for up to 2 months. Thaw frozen bars in the refrigerator overnight before serving.
- When storing, it’s best to cut the bars just before serving to prevent them from becoming soggy.
Gift Packaging Ideas
These pie bars are perfect for gifting, especially during the summer months when peaches are in season. Consider packaging them in a decorative tin or a gift box lined with parchment paper. You can also wrap individual bars in plastic wrap or wax paper and tie with a ribbon for a more personalized touch. Adding a card with the recipe or a few serving suggestions can make the gift even more special.
Flavor Variations
- Different spices: Try adding a pinch of cinnamon, nutmeg, or cardamom to the crust or the filling for a unique twist.
- Creative toppings: Top the bars with whipped cream, vanilla ice cream, caramel sauce, or even toasted nuts for added texture and flavor.
- Ingredient swaps: Use other types of fruit like blueberries, raspberries, or strawberries in place of peaches for a different flavor profile.
Troubleshooting
- Texture problems: If the crust is too hard, it may have been overbaked. If the filling is too runny, it may not have been baked long enough.
- Ingredient replacements: While it’s best to use the ingredients listed, you can substitute the heavy cream with a non-dairy alternative for a vegan version. However, this may affect the texture and flavor slightly.
- Over/undercooking signs: Keep an eye on the bars while they’re baking. If the edges start to brown too quickly, cover them with foil. If the filling is still very jiggly after the recommended baking time, bake for a few more minutes and check again.
FAQs
- Can I freeze it? Yes, the bars can be frozen for up to 2 months. It’s best to freeze them before cutting to maintain their texture.
- Is it gluten-free? The recipe as given contains gluten due to the all-purpose flour. However, you can try substituting the flour with a gluten-free flour mix for a gluten-free version.
- Can I double the recipe? Yes, you can double the recipe to make a larger batch. Just keep in mind that you’ll need to adjust the baking time slightly for the larger batch.
Conclusion
The Heavenly Peaches and Cream Pie Bars are a delightful dessert that’s sure to impress anyone who tries them. With their easy preparation, beautiful presentation, and delicious flavor, they’re perfect for any occasion. Feel free to experiment with different flavors and toppings to make the recipe your own, and don’t hesitate to reach out if you have any questions or need further substitutions or variations. Happy baking, and enjoy the joy of sharing these heavenly bars with your loved ones!
Heavenly Peaches and Cream Pie Bars
A sweet and creamy dessert combining peaches and cream in a bar form, easy to make and perfect for any occasion.
🥘 Ingredients
👩🍳 Instructions
-
1Preheat oven to 350°F (180°C). Prepare the crust by mixing flour, granulated sugar, and brown sugar, then adding cold butter until the mixture resembles coarse crumbs.
-
2Press the crust mixture into a 9x9-inch baking dish and bake for 20-25 minutes, or until lightly golden. Let cool completely.
-
3Prepare the filling by whisking together confectioners' sugar, heavy cream, egg, and vanilla extract. Arrange sliced peaches over the cooled crust and pour the cream mixture over the peaches.
-
4Bake the bars for an additional 25-30 minutes, or until the filling is set and the top is lightly golden. Let cool and chill before serving.