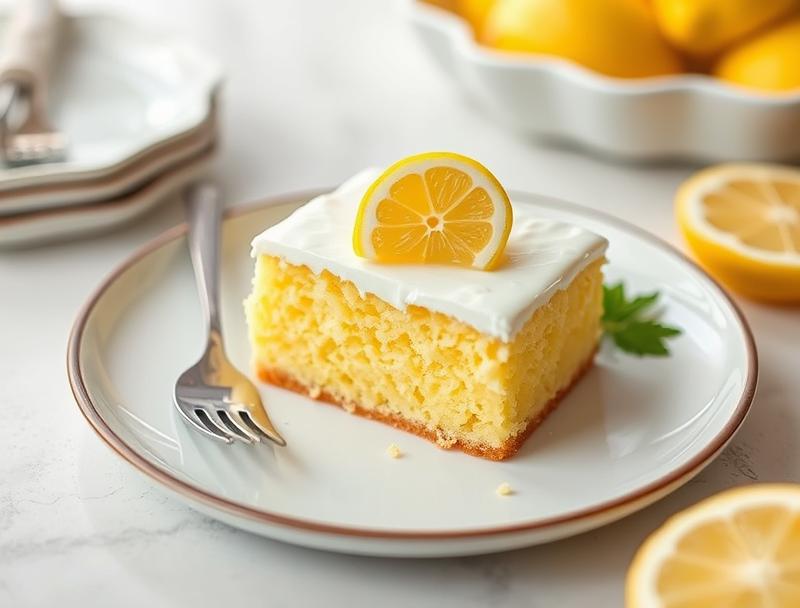
Easy Lemon Yogurt Cake – A Bright, Citrusy Treat
Introduction
Brighten up your day with the simplicity and zest of our Easy Lemon Yogurt Cake, a recipe that embodies the perfect blend of tangy lemon flavor and creamy yogurt, all wrapped up in a moist and delicious cake. This cake is not just a treat for the taste buds, but it’s also incredibly easy to make, requiring minimal effort and using everyday ingredients that you might already have in your pantry. The beauty of this recipe lies in its versatility and the ease with which you can customize it to suit your mood or the occasion. Whether you’re looking for a dessert to impress your guests or a simple snack to brighten up your afternoon, this Easy Lemon Yogurt Cake is sure to hit the spot.
Why This Works
- The balance of flavors in this cake is a key factor in its success. The tartness of the lemon is perfectly complemented by the richness of the yogurt, creating a taste experience that is both refreshing and satisfying.
- The ease of preparation is another significant advantage. With a straightforward list of ingredients and simple instructions, this cake can be whipped up in no time, making it perfect for last-minute gatherings or spontaneous baking sessions.
- Despite its simplicity, the cake yields impressive results. The combination of lemon zest, lemon juice, and yogurt gives it a unique flavor profile that is sure to impress anyone who tries it. Plus, the moist texture and beautiful presentation make it a standout on any dessert table.
Ingredients
- 2 cups all-purpose flour
- 1 cup granulated sugar
- 2 teaspoons baking powder
- 1/2 teaspoon salt
- 1/2 cup unsalted butter, softened
- 1 cup plain yogurt
- 2 large eggs
- 2 teaspoons grated lemon zest
- 2 tablespoons freshly squeezed lemon juice
- 1 teaspoon vanilla extract
- Confectioners’ sugar, for dusting (optional)
Instructions
- Step 1: Preheat and Prep – Preheat your oven to 350°F (175°C). Grease two 8-inch round cake pans and line the bottoms with parchment paper. In a medium bowl, whisk together flour, sugar, baking powder, and salt.
- Step 2: Mix the Batter – In a large bowl, using an electric mixer, beat the butter until creamy. Add the yogurt and beat until well combined. Beat in the eggs one at a time, then stir in the lemon zest, lemon juice, and vanilla extract. Gradually add the dry ingredients to the wet ingredients, mixing until just combined.
- Step 3: Bake the Cakes – Divide the batter evenly between the prepared pans and smooth the tops. Bake for 20-25 minutes or until a toothpick inserted into the center comes out clean. Let the cakes cool in the pans for 5 minutes before transferring them to a wire rack to cool completely.
- Step 4: Assemble and Serve – Once the cakes are completely cool, you can dust them with confectioners’ sugar or assemble them with your favorite frosting or glaze. For a simple lemon glaze, mix powdered sugar with lemon juice until you achieve the desired consistency.
Handy Tips
- For an extra crispy crust, try baking the cakes for an additional 2-3 minutes. However, keep a close eye to avoid overbaking.
- Don’t overmix the batter, as this can lead to a dense cake. Stop mixing as soon as the ingredients are combined.
- Experiment with different types of yogurt, like Greek yogurt for a tangier flavor or coconut yogurt for a dairy-free option.
Heat Control
The ideal temperature for baking this cake is 350°F (175°C). It’s crucial to not overbake, as this can dry out the cake. Check for doneness by inserting a toothpick into the center of the cake; it should come out clean or with a few moist crumbs attached. The cakes should be lightly golden on top and firm to the touch.
Crunch Factor
This cake is designed to be moist and tender, with a delicate crumb. To achieve this texture, make sure not to overmix the batter and don’t overbake. If you prefer a crunchier exterior, you can try baking the cakes at a higher temperature for a shorter amount of time, but be cautious of burning.
Pro Kitchen Tricks
- For a professional finish, use a turntable to display your cake, and consider investing in a cake stand to elevate it.
- To ensure the cake releases easily from the pans, make sure to grease them thoroughly and line the bottoms with parchment paper.
- Keep your ingredients at room temperature before starting to mix the batter. This ensures that the butter and eggs mix smoothly and evenly, contributing to a better texture.
Storage Tips
- The cake can be stored at room temperature for up to 3 days. It’s best to keep it in an airtight container to maintain freshness.
- For longer storage, consider freezing the cake. Wrap it tightly in plastic wrap or aluminum foil and place it in a freezer-safe bag. Frozen cake can be stored for up to 2 months. Thaw at room temperature or refrigerate overnight.
- When reheating, you can warm slices in the microwave for a few seconds or wrap them in foil and heat in the oven at a low temperature.
Gift Packaging Ideas
This cake makes a wonderful gift, especially when beautifully packaged. Consider placing a cooled cake in a decorative tin or a sturdy cardboard box lined with parchment paper. You can add a personal touch with a ribbon around the box or a handwritten note on top. For a more rustic look, wrap the cake in parchment paper and tie with twine, adding a few fresh herbs like rosemary or thyme for a fragrant and visually appealing gift.
Flavor Variations
- Try adding different spices like cinnamon, nutmeg, or cardamom to the batter for unique flavor profiles.
- Experiment with creative toppings such as a lemon cream cheese frosting, a dusting of powdered sugar, or fresh fruits like blueberries or raspberries.
Troubleshooting
- If your cake turns out too dense, it might be due to overmixing the batter. Try mixing the ingredients just until they come together for a lighter texture.
- For cakes that are too dry, check your oven temperature and baking time. Overbaking can quickly dry out a cake.
- If you encounter issues with the cake not rising properly, ensure your baking powder is fresh and not expired, and that you didn’t overmix the batter.
FAQs
- Can I freeze the cake? Yes, the cake can be frozen for up to 2 months. Wrap it tightly to prevent freezer burn.
- Is the cake gluten-free? No, this recipe uses all-purpose flour and is not gluten-free. However, you can experiment with gluten-free flours as a substitute.
- Can I double the recipe? Yes, you can double the recipe to make a larger cake. Just ensure you have enough pans and adjust the baking time as needed.
Conclusion
With its bright citrus flavor and moist texture, the Easy Lemon Yogurt Cake is a delightful treat that’s perfect for any occasion. Whether you’re a seasoned baker or just starting out, this recipe is sure to please. Don’t be afraid to experiment with different flavors and toppings to make the cake your own, and enjoy the process of creating something delicious to share with friends and family. Happy baking!
Easy Lemon Yogurt Cake – A Bright, Citrusy Treat
A moist and delicious cake with a perfect balance of lemon flavor and creamy yogurt, easy to make and customizable for any occasion.
🥘 Ingredients
👩🍳 Instructions
-
1Preheat the oven to 350°F (175°C). Grease two 8-inch round cake pans and line the bottoms with parchment paper.
-
2Mix the dry ingredients in a medium bowl and the wet ingredients in a large bowl, then combine them.
-
3Divide the batter evenly between the prepared pans and smooth the tops. Bake for 20-25 minutes or until a toothpick inserted into the center comes out clean.
-
4Let the cakes cool in the pans for 5 minutes before transferring them to a wire rack to cool completely. Assemble and serve as desired.