Wendy’s Chili Recipe
Introduction
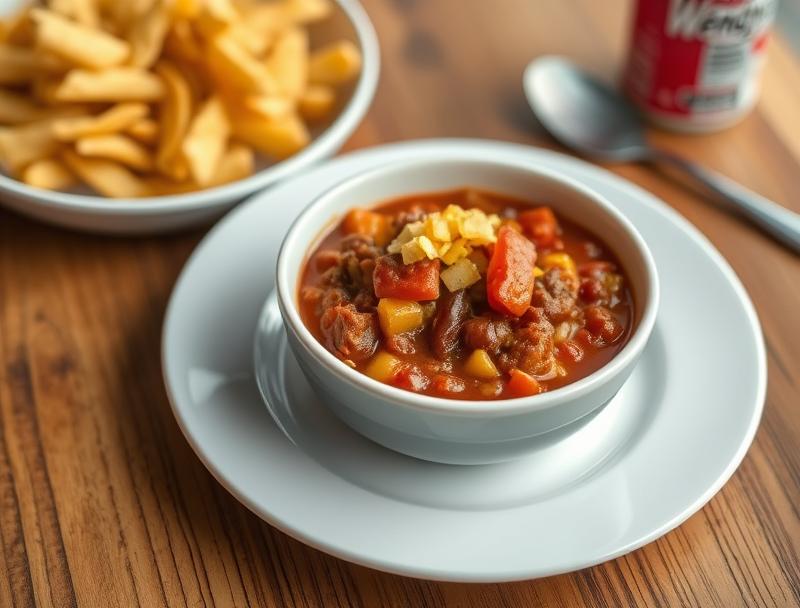
Get ready to warm up with a bowl of delicious, homemade Wendy’s chili that’s easy to make and packed with flavor. This recipe is a perfect blend of ground beef, beans, and spices that will remind you of the classic fast food favorite. Using everyday ingredients, you can create a hearty and satisfying meal that’s sure to become a staple in your household. The best part? It’s incredibly easy to make and requires minimal effort, making it a great option for busy weeknights or weekend gatherings.
Why This Works
- The balance of flavors in this recipe is spot on, with a perfect blend of sweet, spicy, and smoky notes that will leave you wanting more.
- The ingredients are easily accessible and likely already stocked in your pantry, making it a convenient option for a last-minute meal.
- The preparation is straightforward and requires minimal cooking skills, making it a great option for beginners or those short on time.
Ingredients
- 1 lb ground beef
- 1 large onion, diced
- 3 cloves of garlic, minced
- 1 red bell pepper, diced
- 2 tbsp chili powder
- 1 tsp ground cumin
- 1/2 tsp cayenne pepper
- 1/2 tsp salt
- 1/4 tsp black pepper
- 1 can (14.5 oz) diced tomatoes
- 1 can (15 oz) red kidney beans, drained and rinsed
- 1 can (16 oz) pinto beans, drained and rinsed
- 1 cup beef broth
- 1/4 cup water
- 2 tbsp tomato paste
Instructions
- Step 1: Brown the Ground Beef – In a large pot or Dutch oven, cook the ground beef over medium-high heat, breaking it up with a spoon as it cooks, until it is no longer pink, about 5-7 minutes.
- Step 2: Soften the Onions and Garlic – Add the diced onion and minced garlic to the pot and cook until the onion is translucent, about 5 minutes.
- Step 3: Add the Spices and Bell Pepper – Stir in the chili powder, cumin, cayenne pepper, salt, and black pepper. Cook for 1-2 minutes, until the spices are fragrant. Add the diced bell pepper and cook until it starts to soften, about 2-3 minutes.
- Step 4: Add the Canned Goods and Broth – Add the diced tomatoes, red kidney beans, pinto beans, beef broth, water, and tomato paste to the pot. Stir to combine, then bring the mixture to a simmer.
- Step 5: Let it Cook – Reduce the heat to low and let the chili cook, covered, for at least 30 minutes, stirring occasionally, until the flavors have melded together and the chili has thickened slightly.
Handy Tips
- Make sure to brown the ground beef thoroughly to get a rich, depth of flavor in the chili.
- Use a variety of beans to add texture and interest to the chili.
- Don’t be afraid to experiment with different spices and seasonings to make the chili your own.
Heat Control
The heat level in this recipe can be adjusted to your liking by adding more or less cayenne pepper. If you prefer a milder chili, you can omit the cayenne pepper altogether or substitute in some diced jalapenos for an extra kick.
Crunch Factor
This chili is hearty and comforting, with a thick, saucy texture that’s perfect for serving with some crusty bread or over rice. If you prefer a thicker chili, you can simmer it for an additional 10-15 minutes or add some cornstarch or flour to thicken.
Pro Kitchen Tricks
- Use a Dutch oven or heavy pot to cook the chili, as it will distribute the heat evenly and prevent scorching.
- Let the chili cool completely before refrigerating or freezing it, as this will help prevent the growth of bacteria.
- Consider making a double batch of the chili and freezing it for later use, as it will keep for several months in the freezer.
Storage Tips
- Let the chili cool completely before refrigerating or freezing it.
- Store the chili in an airtight container in the refrigerator for up to 3-5 days or in the freezer for up to 3-4 months.
- Reheat the chili gently over low heat, stirring occasionally, until it is hot and bubbly.
Gift Packaging Ideas
This chili is perfect for gifting to friends and family, especially during the holiday season. Consider packaging it in a cute mug or thermos, along with some crusty bread or crackers, and a sprinkle of shredded cheese on top.
Flavor Variations
- Try adding some diced jalapenos or serrano peppers to the chili for an extra kick of heat.
- Substitute in some ground turkey or chicken for a leaner protein option.
- Add some diced onions or bell peppers on top of the chili for a fresh, crunchy texture.
Troubleshooting
- If the chili is too thick, try adding a little more beef broth or water to thin it out.
- If the chili is too thin, try simmering it for an additional 10-15 minutes to reduce the liquid.
- If the flavors are not balanced, try adjusting the amount of spices or seasonings to taste.
FAQs
- Can I freeze it? Yes, this chili freezes beautifully and can be stored in the freezer for up to 3-4 months.
- Is it gluten-free? Yes, this recipe is gluten-free, making it a great option for those with dietary restrictions.
- Can I double the recipe? Yes, this recipe can be easily doubled or tripled to feed a larger crowd.
Conclusion
This Wendy’s chili recipe is a game-changer for anyone looking for a delicious, easy, and satisfying meal. With its rich, depth of flavor and hearty texture, it’s sure to become a staple in your household. So go ahead, give it a try, and enjoy the warm, comforting goodness of a homemade bowl of chili.
Wendy’s Chili Recipe
A hearty and satisfying homemade chili recipe that's easy to make and packed with flavor, reminiscent of the classic fast food favorite.
🥘 Ingredients
👩🍳 Instructions
-
1Brown the ground beef in a large pot or Dutch oven over medium-high heat, breaking it up with a spoon as it cooks, until it is no longer pink, about 5-7 minutes.
-
2Add the diced onion and minced garlic to the pot and cook until the onion is translucent, about 5 minutes.
-
3Stir in the chili powder, cumin, cayenne pepper, salt, and black pepper. Cook for 1-2 minutes, until the spices are fragrant. Add the diced bell pepper and cook until it starts to soften, about 2-3 minutes.
-
4Add the canned goods and broth to the pot. Stir to combine, then bring the mixture to a simmer.
-
5Let the chili cook, covered, for at least 30 minutes, stirring occasionally, until the flavors have melded together and the chili has thickened slightly.