Fruit Snacks Recipe: Homemade and Healthy
Introduction
Imagine being able to create delicious, healthy, and fun fruit snacks right in the comfort of your own home. With this fruit snacks recipe, you can do just that! Using everyday ingredients, you’ll be able to craft mouthwatering treats that are not only good for you but also incredibly easy to make. Whether you’re a parent looking for a wholesome snack for your kids or an individual seeking a healthy alternative to store-bought options, this recipe is perfect for you. The best part? You can get creative with various fruits, flavors, and textures, making each batch unique and exciting.
Why This Works
- Flavor balance and ingredient accessibility: This recipe strikes the perfect balance between sweet and tangy, using ingredients that are readily available in most supermarkets.
- Ease of preparation: The steps are straightforward and simple, requiring minimal cooking skills and effort.
- Impressive results with minimal effort: Despite the ease of preparation, the end result is impressive, with the fruit snacks turning out chewy, flavorful, and visually appealing.
Ingredients
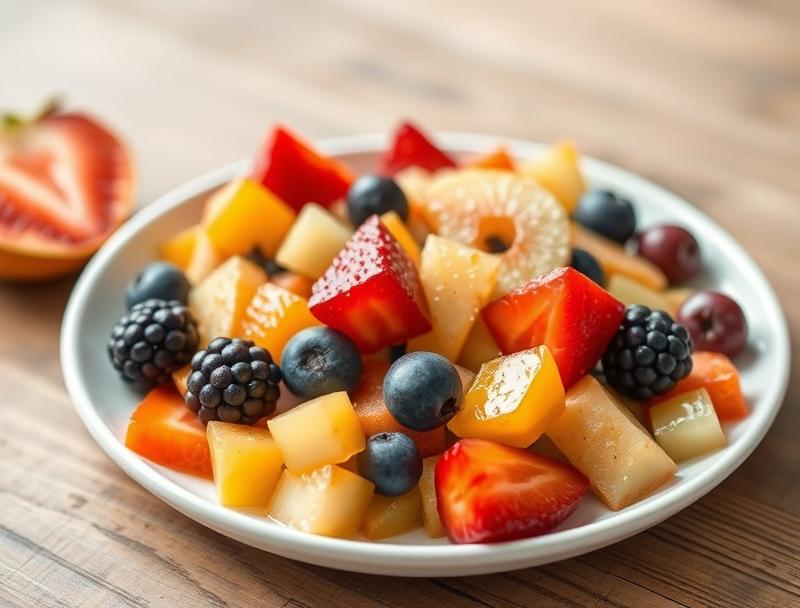
- 2 cups mixed fruit (such as strawberries, blueberries, raspberries, and pineapple)
- 1/2 cup honey
- 1/4 cup lemon juice
- 1/4 cup water
- 1 tablespoon pectin (optional, for a firmer snack)
- 1/4 teaspoon salt
- 1/4 teaspoon vanilla extract (optional, for added flavor)
Instructions
- Step 1: Begin by washing, peeling (if necessary), and chopping the mixed fruit into small pieces. Place them in a blender or food processor.
- Step 2: Add the honey, lemon juice, water, pectin (if using), salt, and vanilla extract (if using) to the blender. Blend the mixture until smooth and well combined.
- Step 3: Pour the mixture into a saucepan and heat it over medium heat, stirring frequently, until the mixture thickens and passes the “wrinkle test”. This should take about 20-25 minutes.
- Step 4: Remove the saucepan from the heat and let the mixture cool slightly. Pour it onto a baking sheet lined with parchment paper or a silicone mat. Spread it evenly to your desired thickness.
- Step 5: Allow the mixture to cool and set at room temperature. This could take a few hours, depending on the thickness and the ambient temperature.
- Step 6: Once set, use a cookie cutter, knife, or scissors to cut the fruit snack into desired shapes and sizes.
Handy Tips
- For a clearer snack, make sure to strain the blended fruit mixture through a fine-mesh sieve before heating it.
- If not using pectin, you can achieve a similar firmness by cooking the mixture for a longer time or by adding a little more honey and lemon juice.
- Always store your homemade fruit snacks in an airtight container to maintain freshness and prevent them from becoming sticky.
Heat Control
When heating the fruit mixture, it’s essential to maintain a medium heat to prevent burning or scorching. Stir frequently to ensure even heating. The mixture is ready when it has thickened and passed the “wrinkle test”: place a small amount of the mixture on a chilled plate, let it cool to room temperature, and then gently push it with your finger; if the surface wrinkles, it’s ready.
Crunch Factor
The texture of your fruit snacks can vary from soft and chewy to firmer, depending on your preference and the method of preparation. For a crunchier snack, you can dehydrate the cut shapes in a low-temperature oven (150°F – 200°F) for a few hours. Alternatively, air-drying them for a longer period can also achieve a similar texture.
Pro Kitchen Tricks
- To prevent the fruit snacks from sticking together, dust them lightly with cornstarch or powdered sugar after cutting them into shapes.
- For an added layer of flavor, you can soak the fruit in a flavored liquid (like fruit juice or tea) before blending.
- Experiment with different spices and extracts (like cinnamon, nutmeg, or almond extract) to create unique flavor profiles.
Storage Tips
- Store the fruit snacks in an airtight container at room temperature for up to 5 days.
- For longer storage, you can refrigerate them for up to 2 weeks or freeze for up to 3 months. When freezing, place the snacks in a single layer in a freezer-safe bag or container to prevent sticking.
- When reheating frozen snacks, simply leave them at room temperature for a few hours or gently warm them in a low-temperature oven.
Gift Packaging Ideas
If you’re considering gifting your homemade fruit snacks, there are several creative ways to package them. You can place the snacks in decorative jars, wrap them in colorful paper or cellophane bags, and tie them with ribbons or twine. Adding a personal touch, like a handwritten note or a small decorative flower, can make the gift even more special.
Flavor Variations
- Different spices: Try adding a pinch of cinnamon to your apple-based snacks or a sprinkle of nutmeg to your pear snacks for a unique twist.
- Creative toppings: Once your snacks are set, you can decorate them with creative toppings like shredded coconut, chopped nuts, or dried fruit.
- Ingredient swaps: Experiment with different types of fruit, like using mango instead of pineapple or peaches instead of berries, to create a variety of flavors.
Troubleshooting
- Texture problems: If your snacks turn out too sticky, they might not have been cooked long enough. If they’re too dry, they might have been overcooked.
- Ingredient replacements: If you’re allergic to certain fruits or prefer not to use honey, you can substitute these ingredients with alternatives like maple syrup or agave nectar for sweetening and different fruits for varying flavors.
- Over/undercooking signs: Keep an eye on the mixture’s consistency and color. It should thicken noticeably and darken slightly as it cooks.
FAQs
- Can I freeze it? Yes, you can freeze your homemade fruit snacks for up to 3 months. Simply place them in a single layer in a freezer-safe bag or container.
- Is it gluten-free? This recipe is naturally gluten-free, making it a great option for those with gluten intolerance or sensitivity.
- Can I double the recipe? Yes, you can easily double or triple this recipe to make more fruit snacks. Just be sure to adjust the cooking time accordingly if you’re making a larger batch.
Conclusion
Making your own fruit snacks at home is not only fun but also a healthier alternative to store-bought options. With this recipe, you have the flexibility to experiment with different fruits, flavors, and textures, ensuring that you never get bored. Whether you’re making these snacks for yourself, your family, or as gifts for friends, the process is rewarding and the results are delicious. So, don’t hesitate to get creative and share your favorite flavor combinations and tips with others. Happy snacking!
Fruit Snacks Recipe: Homemade and Healthy
A simple and healthy fruit snacks recipe made with mixed fruit, honey, and lemon juice, perfect for a quick snack or as a gift.
🥘 Ingredients
👩🍳 Instructions
-
1Wash, peel, and chop the mixed fruit into small pieces.
-
2Blend the fruit with honey, lemon juice, water, pectin (if using), salt, and vanilla extract (if using) until smooth.
-
3Heat the mixture over medium heat, stirring frequently, until it thickens and passes the wrinkle test.
-
4Pour the mixture onto a baking sheet lined with parchment paper or a silicone mat and spread evenly.
-
5Allow the mixture to cool and set at room temperature.
-
6Cut the set mixture into desired shapes and sizes.
-
7Store the fruit snacks in an airtight container at room temperature for up to 5 days or freeze for longer storage.