Easy School Cheddar Snack Crackers – Lunchbox Favorite
Introduction
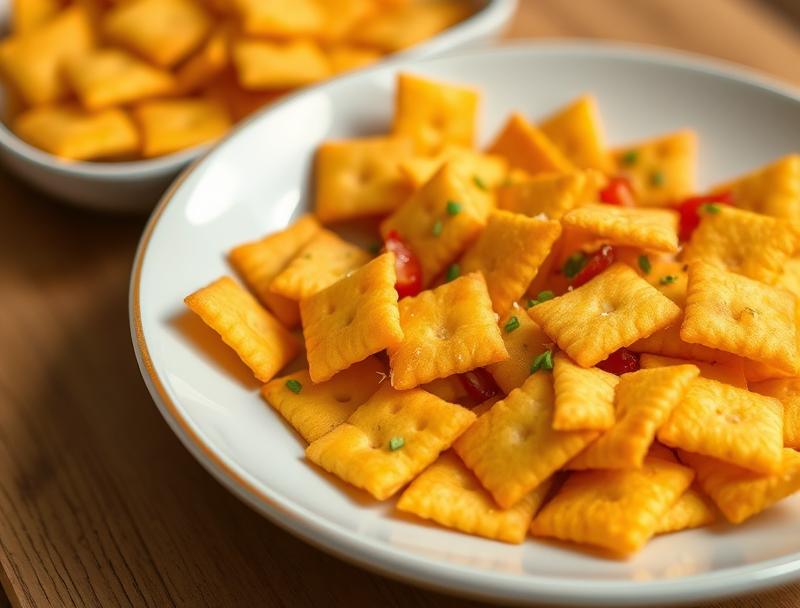
When it comes to packing lunch for school, every parent wants something that’s not just easy to make but also a delight for their kids to eat. The Easy School Cheddar Snack Crackers are a perfect solution – they’re simple, flavorful, and made with everyday ingredients that are likely already in your pantry. These crackers are a masterclass in balance, blending the sharpness of cheddar with the comfort of a homemade snack. Plus, they’re incredibly versatile, allowing you to get creative with shapes and seasonings to keep things interesting for your little ones.
Why This Works
- Flavor balance and ingredient accessibility: The combination of cheddar and other basic pantry staples ensures that these crackers are both delicious and easy to make without needing to hunt down exotic ingredients.
- Ease of preparation: With a straightforward mixing and baking process, these crackers can be ready in no time, making them perfect for busy school mornings.
- Impressive results with minimal effort: Despite their simplicity, these crackers yield impressive results – crispy on the outside, cheesy on the inside, and utterly addictive.
Ingredients
- 2 cups all-purpose flour
- 1/2 cup cold unsalted butter, cut into small pieces
- 1/2 cup grated cheddar cheese
- 1/4 teaspoon salt
- 1/4 teaspoon baking powder
- 1/4 cup ice-cold water
- Optional: Additional seasonings like paprika or dried herbs for extra flavor
Instructions
- Step 1: Preheat your oven to 375°F (190°C). Line a baking sheet with parchment paper.
- Step 2: In a large bowl, whisk together the flour, salt, and baking powder. Add the cold butter and use a pastry blender or your fingers to work it into the flour mixture until it resembles coarse crumbs.
- Step 3: Stir in the grated cheddar cheese. Gradually add the ice-cold water, mixing with a fork until the dough comes together in a ball. Wrap the dough in plastic wrap and refrigerate for 10 minutes.
- Step 4: On a lightly floured surface, roll out the dough to about 1/8 inch thickness. Use a cookie cutter or the rim of a glass to cut out shapes. Place the shapes on the prepared baking sheet, leaving about 1 inch of space between each cracker.
- Step 5: Bake for 15-20 minutes, or until the edges are lightly golden. Allow the crackers to cool on the baking sheet for 5 minutes before transferring them to a wire rack to cool completely.
Handy Tips
- For an extra crispy texture, bake the crackers for an additional 2-3 minutes. Keep an eye on them to prevent overbrowning.
- Consider using different types of cheese or adding some dried herbs to the dough for varied flavors.
- To avoid the dough becoming too warm and sticky, make sure to keep it refrigerated and handle it gently.
Heat Control
When baking these crackers, it’s crucial to keep an eye on the temperature and timing. The ideal temperature is 375°F (190°C), and the crackers are done when they’re lightly golden around the edges. Overbaking can lead to a darker color and a less appealing texture, so aim for the shorter end of the baking time and check on them frequently towards the end.
Crunch Factor
Achieving the perfect crunch is key to these snack crackers. To ensure they come out crispy, make sure the dough is rolled out thinly and evenly. Also, avoid overcrowding the baking sheet, as this can prevent the crackers from cooking uniformly. If you find your crackers are not crunchy enough, try baking them for a few minutes longer, but be cautious not to overdo it.
Pro Kitchen Tricks
- For easier rolling, lightly flour your rolling pin and the surface you’re working on to prevent the dough from sticking.
- Use a variety of cookie cutters to make the snack time more fun for your kids. Shapes like animals, stars, or letters can add an element of excitement to their lunchboxes.
- To speed up the cooling process, place the baked crackers on a wire rack set over a piece of parchment paper or a clean towel. This allows air to circulate under the crackers as well, helping them cool faster and retain their crunch.
Storage Tips
- Once the crackers are completely cool, store them in an airtight container at room temperature for up to 3 days. For longer storage, consider placing them in the freezer, where they can keep for up to 2 months. Simply thaw at room temperature when you’re ready to serve.
- For the best results, store the crackers in a single layer to prevent them from becoming soggy or sticking together. If you need to stack them, place a piece of parchment paper between each layer.
Gift Packaging Ideas
These crackers make for a wonderful homemade gift, especially when packaged in a thoughtful and visually appealing way. Consider placing them in decorative jars or tins, wrapped in cellophane or paper bags tied with a ribbon. Adding a handwritten note or a small packet of gourmet seasoning can elevate the gift, making it a lovely gesture for friends, teachers, or neighbors.
Flavor Variations
- Different spices: Try adding a pinch of cayenne pepper for a spicy kick, or some dried thyme for an herby flavor.
- Creative toppings: Before baking, brush the crackers with a little olive oil and sprinkle with sesame seeds, poppy seeds, or grated Parmesan cheese for added flavor and texture.
- Ingredient swaps: Experiment with different types of cheese, such as Parmesan, mozzarella, or a blend, to change up the flavor profile of your crackers.
Troubleshooting
- Texture problems: If your crackers turn out too soft, they may have been underbaked or stored improperly. Try baking them for a few minutes longer or ensuring they are completely cooled before storage.
- Ingredient replacements: If you’re looking to make these crackers gluten-free, consider substituting the all-purpose flour with a gluten-free flour blend. Note that you may need to adjust the ratio of flours and possibly add some xanthan gum to help with texture.
- Over/undercooking signs: Overcooked crackers will be dark and potentially bitter, while undercooked ones will be soft and pale. Aim for a light golden color around the edges for the perfect bake.
FAQs
- Can I freeze the dough? Yes, you can freeze the dough for up to 2 months. Simply thaw it overnight in the fridge or at room temperature for a few hours before rolling it out.
- Is this recipe gluten-free? Not in its original form. However, you can make it gluten-free by substituting the flour with a gluten-free blend, though you may need to adjust the recipe slightly to get the best results.
- Can I double the recipe? Absolutely. Just keep in mind that you’ll need to adjust the baking time slightly if you’re making a larger batch, as the crackers may take a bit longer to bake through evenly.
Conclusion
Making your own snack crackers from scratch is not only rewarding but also allows you to control the ingredients and the fun factor. These Easy School Cheddar Snack Crackers are a great place to start, offering a delicious, customizable snack that your kids will love. Don’t be afraid to experiment with different shapes, seasonings, and ingredients to make the recipe your own. With a little practice, you’ll be whipping up batches of these tasty crackers in no time, and they’re sure to become a lunchbox favorite.
Easy School Cheddar Snack Crackers – Lunchbox Favorite
Homemade cheddar snack crackers that are easy to make, delicious, and perfect for school lunches.
🥘 Ingredients
👩🍳 Instructions
-
1Preheat oven to 375°F (190°C).
-
2Mix flour, salt, and baking powder in a bowl.
-
3Add cold butter and mix until the mixture resembles coarse crumbs.
-
4Stir in grated cheddar cheese and gradually add ice-cold water to form a dough.
-
5Roll out the dough, cut into desired shapes, and bake for 15-20 minutes or until lightly golden.
-
6Allow the crackers to cool before serving or storing.