No-Bake Butterfinger Truffles with Caramel Crunch – 15 Min Treat!
Introduction
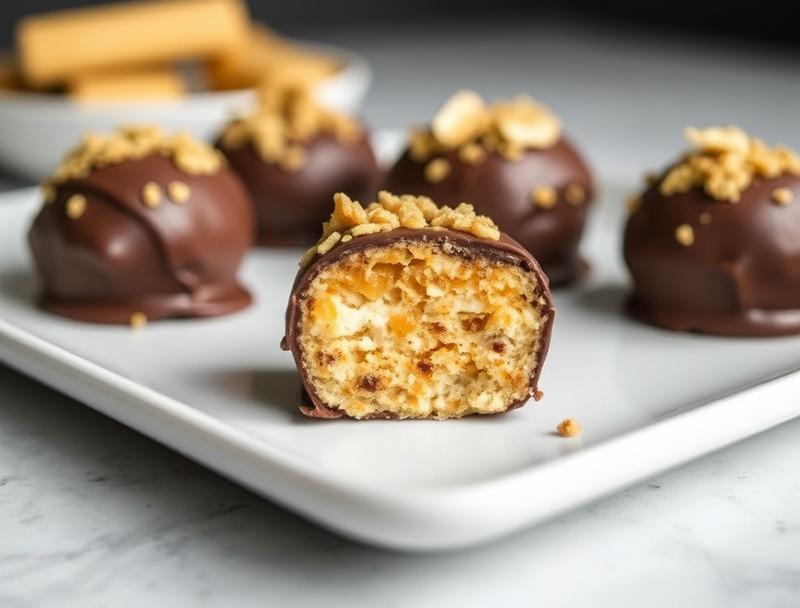
Imagine indulging in a decadent treat that requires no baking and can be prepared in just 15 minutes. The No-Bake Butterfinger Truffles with Caramel Crunch are a game-changer for anyone with a sweet tooth. These bite-sized truffles combine the creamy richness of chocolate, the crunch of Butterfinger candies, and the deep flavor of caramel, all without needing to step into the kitchen with your oven. This recipe is perfect for those who want to impress their friends and family with minimal effort, using everyday ingredients that are easily accessible.
Why This Works
- Flavor balance and ingredient accessibility: The combination of chocolate, Butterfinger, and caramel provides a well-balanced flavor profile that is both familiar and exciting. The ingredients are readily available in most grocery stores, making this recipe highly accessible.
- Ease of preparation: The no-bake aspect of this recipe means that you can skip the lengthy baking process, saving you time and hassle. The steps involved are straightforward and simple to follow.
- Impressive results with minimal effort: Despite the simplicity of the recipe, the end result is incredibly impressive. The truffles are perfect for special occasions or as a quick treat to satisfy your cravings.
Ingredients
- 1 cup (200g) of cream cheese, softened
- 1/2 cup (60g) of unsalted butter, softened
- 1 1/2 cups (190g) of powdered sugar
- 1/2 cup (60g) of crushed Butterfinger candies
- 1/4 cup (60g) of caramel sauce
- 1 teaspoon of vanilla extract
- 1 cup (120g) of chocolate chips (semi-sweet or milk)
- Optional: chopped nuts, sprinkles, or shredded coconut for decoration
Instructions
- Step 1: In a large mixing bowl, combine the softened cream cheese and butter. Mix until smooth and creamy.
- Step 2: Gradually add the powdered sugar to the cream cheese mixture, mixing until well combined.
- Step 3: Stir in the crushed Butterfinger candies, caramel sauce, and vanilla extract until the mixture is uniform.
- Step 4: Cover the mixture and refrigerate for about 10 minutes to firm up. This will make it easier to shape the truffles.
- Step 5: Use a small cookie scoop or your hands to shape the mixture into small balls, about 1 inch (2.5 cm) in diameter. You should end up with around 20-25 truffles.
- Step 6: Melt the chocolate chips in a double boiler or in the microwave in 30-second increments, stirring between each interval until smooth.
- Step 7: Dip each truffle into the melted chocolate, coating it completely. Tap off any excess chocolate by gently tapping the fork or dipping tool against the side of the bowl.
- Step 8: Place the chocolate-covered truffles on a parchment-lined baking sheet or a tray. Refrigerate for at least 30 minutes to set the chocolate.
- Step 9: Once set, you can decorate the truffles with chopped nuts, sprinkles, or shredded coconut if desired.
Handy Tips
- For the best results, make sure the cream cheese and butter are at room temperature before mixing. This will ensure a smooth and creamy texture.
- If you find the mixture too sticky, you can refrigerate it for a few minutes to firm it up before shaping the truffles.
- Experiment with different types of chocolate or add-ins like nuts or dried fruits to create unique flavor variations.
Crunch Factor
The crunch in these truffles comes from the Butterfinger candies and any additional toppings you might choose, like chopped nuts. To maintain the crunch, it’s essential to not overmix the truffle mixture and to handle the truffles gently when coating them in chocolate. This ensures that the crunchy elements remain intact and provide a satisfying texture contrast to the smooth chocolate and creamy truffle center.
Pro Kitchen Tricks
- Use high-quality chocolate for the best flavor. While it might be tempting to use cheaper alternatives, the difference in taste and texture is noticeable.
- Work efficiently when coating the truffles in chocolate. If the chocolate starts to set before you’re done, you can always reheat it gently.
- Consider using a fork or a dipping tool to coat the truffles in chocolate. This helps to create a smooth, even layer and makes it easier to tap off excess chocolate.
Storage Tips
- Store the truffles in an airtight container in the refrigerator for up to 5 days. Allow them to come to room temperature before serving for the best flavor and texture.
- If you plan to make the truffles ahead of time, you can also freeze them. Place the truffles in a single layer in a freezer-safe container or bag and store for up to 2 months. Thaw frozen truffles in the refrigerator overnight before serving.
Gift Packaging Ideas
These truffles are perfect for gifting, especially during holidays or special occasions. Consider packaging them in decorative tins, jars, or boxes lined with parchment paper or gift wrap. You can also wrap each truffle individually in colored foil or place them in cellophane bags tied with a ribbon for a more personalized touch. Adding a handwritten note or a gift tag with the ingredients used (in case of dietary restrictions) can make the gift even more thoughtful.
Flavor Variations
- Try using different types of candy or cookies for the crunch factor, such as M&M’s, chopped peanut butter cups, or even cereal.
- Experiment with various extracts like almond, coconut, or orange to give the truffles a unique flavor twist.
- For a lighter version, you can use less powdered sugar or substitute some of it with a sugar-free alternative.
Troubleshooting
- If your truffle mixture is too sticky, refrigerate it for a few minutes. If it’s too dry, you can add a small amount of cream or melted butter to adjust the consistency.
- If the chocolate doesn’t set properly, it might be due to the temperature or the quality of the chocolate. Try refrigerating the truffles for a longer period or using a higher-quality chocolate.
- For truffles that are too soft or fall apart, refrigerate them for a longer time or add a bit more powdered sugar to the mixture before reshaping.
FAQs
- Can I freeze the truffles? Yes, you can freeze the truffles for up to 2 months. Thaw them in the refrigerator before serving.
- Is this recipe gluten-free? The gluten content depends on the ingredients used, specifically the chocolate and any additives in the Butterfinger candies. Always check the labels if you’re cooking for someone with gluten intolerance.
- Can I double the recipe? Yes, you can easily double or triple the recipe if you’re making the truffles for a larger group. Just be sure to have enough chocolate for coating.
Conclusion
Making the No-Bake Butterfinger Truffles with Caramel Crunch is a fun and rewarding process that yields delicious results with minimal effort. Whether you’re a seasoned baker looking for a quick dessert or a beginner in the kitchen, this recipe is perfect for anyone who loves chocolate and crunchy textures. Feel free to experiment with the recipe, share it with friends and family, and enjoy the process of creating something truly special. Happy baking, or should we say, happy no-baking!
No-Bake Butterfinger Truffles with Caramel Crunch – 15 Min Treat!
A no-bake dessert recipe combining chocolate, Butterfinger candies, and caramel for a quick and delicious treat.
🥘 Ingredients
👩🍳 Instructions
-
1Mix cream cheese and butter until smooth.
-
2Add powdered sugar and mix until well combined.
-
3Stir in crushed Butterfinger candies, caramel sauce, and vanilla extract.
-
4Refrigerate the mixture for 10 minutes to firm up.
-
5Shape into small balls and refrigerate again if necessary.
-
6Melt chocolate and coat each truffle.
-
7Refrigerate until the chocolate is set.
-
8Serve and enjoy!
-
9Optional: decorate with chopped nuts, sprinkles, or shredded coconut.