Spooky Halloween Oreo Bark: Easy Homemade Halloween Treats
Introduction
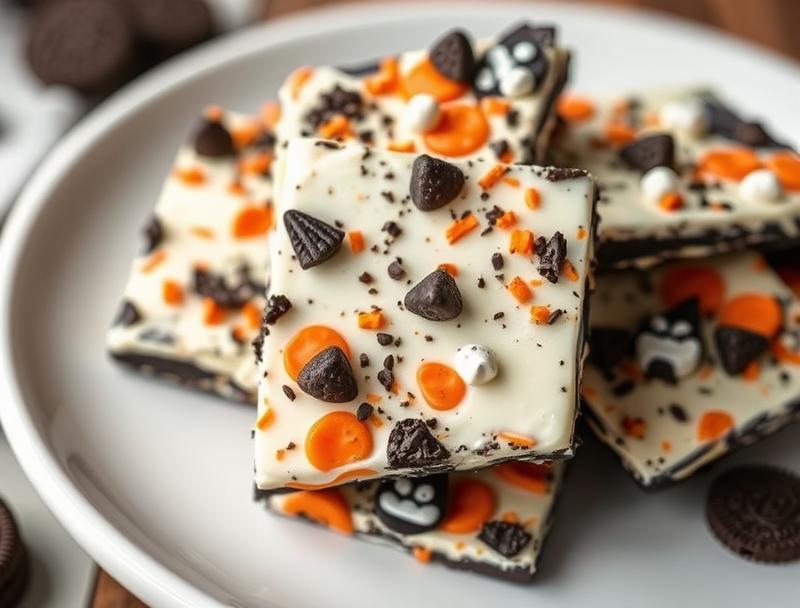
As Halloween approaches, the excitement to create spooky, fun, and delicious treats increases. Among the plethora of Halloween recipes, one that stands out for its simplicity, flavor, and creativity is the Spooky Halloween Oreo Bark. This easy-to-make treat is perfect for Halloween parties, trick-or-treaters, or as a fun project to enjoy with family and friends. Using everyday ingredients like Oreos, white chocolate, and food coloring, you can create a variety of spooky designs that are sure to impress. The best part? It requires minimal cooking skills and can be customized to fit your favorite Halloween themes and characters.
Why This Works
- Flavor balance and ingredient accessibility: The combination of crunchy Oreos, creamy white chocolate, and the sweetness of the chocolate creates a perfect balance of flavors. Moreover, all the ingredients are easily accessible in most supermarkets.
- Ease of preparation: The recipe is incredibly simple, requiring just a few steps to melt the chocolate, spread it, and decorate with Oreos and other Halloween-themed candies.
- Impressive results with minimal effort: Despite its simplicity, the Spooky Halloween Oreo Bark looks impressive and professional, making it a great option for parties or as a gift.
Ingredients
- 1 package of Oreos (any flavor, but Halloween-themed ones like orange or black are more festive)
- 1 bag of white chocolate chips
- 1 bag of milk chocolate chips (for contrasting colors)
- Halloween-themed sprinkles, candies, or edible decorations (e.g., plastic spiders, bats, or pumpkins)
- Food coloring (orange, black, purple) to color the white chocolate for themed effects
- Parchment paper or a silicone mat for easy cleanup
Instructions
- Step 1: Prepare your workspace by laying out parchment paper or a silicone mat on a flat surface. This will make cleanup easier and prevent the chocolate from sticking.
- Step 2: Melt the white chocolate chips in a microwave-safe bowl in 30-second increments, stirring between each interval, until smooth. If desired, add a few drops of food coloring to tint the chocolate orange, black, or purple for a Halloween theme.
- Step 3: Pour the melted white chocolate onto the prepared parchment paper or silicone mat. Spread it evenly to your desired thickness. Immediately sprinkle with Halloween-themed candies or decorations.
- Step 4: Melt the milk chocolate chips in the same manner as the white chocolate. Drizzle the melted milk chocolate over the white chocolate layer in a zigzag pattern or any design you like. This adds a nice contrast in color and texture.
- Step 5: Place the Oreos on top of the chocolate layer. You can arrange them in a pattern or scatter them randomly for a more spooky, uneven look.
- Step 6: Allow the chocolate to set completely. This can take about 30 minutes to an hour, depending on the temperature of your workspace. Once set, break the bark into pieces.
Handy Tips
- For a more vibrant color, make sure to use high-quality food coloring. A little goes a long way, so start with a few drops and add more as needed.
- Experiment with different types of chocolate and candies to create unique flavor combinations and themes.
- Consider using other Halloween-themed cookies or wafers if Oreos are not available.
Heat Control
When melting chocolate, it’s crucial to do so in short intervals and stir well between each heating to prevent the chocolate from burning or becoming too thick. If the chocolate starts to seize up or becomes grainy, it might be due to overheating or introducing cold ingredients too quickly. Start over with new chocolate if this happens.
Crunch Factor
The crunch in this recipe comes from the Oreos and any other crunchy candies you might add. To maintain the crunch, it’s essential to add these elements after the chocolate has been spread and before it sets. This way, the candies remain intact and provide a nice textural contrast to the smooth chocolate.
Pro Kitchen Tricks
- To ensure the chocolate sets evenly and quickly, place the parchment paper or silicone mat in the refrigerator for about 10 minutes after adding the toppings.
- For a glossy finish, melt the chocolate to the right consistency. Overheating can cause the chocolate to lose its shine.
- Use a sharp object or cookie breaker to break the bark into pieces. This helps maintain clean edges and prevents the chocolate from shattering unevenly.
Storage Tips
- Store the Spooky Halloween Oreo Bark in an airtight container at room temperature for up to 3 days. If you live in a hot climate, consider storing it in the refrigerator to prevent the chocolate from melting.
- For longer storage, the bark can be frozen. Place the pieces in a single layer in a freezer-safe bag or container and store for up to 2 months. Allow the frozen bark to thaw at room temperature when you’re ready to serve.
Gift Packaging Ideas
The Spooky Halloween Oreo Bark makes a wonderful gift for friends, neighbors, or coworkers. Consider packaging it in decorative Halloween-themed tins, jars, or bags. Add a ribbon or a gift tag with a spooky message to make it even more special. For a more personalized touch, place the bark pieces in small cellophane bags and tie them with orange and black ribbons, the signature colors of Halloween.
Flavor Variations
- Different spices: Add a pinch of cinnamon, nutmeg, or cayenne pepper to the melted chocolate for a unique twist.
- Creative toppings: Use other types of cookies, nuts, or dried fruits to change up the texture and flavor.
- Ingredient swaps: Replace white chocolate with dark or milk chocolate for a different flavor profile. You can also use different types of candies or sprinkles to match various Halloween themes.
Troubleshooting
- Texture problems: If the chocolate becomes too thick, try warming it slightly. If it’s too thin, let it cool for a few minutes.
- Ingredient replacements: If you can’t find Halloween-themed Oreos, use regular Oreos and decorate with themed sprinkles or candies.
- Over/undercooking signs: Chocolate that’s overheated will be too thin and possibly grainy. Underheated chocolate won’t spread smoothly. Adjust your heating intervals accordingly.
FAQs
- Can I freeze it? Yes, the Spooky Halloween Oreo Bark can be frozen for up to 2 months. Store it in a freezer-safe bag or container.
- Is it gluten-free? This depends on the type of Oreos and chocolate used. Traditional Oreos contain gluten, but there are gluten-free alternatives available.
- Can I double the recipe? Yes, you can easily double or triple the recipe if you’re making it for a large group. Just ensure you have enough space to spread the chocolate evenly.
Conclusion
Making Spooky Halloween Oreo Bark is a fun and easy way to get into the Halloween spirit. With its customizable themes and simple preparation, it’s perfect for parties, gifts, or a quick dessert. Don’t be afraid to experiment with different flavors and decorations to make it your own. Whether you’re a seasoned baker or a beginner in the kitchen, this recipe is sure to cast a spell of delight on anyone who tries it. So, go ahead, get creative, and happy Halloween!
Spooky Halloween Oreo Bark: Easy Homemade Halloween Treats
A simple and fun recipe for Spooky Halloween Oreo Bark, perfect for Halloween parties or as a gift. Uses Oreos, white chocolate, and Halloween-themed candies for a spooky and delicious treat.
🥘 Ingredients
👩🍳 Instructions
-
1Melt the white chocolate chips in a microwave-safe bowl in 30-second increments, stirring between each interval, until smooth.
-
2Pour the melted white chocolate onto parchment paper or a silicone mat. Spread evenly and add Halloween-themed candies or decorations.
-
3Melt the milk chocolate chips and drizzle over the white chocolate layer in a zigzag pattern or any desired design.
-
4Place Oreos on top of the chocolate layer. Arrange in a pattern or scatter randomly for a spooky look.
-
5Allow the chocolate to set completely, then break the bark into pieces.
-
6Store in an airtight container at room temperature for up to 3 days or freeze for up to 2 months.