Spooky White Chocolate Oreo Bark Recipe for Halloween
Introduction
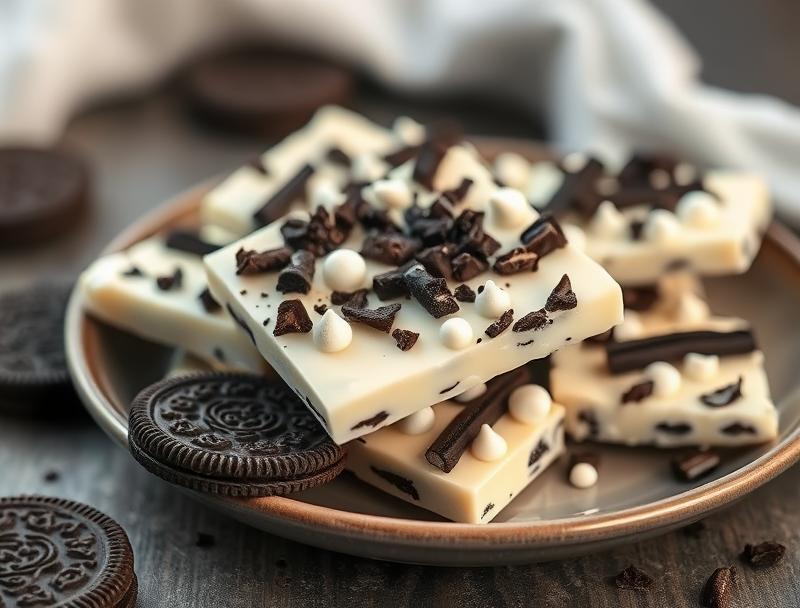
This Spooky White Chocolate Oreo Bark Recipe is perfect for Halloween, offering an easy, flavorful, and creative treat that can be made using everyday ingredients. The combination of white chocolate and Oreos provides a delicious base, while the addition of spooky decorations makes it a great fit for the holiday. With this recipe, you can create a unique and impressive dessert that’s sure to be a hit at any Halloween party or gathering.
Why This Works
- The balance of flavors between the white chocolate and Oreos is a perfect combination, and the accessibility of these ingredients makes it easy to prepare.
- The ease of preparation is a major advantage, as it requires minimal cooking and can be made in just a few steps.
- The impressive results, with the addition of spooky decorations, make it a great option for those looking to create a unique and creative dessert with minimal effort.
Ingredients
- 1 cup white chocolate chips
- 1 cup crushed Oreos
- 1/2 cup spooky decorations, such as edible eyes or Halloween-themed sprinkles
- 1 tablespoon shortening, such as Crisco or coconut oil
- 1 teaspoon vanilla extract
- Pinch of salt
Instructions
- Step 1: Begin by lining a baking sheet with parchment paper or a silicone mat. Melt the white chocolate chips in a double boiler or in the microwave in 30-second increments, stirring between each interval until smooth.
- Step 2: Stir in the shortening, vanilla extract, and salt until well combined. Pour the melted white chocolate onto the prepared baking sheet and spread into a thin layer.
- Step 3: Immediately sprinkle the crushed Oreos over the top of the white chocolate layer. Add the spooky decorations, such as edible eyes or Halloween-themed sprinkles, to create a fun and festive design.
- Step 4: Allow the white chocolate to set at room temperature or in the refrigerator for at least 30 minutes. Once set, break the bark into pieces and serve.
Handy Tips
- To ensure the white chocolate sets properly, make sure the baking sheet is at room temperature and the chocolate is not overheated.
- Experiment with different types of Oreos, such as Mint or Peanut Butter, to create unique flavor combinations.
- Consider using other types of spooky decorations, such as candy corn or gummy worms, to add more variety to the design.
Heat Control
When melting the white chocolate, it’s essential to heat it gently to avoid overheating. If using a microwave, heat in 30-second increments, stirring between each interval, until smooth. If using a double boiler, stir frequently to prevent the chocolate from seizing up.
Crunch Factor
The crunch factor in this recipe comes from the crushed Oreos, which provide a nice textural contrast to the smooth white chocolate. To achieve the perfect crunch, make sure to sprinkle the Oreos over the top of the white chocolate immediately after pouring it onto the baking sheet.
Pro Kitchen Tricks
- To create a more polished look, use a spatula to spread the melted white chocolate into a smooth, even layer.
- Consider using a thermometer to ensure the white chocolate is at the ideal temperature (around 82°F to 90°F) for setting.
- To add more flavor to the white chocolate, stir in a teaspoon of extract, such as almond or coconut, before pouring it onto the baking sheet.
Storage Tips
- Store the Spooky White Chocolate Oreo Bark in an airtight container at room temperature for up to 5 days.
- Consider freezing the bark for up to 2 months, then thawing at room temperature when ready to serve.
- When storing, make sure to keep the bark away from direct sunlight and heat sources to prevent melting or becoming discolored.
Gift Packaging Ideas
This Spooky White Chocolate Oreo Bark is perfect for gift-giving, especially during the Halloween season. Consider packaging it in cellophane bags or containers, then tying with a ribbon or adding a gift tag. You can also add a few extra spooky decorations, such as plastic spiders or bats, to make it a more festive gift.
Flavor Variations
- Try using different types of chocolate, such as milk or dark, to create a unique flavor combination.
- Experiment with different types of cookies or wafers, such as peanut butter cookies or wafers, to add more texture and flavor.
- Consider adding a pinch of salt or a teaspoon of extract, such as mint or orange, to create a more complex flavor profile.
Troubleshooting
- If the white chocolate becomes too thick, try heating it gently in the microwave or over a double boiler to thin it out.
- If the Oreos become too crushed, try using a food processor to crush them into smaller pieces.
- If the spooky decorations become discolored or runny, try using a different type of decoration or storing the bark in an airtight container to prevent moisture from affecting the decorations.
FAQs
- Can I freeze it? Yes, you can freeze the Spooky White Chocolate Oreo Bark for up to 2 months, then thaw at room temperature when ready to serve.
- Is it gluten-free? Yes, this recipe is gluten-free, making it a great option for those with gluten intolerance or sensitivity.
- Can I double the recipe? Yes, you can double the recipe to make a larger batch of Spooky White Chocolate Oreo Bark. Just be sure to adjust the baking sheet size accordingly to accommodate the increased amount of chocolate and Oreos.
Conclusion
This Spooky White Chocolate Oreo Bark Recipe is a fun and creative way to celebrate the Halloween season. With its easy preparation, unique flavor combination, and impressive results, it’s sure to be a hit at any Halloween party or gathering. Feel free to experiment with different flavor combinations and decorations to make it your own, and don’t hesitate to reach out if you have any questions or need further assistance. Happy Halloween!