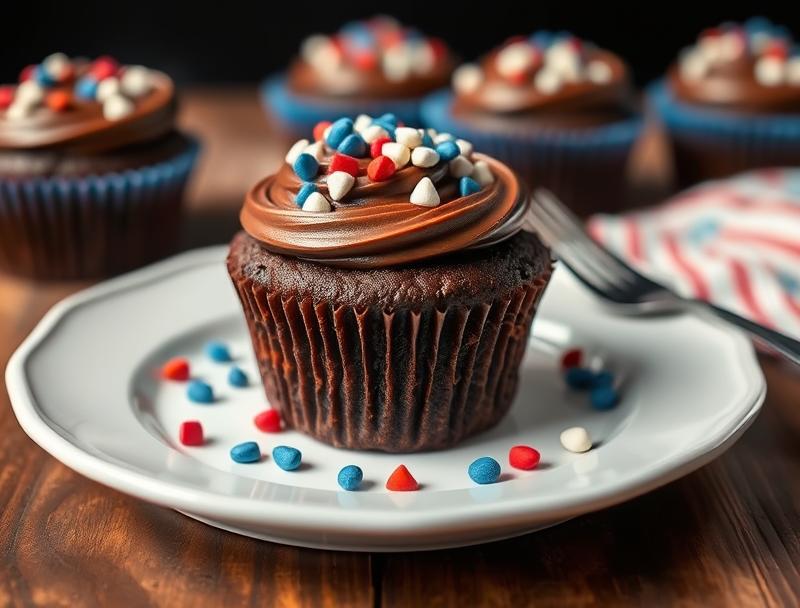
Irresistible Hostess Chocolate Cupcakes (Better Than the Original!) 🍫🧁
Introduction
Imagine sinking your teeth into a moist, decadent chocolate cupcake, topped with a swirl of creamy filling and finished with a signature squiggle of chocolate icing, all reminiscent of the beloved Hostess treats from your childhood, but better. These Irresistible Hostess Chocolate Cupcakes are not just a nostalgic nod to the past; they’re an elevated version that combines ease, rich flavor, and creativity, all using everyday ingredients that you might already have in your pantry. The best part? They’re incredibly easy to make, requiring minimal effort for a dessert that’s sure to impress both kids and adults alike. Whether you’re a busy parent looking for a special treat for your family, a beginner baker seeking a foolproof recipe, or simply a chocolate lover on the hunt for the perfect indulgence, these cupcakes are sure to become a new favorite.
Why This Works
- Flavor balance and ingredient accessibility: The secret to these cupcakes’ irresistible charm lies in their perfectly balanced flavor profile, achieved through a combination of high-quality cocoa powder, sugar, eggs, and flour. Moreover, the ingredients are easily accessible, making it simple for anyone to replicate this recipe at home.
- Ease of preparation: One of the standout features of this recipe is its simplicity. The cupcakes and their filling can be prepared with basic kitchen tools, and the instructions are straightforward, ensuring that even the most novice bakers can achieve professional-looking and tasting results.
- Impressive results with minimal effort: Despite their impressive appearance and taste, these cupcakes require surprisingly little effort. The filling is a simple mixture that doesn’t require cooking, and the chocolate icing is effortlessly piped on top, making it an ideal recipe for those short on time but big on desire for a show-stopping dessert.
Ingredients
- 1 1/2 cups all-purpose flour
- 1 cup granulated sugar
- 2 teaspoons baking powder
- 1/2 teaspoon salt
- 1/2 cup unsweetened cocoa powder
- 1/2 cup whole milk, at room temperature
- 2 large eggs, at room temperature
- 1 teaspoon vanilla extract
- For the filling: 1/2 cup marshmallow creme
- For the icing: 1 cup semisweet chocolate chips
- 1 tablespoon shortening (like Crisco), for the icing
Instructions
- Step 1: Preheat your oven to 350°F (175°C). Line a 12-cup muffin tin with cupcake liners. In a medium bowl, whisk together flour, sugar, baking powder, and salt. In a large bowl, whisk together cocoa powder and milk until smooth. Add the eggs one at a time, whisking well after each addition. Whisk in the vanilla extract.
- Step 2: Add the dry ingredients to the chocolate mixture, whisking until just combined. Divide the batter evenly among the muffin cups. Bake for 18-20 minutes or until a toothpick inserted in the center comes out clean. Let the cupcakes cool completely in the pan.
- Step 3: For the filling, simply use store-bought marshmallow creme. If desired, you can make your own, but for simplicity, store-bought works wonderfully. Once the cupcakes are cool, use a small knife or a cupcake corer to remove a small circle from the top of each cupcake. Fill each cupcake with about 1-2 teaspoons of marshmallow creme.
- Step 4: For the icing, melt the chocolate chips in a double boiler or in the microwave in 30-second increments, stirring between each interval until smooth. Add the shortening and stir until combined. The shortening helps the icing set and gives it a glossy finish. Pipe the icing onto the filled cupcakes in a swirly pattern, finishing with a signature Hostess-like squiggle on top.
Handy Tips
- Use high-quality cocoa powder for the best flavor. Dutch-processed cocoa gives a deeper, richer flavor than natural cocoa.
- Don’t overmix the batter, as this can lead to dense cupcakes.
- For an extra moist cupcake, try adding an extra tablespoon or two of milk or substituting buttermilk for regular milk.
- Experiment with different types of chocolate for the icing for varying flavor profiles. White chocolate or milk chocolate can offer a nice contrast to the dark cocoa cupcakes.
Heat Control
When baking the cupcakes, it’s crucial to keep an eye on them, as oven temperatures can vary. Ideally, the cupcakes are done when they’re firm to the touch and a toothpick inserted into the center of a cupcake comes out clean. If you’re unsure, it’s better to err on the side of underbaking slightly, as the cupcakes will continue to cook a bit after being removed from the oven.
Crunch Factor
The crunch factor in these cupcakes comes from the texture contrast between the moist cake, the creamy filling, and the smooth, slightly hardened chocolate icing on top. To achieve the right texture, make sure not to overbake the cupcakes, and let the icing set properly before serving. You can also add some chopped nuts or chocolate shavings on top of the icing for an extra crunchy element.
Pro Kitchen Tricks
- For a more professional finish, chill the filled cupcakes in the refrigerator for about 10 minutes before icing. This helps the icing set faster and prevents it from melting or becoming too runny.
- Use a turntable to display your cupcakes, especially if you’re making them for a party or special occasion. This allows everyone to see the cupcakes from all angles and adds a touch of professionalism to your presentation.
- Consider investing in a cake decorating turntable and some basic piping tips for more intricate designs and easier icing application.
Storage Tips
- Store the cupcakes in an airtight container at room temperature for up to 3 days. If you live in a hot or humid climate, consider storing them in the refrigerator to prevent the icing from melting.
- For longer storage, you can freeze the cupcakes (without the icing) for up to 2 months. Simply thaw at room temperature or refrigerate overnight, then ice as desired.
- When storing, place the cupcakes in a single layer in the container to prevent them from sticking together. You can separate layers with parchment paper if needed.
Gift Packaging Ideas
These cupcakes make wonderful gifts, especially for birthdays, holidays, or as a thoughtful gesture for friends and family. Consider packaging them in decorative cupcake boxes or towers, or even in mason jars with a ribbon tied around the lid. For a more rustic look, place the cupcakes in a wooden crate or a vintage suitcase lined with parchment paper. Don’t forget to include a personalized note or card to make the gift even more special.
Flavor Variations
- Different spices: Add a pinch of cinnamon, nutmeg, or cayenne pepper to the batter for a unique twist.
- Creative toppings: Instead of the traditional chocolate icing, try topping your cupcakes with whipped cream, chopped nuts, shaved chocolate, or even candy pieces.
- Ingredient swaps: Substitute the all-purpose flour with almond flour for a gluten-free version, or use coconut sugar instead of granulated sugar for a slightly different flavor profile.
Troubleshooting
- Texture problems: If your cupcakes turn out too dense, it might be due to overmixing the batter. Try mixing the wet and dry ingredients separately and gently folding them together.
- Ingredient replacements: If you’re out of an ingredient, don’t be afraid to get creative with substitutions. For example, you can use yogurt instead of milk for added moisture.
- Over/undercooking signs: Keep an eye on your cupcakes while they’re baking. If they’re done, they should be firm to the touch and a toothpick inserted into the center should come out clean. If unsure, it’s always better to underbake slightly, as the cupcakes will continue to cook a bit after being removed from the oven.
FAQs
- Can I freeze it? Yes, you can freeze the cupcakes without the icing for up to 2 months. Simply thaw and ice as desired.
- Is it gluten-free? Not in its current form, but you can make it gluten-free by substituting the all-purpose flour with a gluten-free flour blend.
- Can I double the recipe? Absolutely! Just keep in mind that you might need to adjust the baking time slightly if you’re making a larger batch.
Conclusion
With these Irresistible Hostess Chocolate Cupcakes, you’re not just making a dessert; you’re creating memories. Whether it’s a special occasion or just a Tuesday, these cupcakes are sure to bring joy to anyone who tastes them. Don’t be afraid to experiment with different flavors and toppings to make the recipe your own, and don’t hesitate to reach out if you have any questions or need further guidance. Happy baking, and remember, the most important ingredient in any recipe is love!