Crispy Batter Dipped Fried Fish Recipe
Introduction
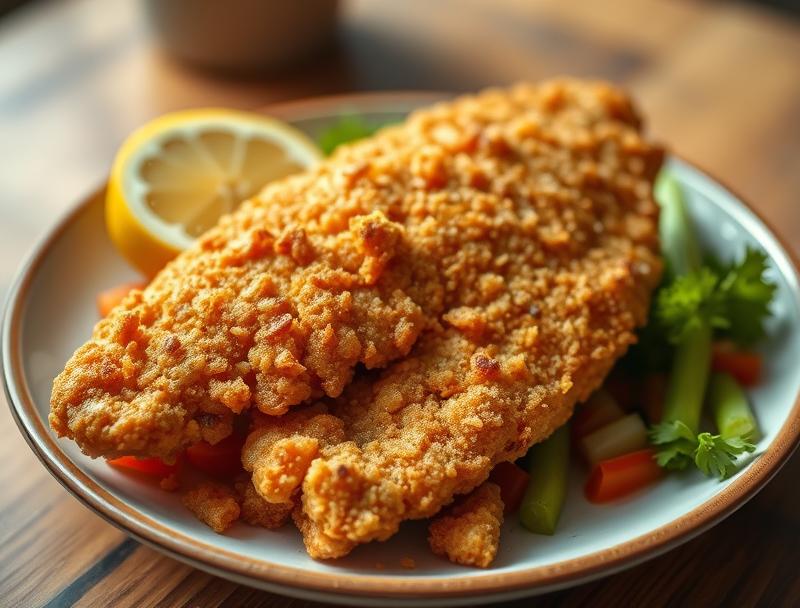
Imagine sinking your teeth into a piece of fish that’s so crispy on the outside, it shatters with each bite, giving way to tender, flaky flesh inside. This is what you get with our Crispy Batter Dipped Fried Fish Recipe, a dish that’s not only a feast for the taste buds but also incredibly easy to make. Using everyday ingredients, you can create a culinary masterpiece that’s sure to impress both family and friends. The beauty of this recipe lies in its simplicity and the freedom it offers for creativity, allowing you to experiment with various seasonings and ingredients to make it your own.
Why This Works
- Flavor balance and ingredient accessibility: The combination of honey, soy sauce, lemon juice, ginger, and garlic creates a harmonious balance of sweet, savory, and tangy flavors, all of which are easily found in most kitchens.
- Ease of preparation: The batter is simple to mix, and the frying process, though it requires some attention, is straightforward and quick.
- Impressive results with minimal effort: Despite the simplicity of the preparation, the end result is a dish that looks and tastes like it was prepared in a professional kitchen, making it perfect for special occasions or everyday meals.
Ingredients
- 4 cod fillets (about 6 oz each)
- 1 cup all-purpose flour
- 1/2 teaspoon paprika
- 1/2 teaspoon garlic powder
- 1/2 teaspoon salt
- 1/4 teaspoon black pepper
- 1/4 teaspoon cayenne pepper (optional)
- 1 cup butter milk
- Vegetable oil for frying
- Chopped parsley or chives for garnish
Instructions
- Step 1: Prepare the Batter – In a large bowl, whisk together the flour, paprika, garlic powder, salt, black pepper, and cayenne pepper (if using). Pour in the buttermilk and whisk until the batter is smooth and free of lumps.
- Step 2: Prepare the Fish – Cut the cod fillets into desired portions and season with a pinch of salt and pepper.
- Step 3: Dredge and Fry the Fish – Dip each piece of fish into the batter, making sure it’s fully coated, then gently place it into hot oil (about 350°F). Fry for about 3-4 minutes on each side, or until the batter is golden brown and the fish is cooked through.
- Step 4: Drain and Serve – Using a slotted spoon, remove the fish from the oil and place it on a paper towel-lined plate to drain excess oil. Serve hot, garnished with chopped parsley or chives.
Handy Tips
- For an extra crispy batter, make sure the fish is completely dry before coating it with the batter. You can pat it dry with a paper towel if necessary.
- Don’t overmix the batter, as this can lead to a dense, less crispy coating.
- If you don’t have buttermilk, you can make a substitute by mixing 1 cup of milk with 1 tablespoon of white vinegar or lemon juice. Let it sit for 5-10 minutes before using.
Heat Control
Maintaining the right oil temperature is crucial for achieving the perfect crispiness. The ideal temperature for frying is between 350°F and 375°F. If the oil is too hot, the outside will burn before the fish is cooked through, and if it’s too cool, the batter will absorb too much oil. Use a thermometer to monitor the temperature, and never leave frying unattended.
Crunch Factor
The crunch factor in this recipe comes from the batter, which, when cooked correctly, provides a satisfying crispy exterior. To enhance the crunch, ensure that the oil is at the right temperature and don’t overcrowd the frying pan, as this can lower the oil temperature and result in a less crispy coating.
Pro Kitchen Tricks
- For less mess, set up a dredging station with the flour mixture, the buttermilk batter, and a plate for the coated fish before you start frying.
- Use a deep frying thermometer to ensure the oil reaches and maintains the correct temperature.
- Don’t fry too many pieces at once. Fry in batches if necessary, to prevent the oil temperature from dropping.
Storage Tips
- For leftover fried fish, store it in an airtight container in the refrigerator for up to a day. Reheat it in the oven at 350°F for about 10-15 minutes, or until heated through.
- Avoid storing fried fish at room temperature for extended periods, as this can lead to food safety issues.
- Freezing is not recommended for fried fish, as the coating can become soggy upon thawing. However, you can freeze the battered but unfried fish pieces on a baking sheet, then transfer them to a freezer-safe bag for up to 3 months. Fry them straight from the freezer, adjusting the frying time as needed.
Gift Packaging Ideas
While fried fish is typically best consumed fresh, if you’re looking to gift something related, consider packaging the dry ingredients for the batter in a decorative jar or bag, along with a recipe card and a bottle of specialty sauce or seasoning. This can make for a thoughtful and unique culinary gift.
Flavor Variations
- Different spices: Experiment with various spices and herbs in the batter, such as dried herbs (thyme, oregano), smoked paprika, or ground cumin, to give the fish a unique flavor profile.
- Creative toppings: Serve the fried fish with a variety of toppings, such as tartar sauce, malt vinegar, or a side of coleslaw, to add an extra layer of flavor.
- Ingredient swaps: For a gluten-free version, use gluten-free flour. For a lighter version, use a lighter batter or less oil.
Troubleshooting
- Texture problems: If the batter is too thick, it won’t coat evenly. If it’s too thin, it won’t provide enough crunch. Adjust the batter consistency by adding more flour or buttermilk as needed.
- Ingredient replacements: If you’re out of a specific ingredient, look for substitutes that offer similar flavor or texture. For example, you can use panko breadcrumbs for an extra crispy coating.
- Over/undercooking signs: Fish is cooked through when it flakes easily with a fork. If it’s undercooked, it will be dense and moist. If overcooked, it will be dry and flake apart too easily.
FAQs
- Can I freeze it? – It’s best not to freeze fried fish, but you can freeze the battered fish before frying. See storage tips for more information.
- Is it gluten-free? – The recipe as given contains gluten due to the all-purpose flour. However, you can easily make it gluten-free by substituting the flour with a gluten-free alternative.
- Can I double the recipe? – Yes, you can double or even triple the recipe if you’re serving a larger crowd. Just ensure you have enough oil and space in your frying pan to accommodate all the pieces without overcrowding.
Conclusion
Cooking is all about experimentation and having fun with flavors and techniques. This Crispy Batter Dipped Fried Fish Recipe offers a delicious base that you can play with, adjusting seasonings and ingredients to suit your taste. Whether you’re a beginner in the kitchen or a seasoned pro, this dish is sure to become a favorite, and with the tips and tricks provided, you’ll be well on your way to creating a culinary masterpiece that will impress anyone. So, don’t be afraid to get creative, and most importantly, enjoy the process and the delicious meal that follows.
Crispy Batter Dipped Fried Fish Recipe
A simple yet impressive recipe for crispy fried fish, perfect for both beginners and experienced cooks. The dish combines the tenderness of cod with a crispy, flavorful batter, making it a great option for family meals or special occasions.
🥘 Ingredients
👩🍳 Instructions
-
1Prepare the batter by whisking together the flour, paprika, garlic powder, salt, black pepper, and cayenne pepper (if using) in a large bowl. Pour in the buttermilk and whisk until smooth.
-
2Prepare the fish by cutting it into desired portions and seasoning with a pinch of salt and pepper.
-
3Dredge the fish pieces in the batter, making sure they're fully coated, then gently place them into hot oil (about 350°F). Fry for about 3-4 minutes on each side, or until the batter is golden brown and the fish is cooked through.
-
4Drain excess oil from the fried fish using a slotted spoon and place it on a paper towel-lined plate. Serve hot, garnished with chopped parsley or chives.