Irresistible No-Bake Cookie Dough Cheesecake Bars
Introduction
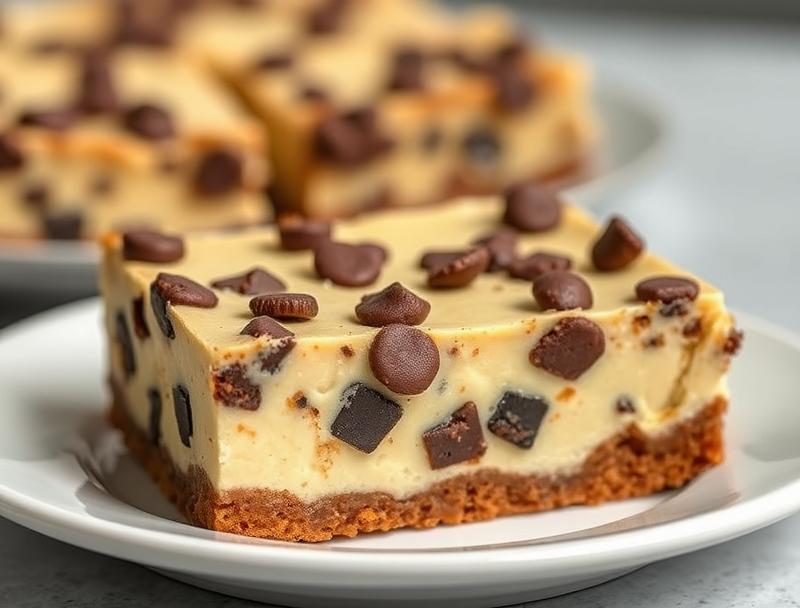
Imagine a dessert that combines the creamy richness of cheesecake, the indulgent taste of cookie dough, and the convenience of a no-bake recipe. Look no further than these Irresistible No-Bake Cookie Dough Cheesecake Bars, a treat that’s as easy to make as it is delicious. With everyday ingredients and minimal effort, you can create a show-stopping dessert that’s perfect for any occasion. Whether you’re a fan of classic cheesecake, cookie dough, or just looking for a new dessert to try, these bars are sure to impress. So, let’s dive in and explore what makes this recipe so special.
Why This Works
- Flavor balance and ingredient accessibility: The combination of a creamy cheesecake layer, a chewy cookie dough layer, and a crunchy graham cracker crust creates a perfect balance of flavors and textures. Plus, all the ingredients are easily found in most grocery stores.
- Ease of preparation: This no-bake recipe requires no cooking, making it perfect for hot summer days or for those who are new to baking. The steps are simple, and the ingredients are easy to mix and assemble.
- Impressive results with minimal effort: Despite the ease of preparation, these cheesecake bars look and taste like they were made in a professional bakery. The layers are well-defined, and the flavors are rich and indulgent.
Ingredients
- 1 1/2 cups graham cracker crumbs
- 1/4 cup granulated sugar
- 1/2 cup unsalted butter, melted
- 16 ounces cream cheese, softened
- 1/2 cup granulated sugar
- 1/2 cup sour cream
- 1 teaspoon vanilla extract
- 1 cup cookie dough (homemade or store-bought)
- 1 cup chocolate chips (optional)
- Chopped nuts or sprinkles for garnish (optional)
Instructions
- Step 1: Prepare the crust by mixing the graham cracker crumbs, sugar, and melted butter in a bowl until well combined. Press the mixture into a lined or greased 8-inch square baking dish.
- Step 2: Prepare the cheesecake layer by beating the cream cheese, sugar, sour cream, and vanilla extract in a large bowl until smooth. Pour the cheesecake mixture over the crust.
- Step 3: Prepare the cookie dough layer by scooping the cookie dough into small balls and flattening them slightly into disks. Place the cookie dough disks on top of the cheesecake layer.
- Step 4: Refrigerate the bars for at least 4 hours or overnight to allow the layers to set. Cut into bars and serve. If desired, melt the chocolate chips and drizzle over the bars, or garnish with chopped nuts or sprinkles.
Handy Tips
- To ensure the crust is evenly baked, press it into the baking dish using a flat-bottomed glass or a spatula.
- If using homemade cookie dough, make sure it’s chilled and firm before using it in the recipe.
- To prevent the cheesecake from cracking, make sure the baking dish is lined or greased properly, and avoid overmixing the cheesecake batter.
Heat Control
Since this is a no-bake recipe, there’s no need to worry about heat control. However, it’s essential to refrigerate the bars for at least 4 hours or overnight to allow the layers to set properly.
Crunch Factor
The crunch factor in these bars comes from the graham cracker crust and the chopped nuts or sprinkles used for garnish. To achieve the perfect crunch, make sure the crust is pressed into the baking dish evenly, and don’t overbake the crust (since it’s a no-bake recipe, this isn’t a concern). If using chopped nuts or sprinkles, sprinkle them over the bars just before serving to ensure they remain crunchy.
Pro Kitchen Tricks
- To ensure the bars are cut cleanly, dip the knife in hot water and wipe it dry with a towel before cutting.
- If you find the cookie dough is too sticky, chill it in the refrigerator for 10-15 minutes before using it in the recipe.
- To add an extra layer of flavor, try using different types of extract (e.g., almond or coconut) in the cheesecake batter.
Storage Tips
- Store the bars in an airtight container in the refrigerator for up to 5 days.
- Freeze the bars for up to 2 months, wrapped tightly in plastic wrap or aluminum foil. Thaw frozen bars in the refrigerator overnight.
- If you need to transport the bars, consider using a insulated container or a cooler with ice packs to keep them cool and prevent melting.
Gift Packaging Ideas
These bars are perfect for gift-giving, especially during the holiday season. Consider wrapping them individually in plastic wrap or aluminum foil and placing them in a decorative tin or jar. You can also add a ribbon or a gift tag with a personal message. If you want to get creative, try making a cookie dough-themed gift basket filled with the bars, cookie dough balls, and other sweet treats.
Flavor Variations
- Different spices: Try adding a pinch of cinnamon, nutmeg, or cardamom to the cheesecake batter for a unique flavor twist.
- Creative toppings: Instead of using chocolate chips, try using caramel sauce, chopped nuts, or shredded coconut to add texture and flavor to the bars.
- Ingredient swaps: If you’re gluten-intolerant, try using gluten-free graham cracker crumbs or cookie dough. You can also swap out the sour cream for Greek yogurt or the granulated sugar for honey or maple syrup.
Troubleshooting
- Texture problems: If the bars are too soft or too hard, it may be due to overmixing or undermixing the cheesecake batter. Try adjusting the mixing time or adding more cream cheese to achieve the right consistency.
- Ingredient replacements: If you don’t have sour cream, try using Greek yogurt or regular yogurt as a substitute. If you don’t have cookie dough, try using a different type of dough or making your own cookie dough from scratch.
- Over/undercooking signs: Since this is a no-bake recipe, there’s no risk of overcooking. However, if the bars are not set properly, it may be due to under-refrigeration. Try refrigerating the bars for a longer period or freezing them for 30 minutes to set the layers.
FAQs
- Can I freeze it? Yes, you can freeze the bars for up to 2 months. Wrap them tightly in plastic wrap or aluminum foil and thaw frozen bars in the refrigerator overnight.
- Is it gluten-free? No, this recipe contains gluten due to the graham cracker crumbs and cookie dough. However, you can try using gluten-free alternatives to make the recipe gluten-free.
- Can I double the recipe? Yes, you can double the recipe to make a larger batch of bars. Just keep in mind that you may need to adjust the refrigeration time to ensure the layers set properly.
Conclusion
These Irresistible No-Bake Cookie Dough Cheesecake Bars are a game-changer for anyone who loves dessert but hates spending hours in the kitchen. With their creamy cheesecake layer, chewy cookie dough layer, and crunchy graham cracker crust, they’re sure to impress your friends and family. So go ahead, get creative, and make these bars your own. Experiment with different flavors, toppings, and ingredients to create a unique dessert that’s all yours. Happy baking (or should I say, happy no-baking)!
Irresistible No-Bake Cookie Dough Cheesecake Bars
A no-bake dessert recipe that combines creamy cheesecake, chewy cookie dough, and a crunchy graham cracker crust.
🥘 Ingredients
👩🍳 Instructions
-
1Prepare the crust by mixing the graham cracker crumbs, sugar, and melted butter in a bowl until well combined.
-
2Prepare the cheesecake layer by beating the cream cheese, sugar, sour cream, and vanilla extract in a large bowl until smooth.
-
3Prepare the cookie dough layer by scooping the cookie dough into small balls and flattening them slightly into disks.
-
4Refrigerate the bars for at least 4 hours or overnight to allow the layers to set.