Irresistible Mini Egg Brownies
Introduction
Indulge in the richness of chocolate and the playful surprise of mini eggs with our Irresistible Mini Egg Brownies recipe. This delightful treat is not only a feast for the eyes with its colorful mini eggs on top, but it’s also incredibly easy to make, requiring just a few everyday ingredients. The combination of gooey chocolate, crunchy mini eggs, and a hint of sweetness will make these brownies a hit at any gathering or a perfect snack for satisfying your sweet tooth. The best part? You don’t need to be a skilled baker to achieve these irresistible treats. With a simple and straightforward method, anyone can create these mini egg brownies that are sure to impress both kids and adults alike.
Why This Works
- Flavor balance and ingredient accessibility: The recipe strikes a perfect balance between the deep flavor of chocolate and the subtle sweetness of mini eggs, using ingredients that are easily found in most supermarkets.
- Ease of preparation: The method is straightforward and simple, making it accessible to bakers of all skill levels. From mixing the batter to baking, each step is designed to be easy to follow and execute.
- Impressive results with minimal effort: Despite the simplicity of the recipe, the end result is visually appealing and delicious, perfect for surprising friends and family or as a fun project to do with kids.
Ingredients
- 1 and 1/2 sticks of unsalted butter, plus more for greasing the pan
- 2 cups of sugar
- 4 large eggs
- 1/2 cup of unsweetened cocoa powder
- 1 teaspoon of vanilla extract
- 1 and 1/4 cups of all-purpose flour
- 1 teaspoon of salt
- 1 cup of semi-sweet chocolate chips
- 1 cup of mini eggs, for topping
Instructions
- Step 1: Preparation – Preheat your oven to 350°F (180°C). Grease an 8-inch square baking pan with butter and line it with parchment paper, leaving some overhang for easy removal.
- Step 2: Mixing the Batter – In a medium bowl, whisk together flour, salt, and cocoa powder. Set aside. In a large bowl, use an electric mixer to beat together the butter and sugar until light and fluffy. Beat in the eggs one at a time, followed by the vanilla extract.
- Step 3: Combining Wet and Dry Ingredients – Gradually mix the dry ingredients into the wet ingredients until just combined, being careful not to overmix. Stir in the chocolate chips.
- Step 4: Baking – Pour the batter into the prepared baking pan and smooth the top. Bake for 25-30 minutes or until a toothpick inserted into the center comes out with a few moist crumbs attached.
- Step 5: Adding Mini Eggs – Remove the brownies from the oven and immediately press the mini eggs gently into the top of the brownies. Return the brownies to the oven and bake for an additional 2-3 minutes, just until the mini eggs are slightly softened.
- Step 6: Cooling and Cutting – Let the brownies cool completely in the pan before cutting into squares and serving.
Handy Tips
- For an extra fudgy texture, don’t overbake the brownies. A slightly underbaked center will result in a gooier, more decadent brownie.
- Experiment with different types of chocolate chips or chunks for varying flavor profiles.
- Consider using different colors or types of mini eggs for different occasions or themes, such as pastel colors for Easter or red and green for Christmas.
Heat Control
Keeping an eye on the temperature and baking time is crucial. The oven should be at a consistent 350°F (180°C) for even baking. The brownies are done when a toothpick comes out with a few moist crumbs, indicating they are cooked through but still retain moisture. Overbaking will result in dry, hard brownies.
Crunch Factor
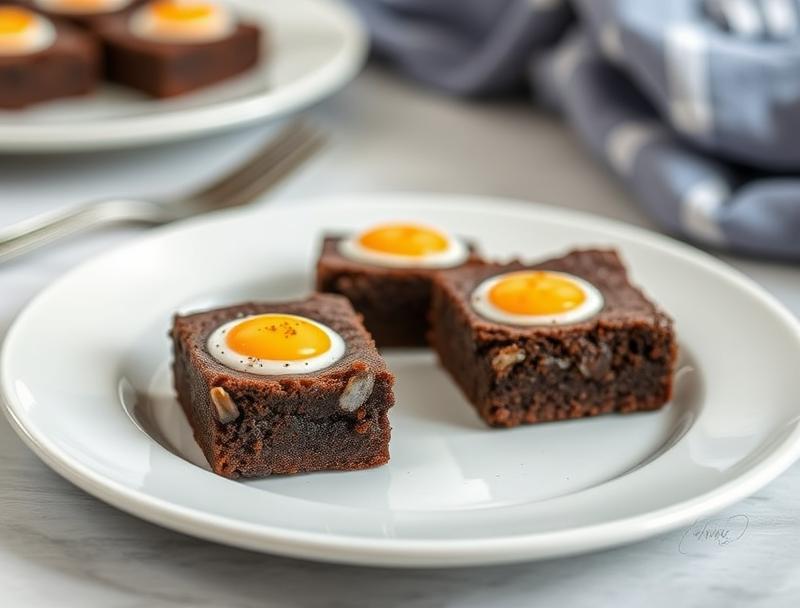
The crunch factor in these brownies comes from the mini eggs on top, which add a delightful textural contrast to the soft, chewy brownie. To enhance this, ensure the mini eggs are pressed into the brownies when they are still warm, allowing them to stick and slightly melt into the surface.
Pro Kitchen Tricks
- For a glossy top, melt a tablespoon of chocolate and brush it over the cooled brownies before cutting.
- Use high-quality chocolate for the best flavor. Dark, semi-sweet, or milk chocolate can be used depending on your preference.
- To make the brownies more festive, sprinkle with powdered sugar or use edible decorations around the mini eggs.
Storage Tips
- These brownies are best stored in an airtight container at room temperature for up to 3 days. They can also be frozen for up to 2 months, thawed at room temperature when needed.
- For the freshest flavor, consume within a day or two of baking.
- When freezing, consider cutting the brownies into individual portions, wrapping each in plastic wrap or aluminum foil, and then placing them in a freezer bag for easy thawing and serving.
Gift Packaging Ideas
These brownies make a wonderful gift, especially during holidays like Easter. Consider packaging them in decorative tins, gift boxes, or bags with a ribbon and a handwritten note. For a more rustic look, wrap individual brownies in parchment paper and twine. Adding a few extra mini eggs on top of the package can also make it more appealing and thematic.
Flavor Variations
- Different spices: Add a pinch of salt or a teaspoon of espresso powder to enhance the chocolate flavor.
- Creative toppings: Besides mini eggs, consider using chopped nuts, sprinkles, or even candy pieces for different textures and flavors.
- Ingredient swaps: Use gluten-free flour for a gluten-free version or dairy-free chocolate for a vegan option.
Troubleshooting
- Texture problems: If the brownies turn out too dry, they may have been overbaked. If too gooey, they might not have been baked long enough.
- Ingredient replacements: Always try to use the ingredients listed for the best results, but in a pinch, similar ingredients can be substituted, such as using milk chocolate instead of semi-sweet.
- Over/undercooking signs: Keep an eye on the baking time and check the brownies frequently towards the end of the baking time. A toothpick test is the best way to ensure they are cooked to perfection.
FAQs
- Can I freeze it? Yes, these brownies can be frozen for up to 2 months. It’s best to freeze them after they have cooled completely.
- Is it gluten-free? The recipe as written is not gluten-free due to the all-purpose flour. However, you can make a gluten-free version by substituting the flour with a gluten-free flour mix.
- Can I double the recipe? Yes, you can double the recipe to make a larger batch. Just ensure you have a large enough baking pan, such as a 9×13 inch pan, and adjust the baking time accordingly, likely adding an extra 10-15 minutes.
Conclusion
With these Irresistible Mini Egg Brownies, you’re not just baking a dessert; you’re creating a fun, interactive treat that’s perfect for any chocolate lover. The combination of rich, fudgy brownies and colorful, crunchy mini eggs is a match made in heaven. Whether you’re a seasoned baker or just starting out, this recipe is a must-try. So go ahead, get creative, and indulge in the delightful world of mini egg brownies. Share your creations, experiment with new flavors, and most importantly, enjoy the process and the delicious results!
Irresistible Mini Egg Brownies
Rich, fudgy brownies loaded with colorful mini eggs, perfect for any occasion.
🥘 Ingredients
👩🍳 Instructions
-
1Preheat the oven to 350°F (180°C).
-
2Prepare the baking pan by greasing it with butter and lining it with parchment paper.
-
3Mix the batter by combining the dry and wet ingredients separately and then together.
-
4Pour the batter into the prepared pan and bake for 25-30 minutes.
-
5Add mini eggs on top and return to the oven for an additional 2-3 minutes.
-
6Let cool completely before cutting and serving.