Creamy Banana Pudding Recipe with Vanilla Wafers
Introduction
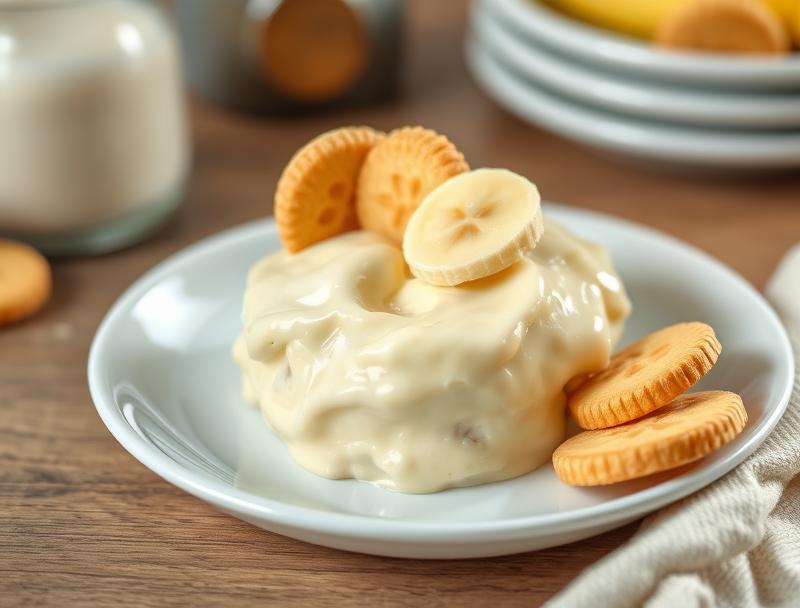
This creamy banana pudding recipe with vanilla wafers is a classic dessert that combines the natural sweetness of bananas, the crunch of vanilla wafers, and the richness of a creamy pudding. It’s a dish that’s both easy to make and impressive to serve, perfect for family gatherings, potlucks, or as a simple treat any day of the week. The best part? It’s made with everyday ingredients that are likely already in your pantry, making it a convenient option for a quick dessert. With its perfect balance of flavors and textures, this banana pudding is sure to become a favorite.
Why This Works
- The combination of ripe bananas, vanilla pudding, and crunchy vanilla wafers creates a delightful harmony of flavors and textures that appeal to both kids and adults.
- The ease of preparation is a significant advantage, as it requires minimal cooking and can be assembled in no time, making it perfect for busy days or last-minute dessert needs.
- Despite its simplicity, the presentation of layered banana pudding, vanilla wafers, and whipped cream can be quite impressive, especially when served in individual glasses or a large serving dish, making it suitable for special occasions.
Ingredients
- 4 large ripe bananas, sliced
- 1 package of vanilla pudding mix (4-serving size)
- 1 1/2 cups of milk
- 1/4 cup of sugar
- 1/4 teaspoon of salt
- 1/2 teaspoon of vanilla extract
- 1 package of vanilla wafers (about 20-25 wafers)
- 1 cup of heavy whipping cream
- Optional: chopped nuts or additional whipped cream for garnish
Instructions
- Step 1: Prepare the Pudding – In a large bowl, combine the vanilla pudding mix, milk, sugar, and salt. Whisk until the pudding mix is well dissolved and the mixture is smooth. Add the vanilla extract and whisk again.
- Step 2: Chill the Pudding – Refrigerate the pudding mixture for at least 5 minutes to allow it to chill and set.
- Step 3: Assemble the Pudding – In a large serving dish or in individual glasses, create a layer of vanilla wafers. You can trim the wafers to fit the bottom of the dish, if necessary. Next, add a layer of sliced bananas, followed by a layer of the chilled pudding mixture. Repeat this process one more time, ending with a layer of pudding on top.
- Step 4: Top with Whipped Cream – Whip the heavy whipping cream until it forms stiff peaks. Spread or pipe the whipped cream over the top layer of pudding. You can garnish with additional vanilla wafers, sliced bananas, or chopped nuts, if desired.
Handy Tips
- For a creamier pudding, make sure to chill it in the refrigerator for the recommended time. This will help the flavors to meld together and the pudding to set properly.
- If using individual serving glasses, consider layering the ingredients in a way that creates a visually appealing presentation, such as placing a vanilla wafer at the bottom of each glass and reserving some whipped cream for the top.
- Don’t overmix the pudding, as this can result in a pudding that’s too stiff or develops an unpleasant texture.
Heat Control
This recipe does not require any cooking, as it uses a packaged pudding mix that’s mixed with cold milk. Therefore, there’s no need to worry about heat control or cooking times. However, chilling the pudding mixture in the refrigerator is crucial for allowing the flavors to meld together and the pudding to set properly.
Crunch Factor
The crunch in this dessert comes from the vanilla wafers, which provide a nice textural contrast to the smooth pudding and bananas. To maintain the crunch of the wafers, it’s best to assemble the pudding just before serving. If you’re preparing the dessert ahead of time, consider adding the vanilla wafers just before serving to prevent them from becoming soggy.
Pro Kitchen Tricks
- To prevent the bananas from browning, sprinkle them with a little lemon juice after slicing. This will help maintain their color and freshness.
- For an extra creamy pudding, you can add a tablespoon or two of sour cream or Greek yogurt to the pudding mixture before chilling it.
- Experiment with different types of cookies or wafers to change up the flavor and texture of the dessert. For example, you could use chocolate sandwich cookies or peanut butter wafers for a different twist.
Storage Tips
- Store the assembled pudding in the refrigerator for up to 24 hours. It’s best to assemble the pudding just before serving, but you can prepare the components (pudding, sliced bananas, whipped cream) ahead of time and store them separately in the refrigerator.
- If you’re not serving the pudding immediately, consider covering the serving dish with plastic wrap or aluminum foil to prevent the whipped cream from drying out.
- Leftover pudding can be stored in an airtight container in the refrigerator for up to 3 days. Give it a good stir before serving, and consider topping with additional whipped cream or a sprinkle of nutmeg.
Gift Packaging Ideas
This banana pudding is a great dessert to gift to friends, family, or neighbors, especially during the summer months when a cool and creamy treat is especially welcome. Consider packaging the pudding in individual serving cups or glasses, topped with whipped cream and a sprinkle of nutmeg. You could also package the components separately (pudding, vanilla wafers, sliced bananas, whipped cream) in a gift basket or container, along with a few instructions for assembly. This makes for a fun and interactive gift that the recipient can enjoy at their leisure.
Flavor Variations
- Try adding a teaspoon of cinnamon or nutmeg to the pudding mixture for an extra boost of flavor.
- Use different types of milk, such as almond milk or soy milk, to create a non-dairy version of the pudding.
- Add some diced fruit, such as strawberries or blueberries, to the pudding mixture for added flavor and nutrition.
Troubleshooting
- If the pudding is too thick, try thinning it out with a little more milk. If it’s too thin, you can try chilling it for a few more minutes to allow it to set.
- If the whipped cream is too stiff, try beating it for a few more seconds to loosen it up. If it’s too runny, you can try chilling it in the refrigerator for a few minutes to firm it up.
- If the vanilla wafers become soggy, try substituting them with a different type of cookie or wafer that holds up better to moisture.
FAQs
- Can I freeze the pudding? Yes, you can freeze the pudding for up to 2 months. Simply assemble the pudding, cover it with plastic wrap or aluminum foil, and place it in the freezer. When you’re ready to serve, thaw the pudding in the refrigerator overnight and top with whipped cream and vanilla wafers.
- Is this pudding gluten-free? Yes, this pudding is gluten-free, as long as you use gluten-free vanilla wafers. Be sure to check the ingredient label to ensure that the wafers are safe for those with gluten intolerance or sensitivity.
- Can I double the recipe? Yes, you can easily double or triple the recipe to serve a larger crowd. Simply multiply the ingredients accordingly and assemble the pudding in a larger serving dish or individual glasses.
Conclusion
This creamy banana pudding recipe with vanilla wafers is a classic dessert that’s easy to make and fun to eat. With its perfect balance of flavors and textures, it’s sure to become a favorite in your household. Don’t be afraid to experiment with different flavor variations or substitutions to make the recipe your own. And don’t forget to share your creations with friends and family – this pudding is perfect for potlucks, picnics, or any other gathering where a cool and creamy treat is sure to be a hit. Happy cooking!
Creamy Banana Pudding Recipe with Vanilla Wafers
A classic dessert recipe that combines the natural sweetness of bananas, the crunch of vanilla wafers, and the richness of a creamy pudding.
🥘 Ingredients
👩🍳 Instructions
-
1Prepare the pudding by whisking together the vanilla pudding mix, milk, sugar, and salt in a large bowl.
-
2Chill the pudding mixture in the refrigerator for at least 5 minutes to allow it to set.
-
3Assemble the pudding by creating a layer of vanilla wafers, followed by a layer of sliced bananas, and then a layer of the chilled pudding mixture. Repeat this process one more time, ending with a layer of pudding on top.
-
4Top the pudding with whipped cream and garnish with additional vanilla wafers or sliced bananas, if desired.