Easy No-Bake Chocolate Mousse Cake Recipe
Introduction
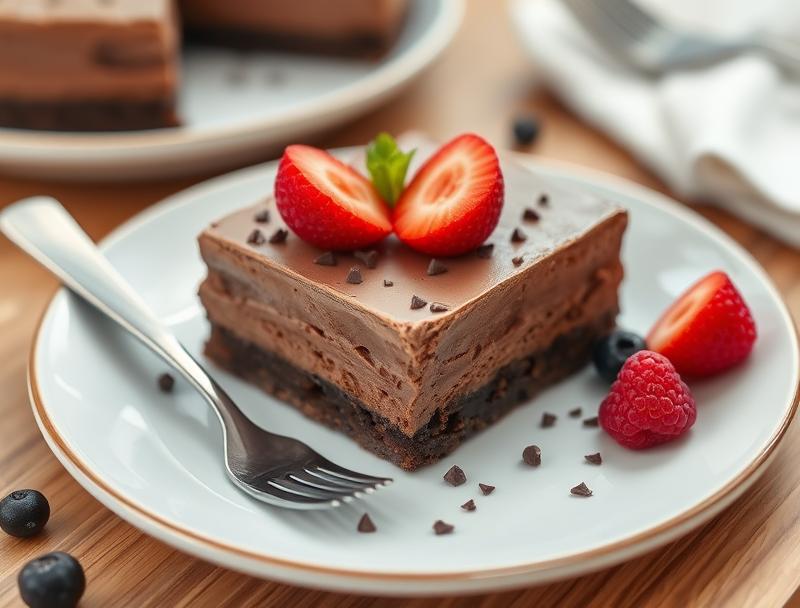
Indulge in the richness of chocolate without the fuss of baking with our Easy No-Bake Chocolate Mousse Cake Recipe. This decadent dessert is a masterclass in simplicity, using everyday ingredients to create a masterpiece that will impress both in taste and presentation. The beauty of this recipe lies in its ease and versatility, allowing you to unleash your creativity while enjoying the deep, velvety smoothness of chocolate. Perfect for any occasion, from casual gatherings to special celebrations, this no-bake chocolate mousse cake is sure to become a favorite among chocolate lovers of all ages.
Why This Works
- Flavor balance and ingredient accessibility: The combination of dark chocolate, cream, and a touch of sugar creates a perfectly balanced flavor profile that is both rich and refreshing. The ingredients are easily found in most supermarkets, making this recipe accessible to everyone.
- Ease of preparation: Unlike traditional cakes that require baking, this no-bake recipe simplifies the process, eliminating the need for an oven. The steps are straightforward, and the preparation time is minimal, making it perfect for last-minute desserts or for those who are new to dessert making.
- Impressive results with minimal effort: Despite its simplicity, the end result is a visually stunning and deliciously decadent chocolate mousse cake that is sure to impress your guests. The layers of chocolate mousse and the smooth texture create a sophisticated dessert that belies the ease of its preparation.
Ingredients
- 250g dark chocolate (at least 70% cocoa), broken into small pieces
- 250ml heavy cream
- 100ml whole milk
- 2 tablespoons unsalted butter, softened
- 2 tablespoons granulated sugar
- 1 teaspoon vanilla extract
- 1 1/2 cups chocolate sandwich cookies (e.g., Oreos), crushed
- Fresh berries or chocolate shavings for garnish (optional)
Instructions
- Step 1: Prepare the Crust – In a medium bowl, mix together the crushed cookies and melted butter until well combined. Press the mixture into the bottom of a 9-inch springform pan. Refrigerate for at least 30 minutes to set.
- Step 2: Make the Chocolate Mousse – In a double boiler or a heatproof bowl set over a pot of simmering water, melt the chocolate, stirring occasionally. In a separate bowl, whip the heavy cream until it forms stiff peaks. Set aside. In another bowl, whisk together the milk, sugar, and vanilla extract. Once the chocolate has melted, let it cool slightly, then fold it into the milk mixture until well combined. Gently fold in the whipped cream until no white streaks remain.
- Step 3: Assemble the Cake – Pour the chocolate mousse over the prepared crust. Smooth the top with a spatula. Refrigerate for at least 4 hours or overnight to allow the mousse to set.
- Step 4: Serve and Enjoy – Once set, remove the cake from the refrigerator about 30 minutes before serving to allow it to come to room temperature slightly. Release the springform pan sides and transfer the cake to a serving plate. Garnish with fresh berries or chocolate shavings, if desired. Slice and serve.
Handy Tips
- For a lighter texture, make sure not to overmix the chocolate mousse. Fold the whipped cream into the chocolate mixture gently to retain the airiness.
- Experiment with different types of chocolate for varying flavor profiles. Milk chocolate will give a sweeter taste, while white chocolate can add a creamy and vanilla-forward flavor.
- Consider using different types of cookies for the crust to change up the flavor. For example, peanut butter cookies can add a nutty flavor, while chocolate wafers can intensify the chocolate experience.
Heat Control
Since this is a no-bake recipe, heat control is primarily about melting the chocolate. Use a double boiler or a heatproof bowl over simmering water to melt the chocolate gently. Avoid overheating, as it can seize the chocolate, making it grainy and unusable.
Crunch Factor
The crunch in this dessert comes from the cookie crust. To maintain the crunch, avoid overmixing the cookie and butter mixture, and make sure the crust is completely set before adding the mousse. If you prefer a crunchier texture throughout, consider sprinkling some chopped nuts or cookie crumbs on top of the mousse before it sets.
Pro Kitchen Tricks
- To ensure the cake releases smoothly from the springform pan, run a knife around the edges before releasing the springform sides.
- For a more defined layering, chill the cake in the freezer for about 10 minutes before serving. This will help the slices hold their shape better.
- Use high-quality chocolate for the best flavor. Dark chocolate with a high cocoa content will give a deeper, richer flavor compared to milk chocolate.
Storage Tips
- Store the cake in the refrigerator, covered with plastic wrap or aluminum foil, for up to 3 days.
- Freezing is not recommended for the assembled cake, as it can affect the texture of the mousse. However, you can freeze the chocolate mousse separately before assembling the cake. Simply thaw in the refrigerator overnight before using.
- Let the cake come to room temperature for about 30 minutes before serving for the best taste and texture.
Gift Packaging Ideas
If you’re planning to gift this cake, consider packaging it in a decorative cake box or a large tin. You can also wrap the cake tightly in plastic wrap or aluminum foil and then place it in a gift bag. Add a personal touch with a ribbon around the box or a handwritten note. For a more rustic look, use a wooden crate or a wicker basket lined with parchment paper.
Flavor Variations
- Different spices: Add a pinch of cinnamon, nutmeg, or cayenne pepper to the chocolate mousse for a unique twist.
- Creative toppings: Use fresh fruits like raspberries, strawberries, or blueberries, or even caramel sauce, nuts, or shaved chocolate for added texture and flavor.
- Ingredient swaps: Replace the heavy cream with coconut cream for a dairy-free version, or use almond milk instead of whole milk for a lighter taste.
Troubleshooting
- Texture problems: If the mousse becomes too runny, refrigerate it for a bit to firm up. If it’s too stiff, gently fold in a little more whipped cream.
- Ingredient replacements: Always choose replacements that are as close in texture and flavor profile as possible to the original ingredient to maintain the integrity of the dessert.
- Over/undercooking signs: Since this is a no-bake recipe, the concern is more about the setting of the mousse. If it’s under-set, it will be too runny. If over-set, it might become too firm. Adjust the refrigeration time accordingly.
FAQs
- Can I freeze it? – It’s best not to freeze the assembled cake, but you can freeze the chocolate mousse before assembling. Thaw overnight in the refrigerator before using.
- Is it gluten-free? – Depending on the cookies used for the crust, this cake might not be gluten-free. Choose gluten-free cookies to make the dessert accessible to those with gluten intolerance.
- Can I double the recipe? – Yes, you can double the recipe, but be sure to use a larger springform pan to accommodate the increased volume. Adjust the refrigeration time slightly, as a larger cake will take longer to set.
Conclusion
With its simplicity, rich flavor, and elegant presentation, the Easy No-Bake Chocolate Mousse Cake Recipe is a versatile dessert perfect for any occasion. Whether you’re a seasoned baker or a beginner in the kitchen, this recipe is sure to delight. Feel free to experiment with different flavors and toppings to make it your own, and don’t hesitate to share your creations with friends and family. Happy baking, or rather, happy no-baking!
Easy No-Bake Chocolate Mousse Cake Recipe
A rich and decadent no-bake chocolate mousse cake made with dark chocolate, heavy cream, and a touch of sugar, perfect for any chocolate lover.
🥘 Ingredients
👩🍳 Instructions
-
1Prepare the crust by mixing crushed cookies and melted butter, then press into a springform pan and refrigerate.
-
2Melt the chocolate in a double boiler, then let it cool slightly.
-
3Whip the heavy cream until stiff peaks form, then set aside.
-
4Fold the whipped cream into the cooled chocolate until well combined, then pour over the prepared crust.
-
5Refrigerate for at least 4 hours or overnight to allow the mousse to set, then serve and enjoy.