Cheesy Keto Garlic Rolls Recipe
Introduction
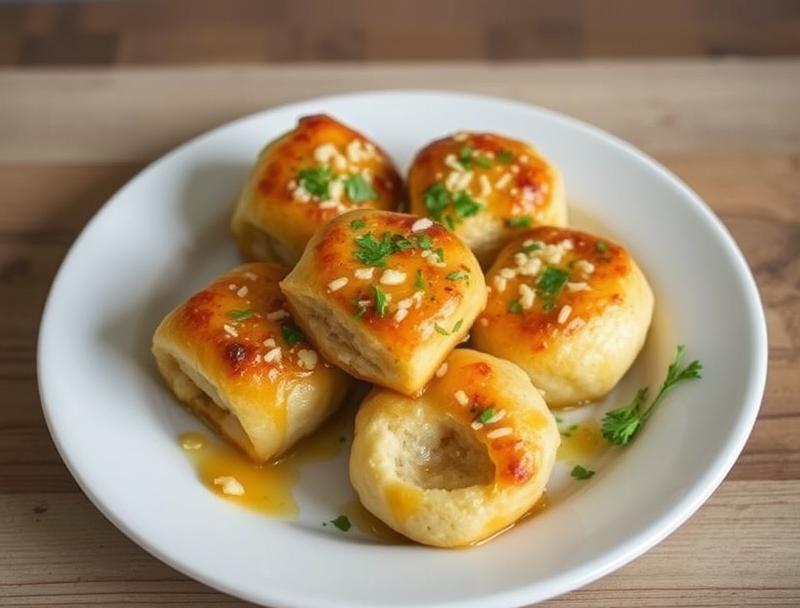
Imagine sinking your teeth into a warm, cheesy, garlic-infused roll that not only tastes amazing but also fits perfectly into your keto diet. The Cheesy Keto Garlic Rolls Recipe is a game-changer for anyone looking to indulge in a delicious, comforting treat without compromising on their dietary preferences. This recipe is all about ease, flavor, and creativity, using everyday ingredients to create something truly special. Whether you’re a seasoned baker or a beginner in the kitchen, these rolls are sure to become a favorite. They’re perfect for a quick snack, a side dish, or even as a base for your favorite sandwiches and burgers.
Why This Works
- Flavor balance and ingredient accessibility: The combination of melted cheese, garlic, and keto-friendly dough creates a perfect balance of flavors that is both satisfying and delicious. The ingredients are easily accessible, making this recipe a staple for any keto diet follower.
- Ease of preparation: Despite the impressive results, the preparation and cooking process is remarkably straightforward. The dough is simple to make, and the assembly of the rolls is a breeze, even for those less experienced in baking.
- Impressive results with minimal effort: The end result is a batch of beautifully golden, cheesy garlic rolls that look and taste like they came from a professional bakery, all achieved with minimal fuss and effort.
Ingredients
- 2 cups of almond flour
- 1/2 cup of coconut flour
- 1/4 cup of granulated sweetener (such as Swerve or Erythritol)
- 1/2 teaspoon of salt
- 1/4 teaspoon of black pepper
- 1/4 teaspoon of garlic powder
- 1/2 cup of melted mozzarella cheese
- 1/4 cup of melted butter
- 2 large eggs
- 2 cloves of garlic, minced
- 1/2 cup of grated cheddar cheese (optional)
- Fresh parsley, chopped (for garnish)
Instructions
- Step 1: Begin by preheating your oven to 375°F (190°C). In a large mixing bowl, combine the almond flour, coconut flour, granulated sweetener, salt, black pepper, and garlic powder. Mix well to ensure all the dry ingredients are fully incorporated.
- Step 2: In a separate mixing bowl, whisk together the melted mozzarella cheese, melted butter, eggs, and minced garlic until you have a smooth, consistent mixture.
- Step 3: Add the wet ingredients to the dry ingredients and mix until a dough forms. The dough should be pliable and easy to work with. If it’s too sticky, you can add a little more almond flour.
- Step 4: Divide the dough into 6-8 equal pieces, depending on how large you want your rolls to be. Roll each piece into a ball and then flatten it slightly into a disk shape. Place a tablespoon or two of grated cheddar cheese in the center of each disk (if using), and then fold the dough over the cheese, pressing the edges together to seal the roll. Place the rolls on a baking sheet lined with parchment paper, leaving about an inch of space between each roll.
- Step 5: Brush the tops of the rolls with a little melted butter and sprinkle with additional grated cheese if desired. Bake the rolls in the preheated oven for about 15-20 minutes, or until they’re golden brown.
Handy Tips
- Make sure to not overmix the dough, as this can lead to tough rolls. Stop mixing as soon as all the ingredients come together in a cohesive ball.
- For an extra crispy crust, you can broil the rolls for an additional 1-2 minutes after baking. Keep a close eye on them to prevent burning.
- Consider using different types of cheese for varying flavor profiles. Parmesan, for example, adds a nice salty kick, while mozzarella provides a milder taste.
Heat Control
Heat control is crucial when baking these rolls. The ideal temperature is 375°F (190°C), and the rolls should be baked for 15-20 minutes, or until they’re golden brown. It’s also important to keep an eye on the rolls during the last few minutes of baking, as the tops can go from perfectly golden to burnt quickly. If you’re unsure, it’s always better to err on the side of underbaking slightly, as the rolls will continue to cook a bit after they’re removed from the oven.
Crunch Factor
The crunch factor of these rolls comes from the outside crust, which should be crispy and golden, giving way to a soft, cheesy interior. To achieve this, make sure the rolls are baked until they’re nicely browned on top. You can also try brushing the tops with a little bit of egg wash (beaten egg mixed with a tablespoon of water) before baking for an extra golden crust.
Pro Kitchen Tricks
- For an easy cleanup, line your baking sheet with parchment paper before placing the rolls on it. This will prevent the cheese from sticking and make washing up a breeze.
- Consider making the dough ahead of time and refrigerating or freezing it for later use. This can be a huge time-saver, especially if you’re planning to make these rolls for a large gathering or event.
- To ensure the rolls are evenly baked, rotate the baking sheet halfway through the baking time. This will help the rolls cook uniformly and prevent some from being overcooked while others are undercooked.
Storage Tips
- These rolls are best served fresh, but they can be stored in an airtight container at room temperature for up to 2 days. For longer storage, consider freezing the baked rolls and reheating them in the oven or microwave when needed.
- When reheating, place the rolls in the oven at 350°F (180°C) for about 5 minutes, or until warmed through. You can also reheat them in the microwave, but be careful not to overheat, as this can make the cheese rubbery.
- For freezing, place the cooled rolls in a freezer-safe bag or container and store in the freezer for up to 2 months. When you’re ready to eat them, simply thaw and reheat as desired.
Gift Packaging Ideas
These cheesy keto garlic rolls make a wonderful gift, especially for friends or family members who are also following a keto diet. Consider packaging them in a decorative tin or basket, lined with parchment paper or a clean kitchen towel. You could also wrap individual rolls in plastic wrap or aluminum foil and place them in a gift bag or box. Adding a personal touch, such as a handwritten note or a small packet of keto-friendly seasoning, can make the gift even more special.
Flavor Variations
- Different spices: Try adding some dried oregano, basil, or thyme to the dough for a herby flavor. You could also add some red pepper flakes for a spicy kick.
- Creative toppings: In addition to the grated cheddar cheese, consider topping your rolls with some diced bacon, chopped scallions, or a sprinkle of sesame seeds.
- Ingredient swaps: For a dairy-free version, you could substitute the mozzarella cheese with a dairy-free alternative. Similarly, you could use different types of flour, such as coconut flour or flaxseed meal, to change the texture and flavor of the rolls.
Troubleshooting
- Texture problems: If your rolls turn out too dense or heavy, it might be because the dough was overmixed. Try mixing the ingredients just until they come together in a ball, and then stop mixing.
- Ingredient replacements: If you don’t have a particular ingredient, such as almond flour, you might be able to substitute it with something else. However, keep in mind that substituting ingredients can affect the texture and flavor of the final product.
- Over/undercooking signs: If your rolls are undercooked, they might be pale and soft. If they’re overcooked, they might be dark brown or even burnt. Keep an eye on the rolls during the baking time, and adjust the cooking time as needed.
FAQs
- Can I freeze it? Yes, these rolls can be frozen for up to 2 months. Simply place the cooled rolls in a freezer-safe bag or container and store in the freezer.
- Is it gluten-free? Yes, this recipe is gluten-free, making it a great option for those with gluten intolerance or sensitivity.
- Can I double the recipe? Yes, you can easily double or even triple this recipe if you need to make a large batch of rolls. Just keep in mind that you might need to adjust the baking time slightly.
Conclusion
The Cheesy Keto Garlic Rolls Recipe is a delicious and easy-to-make treat that’s perfect for anyone following a keto diet. With its simple ingredients and straightforward instructions, this recipe is accessible to bakers of all skill levels. Whether you’re looking for a quick snack, a side dish, or a base for your favorite sandwiches and burgers, these rolls are sure to become a staple in your kitchen. So go ahead, give this recipe a try, and enjoy the warm, cheesy, garlic-infused goodness of these amazing keto rolls!