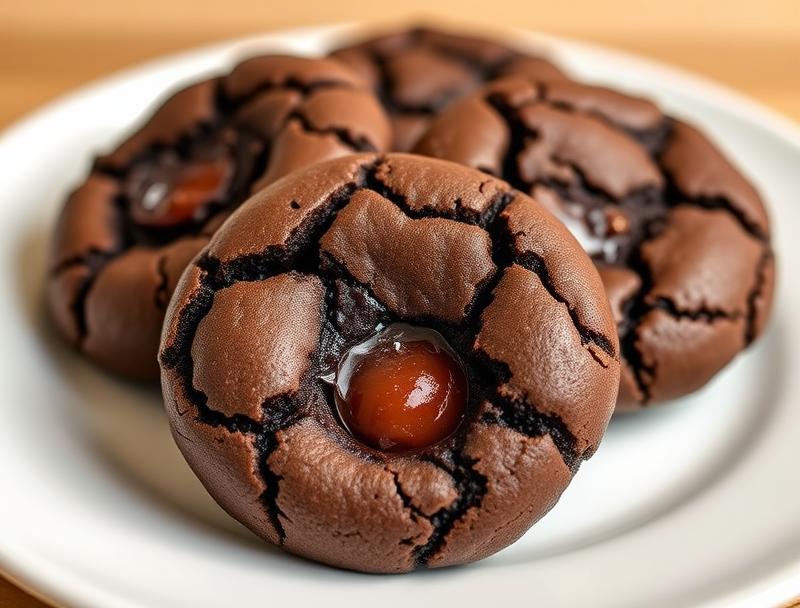
Chocolate Lava Cookies – Easy Back-to-School Treat Kids Will Love!
Introduction
As the back-to-school season kicks in, finding treats that are both delicious and easy to make can be a challenge. However, with the Chocolate Lava Cookies recipe, you’re in for a treat that not only satisfies your kids’ sweet tooth but also brings a smile to their faces. Made with everyday ingredients and requiring minimal effort, these cookies are perfect for a quick after-school snack or as a special surprise in their lunchboxes. The best part? They’re incredibly easy to customize, allowing your kids to express their creativity and make the cookies truly their own.
Why This Works
- Flavor balance and ingredient accessibility: The combination of melted chocolate, crunchy edges, and a gooey center creates a flavor balance that kids and adults alike will love. Plus, the ingredients are easily found in most kitchens, making it a convenient option for any day.
- Ease of preparation: With a simple list of ingredients and a straightforward preparation process, these cookies can be ready in no time. Perfect for busy parents looking to make a special treat without spending hours in the kitchen.
- Impressive results with minimal effort: Despite the ease of preparation, the end result is impressive. The lava effect in the center of the cookies is sure to wow both kids and their friends, making it a great option for school parties or gatherings.
Ingredients
- 2 1/4 cups all-purpose flour
- 1 tsp baking soda
- 1 tsp salt
- 1 cup unsalted butter, at room temperature
- 3/4 cup white granulated sugar
- 3/4 cup brown sugar
- 2 large eggs
- 2 teaspoons pure vanilla extract
- 2 cups semi-sweet chocolate chips
- Optional: chopped nuts, sprinkles, or other mix-ins of your choice
Instructions
- Step 1: Preheat your oven to 375°F (190°C). Line a baking sheet with parchment paper or a silicone mat. In a medium bowl, whisk together the flour, baking soda, and salt. Set aside.
- Step 2: In a large bowl, use an electric mixer to cream together the butter and sugars until light and fluffy, about 2-3 minutes. Beat in the eggs one at a time, followed by the vanilla extract.
- Step 3: Gradually mix in the dry ingredients (flour mixture) until just combined, being careful not to overmix. Stir in the chocolate chips and any optional mix-ins you’re using.
- Step 4: Use a cookie scoop or spoon to drop rounded balls of dough onto the prepared baking sheet, leaving about 2 inches of space between each cookie. Bake for 12-14 minutes or until the edges are lightly golden brown and the centers are set.
- Step 5: Remove the cookies from the oven and let them cool on the baking sheet for 5 minutes before transferring them to a wire rack to cool completely. Serve warm for the best lava effect.
Handy Tips
- For an extra gooey center, bake the cookies for 10-11 minutes. They will look underbaked but will set as they cool.
- Consider using different types of chocolate chips or adding nuts for varied flavors and textures.
- If you find that your cookies are spreading too much, try chilling the dough for 30 minutes before baking.
Heat Control
The ideal baking temperature for these cookies is 375°F (190°C). It’s crucial to not overbake, as this can cause the cookies to lose their lava centers. Look for lightly golden brown edges and a set center. If you prefer a chewier cookie, bake for 10-11 minutes. For a crisper cookie, bake for 14-15 minutes.
Crunch Factor
The crunch factor in these cookies comes from the edges, which should be lightly golden brown and crispy. The center, however, should remain soft and gooey, creating a delightful textural contrast. To achieve this, ensure you don’t overbake the cookies and consider taking them out of the oven when they still look slightly underdone.
Pro Kitchen Tricks
- Use high-quality chocolate for the best flavor. Semi-sweet chocolate chips provide a good balance between sweetness and depth of flavor.
- Don’t overmix the dough. This can lead to tough cookies. Stop mixing as soon as the ingredients come together in a ball.
- Experiment with different mix-ins like nuts, dried cranberries, or even candy pieces to create unique flavor combinations.
Storage Tips
- Store baked cookies in an airtight container at room temperature for up to 5 days. They can also be frozen for up to 2 months.
- To freeze, place the cookies in a single layer in a freezer-safe bag or container. When you’re ready to serve, thaw at room temperature or reheat in the microwave for a few seconds.
- Consider freezing the dough balls instead of baking them all at once. This way, you can bake fresh cookies anytime you want by simply placing the frozen dough balls on a baking sheet and baking for an additional 2-3 minutes.
Gift Packaging Ideas
If you’re looking to give these cookies as a gift, consider packaging them in decorative jars or tins. You can also wrap them individually in plastic wrap or aluminum foil and place them in a gift bag. Adding a ribbon or a handmade card can make the gift even more special. For a more rustic look, use brown paper bags and twine. You could also include a packet of hot cocoa mix for an extra-special treat.
Flavor Variations
- Different spices: Add a pinch of cinnamon, nutmeg, or cayenne pepper to give your cookies a unique twist.
- Creative toppings: Use chopped nuts, sprinkles, or even crushed candy canes for a festive touch.
- Ingredient swaps: Try using peanut butter chips instead of chocolate for a peanut butter lava cookie, or use oats for a slightly healthier version.
Troubleshooting
- Texture problems: If your cookies turn out too hard, they might have been overbaked. If they’re too soft, they might not have been baked long enough.
- Ingredient replacements: If you’re out of a particular ingredient, consider what you can substitute it with. For example, brown sugar can be replaced with white sugar and a tablespoon of molasses.
- Over/undercooking signs: Keep an eye on your cookies while they’re baking. If the edges start to get too dark, they’re likely overcooking. If the centers look raw, they need a bit more time.
FAQs
- Can I freeze it? Yes, you can freeze both the baked cookies and the dough balls. Frozen dough balls can be baked straight from the freezer, adding 2-3 minutes to the baking time.
- Is it gluten-free? The recipe as written is not gluten-free due to the all-purpose flour. However, you can experiment with gluten-free flours to adapt the recipe.
- Can I double the recipe? Yes, you can easily double or even triple the recipe if you’re making cookies for a large group. Just ensure you have enough baking sheets and space in your oven.
Conclusion
Making Chocolate Lava Cookies is a fun and rewarding experience, especially when shared with kids. The process is simple enough for them to follow along and even assist with, teaching them valuable baking skills and the joy of creating something delicious from scratch. Whether you’re a seasoned baker or just starting out, these cookies are sure to become a favorite. So, go ahead, get creative, and enjoy the ooey-gooey goodness of these chocolate lava cookies!
Chocolate Lava Cookies – Easy Back-to-School Treat Kids Will Love!
A delicious and easy-to-make chocolate lava cookie recipe perfect for back-to-school treats.
🥘 Ingredients
👩🍳 Instructions
-
1Preheat oven to 375°F (190°C).
-
2Whisk together flour, baking soda, and salt. Set aside.
-
3Cream together butter and sugars. Beat in eggs and vanilla extract.
-
4Gradually mix in the dry ingredients until just combined. Stir in chocolate chips.
-
5Drop rounded balls of dough onto a prepared baking sheet, leaving 2 inches of space between each cookie. Bake for 12-14 minutes or until lightly golden brown.