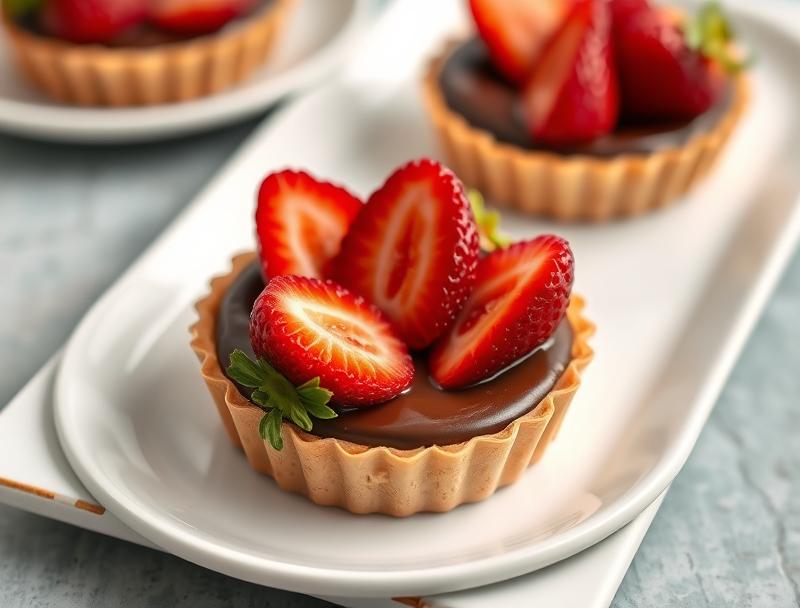
Easy Chocolate Strawberry Tarts with Homemade Tart Shells
Introduction
Indulge in the simplicity and elegance of Easy Chocolate Strawberry Tarts with Homemade Tart Shells, a dessert that perfectly balances flavor, creativity, and ease of preparation. Using everyday ingredients, these tarts are a masterpiece of textures and tastes, combining the crunch of homemade tart shells, the richness of chocolate, and the sweetness of fresh strawberries. Whether you’re a seasoned baker or a beginner in the kitchen, this recipe is designed to impress with minimal effort, making it perfect for special occasions or everyday treats.
Why This Works
- Flavor balance and ingredient accessibility: The combination of chocolate and strawberries is a classic, and using readily available ingredients makes this dessert accessible to everyone.
- Ease of preparation: Despite involving homemade tart shells, the process is surprisingly straightforward and requires minimal specialized equipment.
- Impressive results with minimal effort: The end result looks and tastes like it came from a professional bakery, making it an ideal choice for entertaining or gift-giving.
Ingredients
- 2 cups all-purpose flour
- 1/2 cup confectioners’ sugar
- 1/4 teaspoon salt
- 1/2 cup unsalted butter, chilled and cut into small pieces
- 1/4 cup ice water
- 1 cup semisweet chocolate chips
- 2 cups sliced strawberries
- 1 tablespoon granulated sugar
- 1 tablespoon honey
- Whipped cream or vanilla ice cream for serving (optional)
Instructions
- Step 1: Make the Tart Dough – In a large bowl, combine flour, confectioners’ sugar, and salt. Add the cold butter and use a pastry blender or your fingers to work it into the flour until the mixture resembles coarse crumbs. Gradually add the ice water, stirring with a fork until the dough comes together in a ball. Wrap in plastic and refrigerate for at least 30 minutes.
- Step 2: Roll Out the Dough and Cut Out Shells – On a lightly floured surface, roll out the chilled dough to about 1/8 inch thickness. Use a cookie cutter or the rim of a glass to cut out circles of dough. Gather the scraps, re-roll the dough, and cut out additional circles until all the dough is used.
- Step 3: Bake the Tart Shells – Preheat your oven to 375°F (190°C). Place the dough circles into a tart pan with a removable bottom. Press the dough into the corners and up the sides of the pan. Prick the bottom of each shell with a fork to prevent it from bubbling. Bake for 15-20 minutes, or until the edges are lightly golden. Allow the shells to cool completely in the pan.
- Step 4: Prepare the Chocolate and Strawberry Filling – Melt the chocolate chips in a double boiler or in the microwave in 30-second increments, stirring between each interval until smooth. Arrange the sliced strawberries in a pattern that suits your aesthetic. You can drizzle with a little granulated sugar and honey for extra flavor.
- Step 5: Assemble the Tarts – Once the tart shells are cool, fill each shell with a spoonful of melted chocolate, spreading it to cover the bottom. Arrange a few slices of strawberry on top of the chocolate. Serve immediately, or cover and refrigerate for up to a day before serving. Optional: top with whipped cream or a scoop of vanilla ice cream.
Handy Tips
- For a more intense chocolate flavor, use dark or bittersweet chocolate chips.
- Don’t overwork the tart dough, as this can lead to a tough crust.
- Let the tart shells cool completely before filling to prevent the chocolate from melting.
Heat Control
When baking the tart shells, keep an eye on them to ensure they don’t overcook. The ideal color is a light golden brown, and the shells should be firm to the touch. For melting chocolate, use low heat and stir frequently to avoid burning the chocolate.
Crunch Factor
The crunch in these tarts comes from the freshly baked tart shells. To maintain their crunch, it’s essential to not overbake them. If you’re serving the tarts later, you can refresh the crunch of the shells by baking them in a preheated oven at 350°F (175°C) for about 5 minutes.
Pro Kitchen Tricks
- Use high-quality chocolate for the best flavor.
- Don’t overfill the tart shells, as this can make them difficult to serve and eat.
- Experiment with different types of fruit or nuts to create unique flavor combinations.
Storage Tips
- Unfilled tart shells can be stored in an airtight container at room temperature for up to 2 days.
- Filled tarts are best served fresh but can be refrigerated for up to a day.
- Consider freezing the tart shells before baking for up to 2 months. Simply place the frozen shells on a baking sheet and bake as directed, adding a few extra minutes to the baking time.
Gift Packaging Ideas
These tarts are perfect for gifting, especially when packaged in decorative boxes or bags. Consider adding a ribbon or a gift tag with a personal message. For a more rustic look, wrap each tart individually in parchment paper and twine. You can also include a small jar of homemade jam or a bag of specialty chocolates to complement the gift.
Flavor Variations
- Different spices: Add a pinch of cinnamon or nutmeg to the tart dough for a unique twist.
- Creative toppings: Use other fruits like blueberries, raspberries, or peaches, or add a sprinkle of sea salt or chopped nuts.
- Ingredient swaps: Substitute the semisweet chocolate with white chocolate or caramel sauce for a different flavor profile.
Troubleshooting
- Texture problems: If the tart shells are too hard, they might have been overbaked. If they’re too soft, they might not have been baked long enough.
- Ingredient replacements: If you don’t have confectioners’ sugar, you can make a substitute by blending granulated sugar in a food processor until it’s powdery.
- Over/undercooking signs: Keep an eye on the tart shells while they’re baking. They should be lightly golden and firm to the touch when done.
FAQs
- Can I freeze the filled tarts? It’s not recommended, as the filling can become soggy. However, you can freeze the tart shells before baking and the chocolate filling separately for later use.
- Is this recipe gluten-free? The tart shells contain wheat flour, making them not gluten-free. Consider substituting with a gluten-free flour mix for a gluten-free version.
- Can I double the recipe? Yes, you can easily double or triple the recipe to make more tarts. Just ensure you have enough tart pans and baking sheets.
Conclusion
Easy Chocolate Strawberry Tarts with Homemade Tart Shells are a delightful dessert that combines the simplicity of everyday ingredients with the elegance of a professionally made treat. With these easy steps and handy tips, you’re well on your way to creating a dessert that will impress your family and friends. Don’t be afraid to experiment and make this recipe your own, and enjoy the process of baking something truly special.
Easy Chocolate Strawberry Tarts with Homemade Tart Shells
A simple yet elegant dessert featuring homemade tart shells filled with rich chocolate and fresh strawberries.
🥘 Ingredients
👩🍳 Instructions
-
1Make the tart dough by combining flour, confectioners' sugar, and salt, then adding cold butter and ice water.
-
2Roll out the dough and cut out circles to fit into tart pans.
-
3Bake the tart shells until lightly golden, then allow them to cool.
-
4Melt the chocolate and prepare the strawberry filling.
-
5Assemble the tarts by filling the cooled shells with chocolate and topping with strawberries.