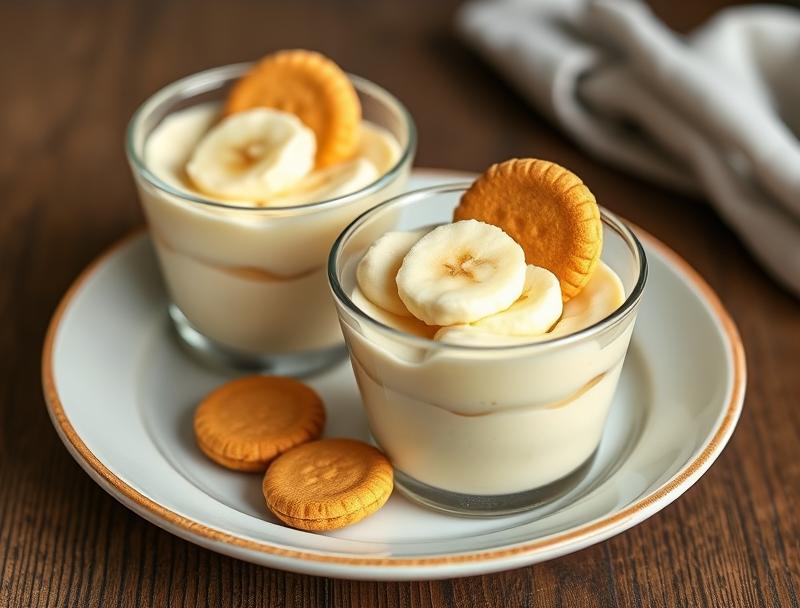
Creamy Banana Pudding Cups with Vanilla Wafers
Introduction
Creamy Banana Pudding Cups with Vanilla Wafers are a classic dessert that combines the simplicity of everyday ingredients with the elegance of a perfectly layered treat. This recipe is all about ease, flavor, and creativity, making it perfect for both beginners and seasoned bakers. The best part? It’s incredibly easy to make and requires minimal effort, yet the results are nothing short of impressive. With the sweetness of bananas, the crunch of vanilla wafers, and the creaminess of pudding, this dessert is sure to become a favorite among family and friends.
Why This Works
- The balance of flavors, with the natural sweetness of bananas, the subtle taste of vanilla, and the richness of cream, creates a harmonious and indulgent dessert experience.
- The accessibility of the ingredients, most of which are likely already in your pantry, makes this recipe convenient and budget-friendly.
- The ease of preparation, requiring no advanced cooking techniques, ensures that anyone can make these pudding cups, regardless of their culinary skill level.
Ingredients
- 4 large ripe bananas, sliced
- 1 package of vanilla pudding mix
- 1 1/2 cups of milk
- 1/4 cup of heavy cream
- 1 tablespoon of unsalted butter, melted
- 1 teaspoon of vanilla extract
- 1 cup of vanilla wafers, crushed
- Whipped cream, for topping (optional)
- Additional sliced bananas, for garnish (optional)
Instructions
- Step 1: Prepare the Pudding – In a large bowl, combine the vanilla pudding mix, milk, and heavy cream. Whisk until the pudding mix is fully dissolved and the mixture is smooth.
- Step 2: Add Flavor and Texture – Stir in the melted butter and vanilla extract until well combined.
- Step 3: Assemble the Pudding Cups – In small individual serving cups, create a layer of crushed vanilla wafers. You can use about 1-2 tablespoons of crushed wafers per cup, depending on the size of your cups.
- Step 4: Add the Banana Slices and Pudding – On top of the vanilla wafer layer, add a few slices of banana, followed by a spoonful of the pudding mixture. Repeat this layering process one more time, ending with a layer of pudding on top.
- Step 5: Chill and Serve – Refrigerate the pudding cups for at least 30 minutes to allow the flavors to meld and the pudding to set. Just before serving, you can top each cup with whipped cream and an additional slice of banana, if desired.
Handy Tips
- For an extra crunchy vanilla wafer layer, you can bake the crushed wafers in a preheated oven at 350°F (180°C) for about 5 minutes, or until lightly toasted. Keep an eye on them to prevent burning.
- If you prefer a lighter pudding, you can reduce the amount of heavy cream or substitute it with more milk.
- Experiment with different types of cookies or wafers for the crust, such as chocolate sandwich cookies for a chocolate-banana pudding variation.
Heat Control
This recipe does not require any cooking over heat, as it uses instant pudding mix. However, if you choose to toast your vanilla wafers in the oven for extra crunch, make sure to keep an eye on them and remove them as soon as they are lightly toasted to prevent burning.
Crunch Factor
The crunch in this dessert comes from the vanilla wafers. To achieve the perfect crunch, make sure not to overprocess the wafers when crushing them. You want to retain some texture. If you choose to toast them, a light hand is best to avoid making them too crispy or burnt.
Pro Kitchen Tricks
- To prevent the bananas from browning, you can sprinkle them with a little lemon juice after slicing.
- For a more intense vanilla flavor, use high-quality vanilla extract or add a few seeds from a vanilla bean to the pudding mixture.
- Consider making the pudding and preparing the vanilla wafer crust ahead of time, then assemble the cups just before chilling. This can save time and make the process less rushed.
Storage Tips
- These pudding cups are best served fresh, but they can be refrigerated for up to 24 hours before serving.
- If you need to store them for a longer period, consider preparing the components separately (pudding, vanilla wafer crust, sliced bananas) and assembling them just before serving.
- Do not freeze, as the texture of the pudding and the freshness of the bananas will be compromised.
Gift Packaging Ideas
These creamy banana pudding cups make wonderful gifts, especially for potlucks, picnics, or as a dessert to bring to a friend’s house. Consider packaging them in decorative cups or jars, topped with a dollop of whipped cream and a sprinkle of nutmeg or cinnamon. You can also add a few extra vanilla wafers on the side for a fun snack. Wrap the cups in a decorative bag or box and add a ribbon for a personal touch.
Flavor Variations
- Chocolate Banana Pudding: Add cocoa powder to the pudding mixture or use chocolate pudding mix for a chocolate twist. You can also use chocolate sandwich cookies for the crust.
- Nutty Banana Pudding: Sprinkle some chopped nuts (walnuts, pecans, or hazelnuts) over the vanilla wafer layer or mix them into the pudding for added texture and flavor.
- Fruit Layered Pudding: Experiment with layering different fruits like strawberries, blueberries, or raspberries with the bananas for a fruit salad twist.
Troubleshooting
- Too Thin Pudding: If your pudding turns out too thin, you can refrigerate it for a bit to allow it to set. If it’s still too thin, you can mix in a little more pudding mix (following the package instructions for mixing) or add some cornstarch mixed with a small amount of cold milk to thicken.
- Soggy Vanilla Wafers: To prevent soggy wafers, make sure not to overload the cups with too much pudding or to press down on the wafers, which can cause them to become soggy faster.
- Browning Bananas: If your bananas start to brown, sprinkle them with lemon juice to slow down the browning process.
FAQs
- Can I freeze the pudding cups? It’s not recommended to freeze the assembled pudding cups, as the texture and freshness will be compromised. However, you can prepare the components (pudding, vanilla wafer crust, sliced bananas) ahead of time and store them separately in the refrigerator until assembly.
- Is this recipe gluten-free? Depending on the brand of vanilla wafers and pudding mix you use, this recipe may or may not be gluten-free. Always check the ingredient labels to ensure that the products you choose are gluten-free if that’s a dietary requirement.
- Can I double the recipe? Yes, you can easily double or triple this recipe to serve a larger crowd. Just keep in mind that you’ll need more cups and possibly a larger bowl to mix the pudding.
Conclusion
Creamy Banana Pudding Cups with Vanilla Wafers are a delightful dessert that’s perfect for any occasion. With their creamy texture, sweet flavor, and crunchy vanilla wafer crust, they’re sure to be a hit. Whether you’re looking for a quick dessert to whip up for a family dinner or a special treat to bring to a gathering, this recipe is versatile and easy to adapt. So go ahead, get creative, and enjoy the simplicity and elegance of these pudding cups!
Creamy Banana Pudding Cups with Vanilla Wafers
A classic dessert combining the simplicity of everyday ingredients with elegance, featuring creamy pudding, sweet bananas, and crunchy vanilla wafers.
🥘 Ingredients
👩🍳 Instructions
-
1Prepare the pudding by whisking together the vanilla pudding mix, milk, and heavy cream in a large bowl until smooth.
-
2Add the melted butter and vanilla extract to the pudding mixture and stir until well combined.
-
3Assemble the pudding cups by layering crushed vanilla wafers, sliced bananas, and the pudding mixture in small individual serving cups.
-
4Refrigerate the pudding cups for at least 30 minutes to allow the flavors to meld and the pudding to set.
-
5Just before serving, top each cup with whipped cream and an additional slice of banana, if desired.