Irresistible Homemade Peanut Butter Cups
Introduction
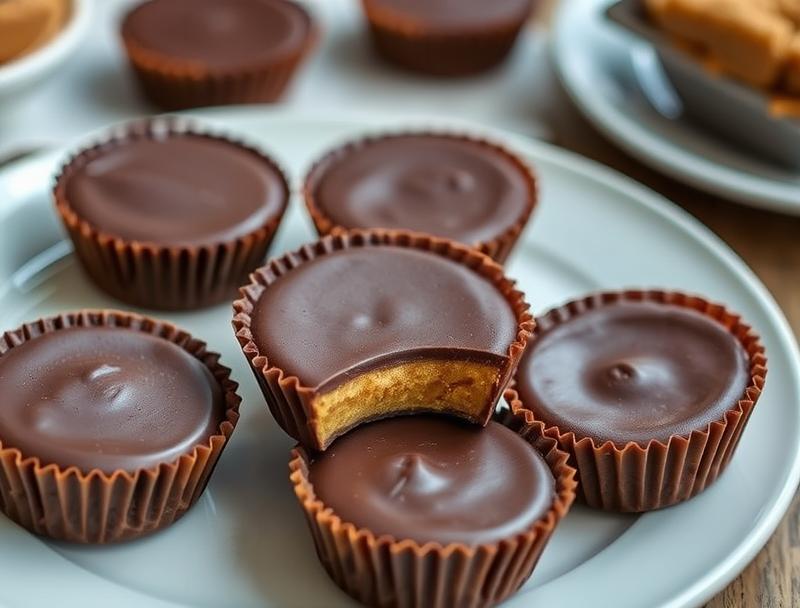
Indulge in the creamy, dreamy delight of homemade peanut butter cups, where the simplicity of everyday ingredients transforms into a treat that’s both familiar and exciting. With just a few basic components, you can create these bite-sized wonders that are perfect for satisfying your sweet tooth, impressing friends, or making special occasions even more memorable. The best part? It’s incredibly easy to make, requiring minimal effort for a dessert that tastes like it was plucked straight from a gourmet candy store. Whether you’re a peanut butter aficionado or just looking for a fun project to enjoy with the family, these homemade peanut butter cups are sure to become a new favorite.
Why This Works
- Flavor balance and ingredient accessibility: The combination of peanut butter, chocolate, and powdered sugar creates a perfectly balanced flavor profile that is both rich and approachable. The ingredients are also readily available in most grocery stores, making it easy to whip up a batch at any time.
- Ease of preparation: One of the most appealing aspects of this recipe is its simplicity. With just a few steps, you can go from raw ingredients to finished peanut butter cups, making it a great option for those who are new to cooking or short on time.
- Impressive results with minimal effort: Despite the ease of preparation, the end result is impressive and sure to delight both kids and adults. The presentation is elegant, and the taste is decadent, making these homemade peanut butter cups perfect for gift-giving or special occasions.
Ingredients
- 1 cup creamy peanut butter
- 1/2 cup powdered sugar
- 1/4 teaspoon salt
- 1 tablespoon shortening (like Crisco), softened
- 1 cup milk chocolate chips or chopped milk chocolate
- 1 tablespoon shortening (like Crisco) for the chocolate
- Optional: chopped peanuts or sea salt for topping
Instructions
- Step 1: In a medium-sized bowl, combine the peanut butter, powdered sugar, and salt. Mix until smooth and creamy, using a hand mixer or a wooden spoon. The mixture should be well combined and free of lumps.
- Step 2: Add the softened shortening to the peanut butter mixture and mix until fully incorporated. This will help the peanut butter mixture to hold its shape when formed into cups.
- Step 3: Cover the bowl with plastic wrap and refrigerate the peanut butter mixture for at least 30 minutes to allow it to firm up. This step is crucial for making it easier to shape the mixture into cups.
- Step 4: Once the peanut butter mixture is firm, use a small cookie scoop or your hands to shape it into small balls, about 1 inch in diameter. You should end up with around 20-25 balls, depending on the size.
- Step 5: Flatten each ball slightly into a disk shape to form the peanut butter cups. Place the disks onto a baking sheet lined with parchment paper.
- Step 6: Melt the chocolate chips in a double boiler or in a microwave-safe bowl in 30-second increments, stirring between each interval until smooth. Add the tablespoon of shortening to the melted chocolate and stir to combine.
- Step 7: Dip each peanut butter disk into the melted chocolate, using a fork to fully coat the peanut butter cup. Tap off any excess chocolate by gently tapping the fork against the side of the bowl.
- Step 8: Place the chocolate-covered peanut butter cups back onto the parchment-lined baking sheet. If desired, sprinkle with chopped peanuts or sea salt before the chocolate hardens.
- Step 9: Refrigerate the peanut butter cups for at least 30 minutes to allow the chocolate to set. Once set, they are ready to serve and enjoy.
Handy Tips
- For easier handling, make sure the peanut butter mixture is well chilled before shaping into cups.
- Use high-quality chocolate for the best flavor.
- Experiment with different types of chocolate (dark, white, etc.) for unique flavor profiles.
- Consider using a candy mold to create perfectly shaped peanut butter cups.
Heat Control
When melting the chocolate, it’s essential to avoid overheating, which can cause the chocolate to seize up and become grainy. Using a double boiler or heating in short increments in the microwave, stirring between each interval, helps maintain a smooth, melted chocolate.
Crunch Factor
The crunch factor in these peanut butter cups comes from the peanuts if you choose to top them with chopped nuts. For an added crunch, you can also sprinkle a pinch of sea salt on top of the chocolate before it sets. This contrast in texture adds to the overall appeal of the dessert.
Pro Kitchen Tricks
- Tempering the chocolate can give the peanut butter cups a professional finish. To temper chocolate, melt it to around 105°F to 115°F (40°C to 46°C), then cool it down to around 82°F to 90°F (28°C to 32°C) before using.
- Using a thermometer when melting chocolate can help achieve the perfect temperature for a smooth, glossy finish.
- For a fun twist, add a teaspoon of flavor extract (like vanilla or hazelnut) to the peanut butter mixture for an extra layer of flavor.
Storage Tips
- Store the peanut butter cups in an airtight container in the refrigerator for up to 5 days.
- For longer storage, consider freezing the peanut butter cups. Place them in a single layer in a freezer-safe bag or container and store in the freezer for up to 3 months. Allow them to come to room temperature before serving.
- When storing, keep the peanut butter cups away from strong-smelling foods, as they can absorb odors easily.
Gift Packaging Ideas
These homemade peanut butter cups make wonderful gifts, especially when packaged in decorative jars, bags, or boxes. Consider adding a personal touch with ribbons, gift tags, or a handwritten note. For a more rustic look, place the peanut butter cups in small paper bags and tie the top with twine. You can also arrange them in a gift box lined with parchment paper or a decorative insert for a more elegant presentation.
Flavor Variations
- Different spices: Add a pinch of cinnamon, nutmeg, or cayenne pepper to the peanut butter mixture for a unique twist.
- Creative toppings: Besides chopped peanuts and sea salt, consider using sprinkles, shredded coconut, or even crushed candy pieces for a fun topping.
- Ingredient swaps: For a nut-free version, you can substitute the peanut butter with sunflower seed butter or another nut butter alternative.
Troubleshooting
- Texture problems: If the peanut butter mixture is too sticky, refrigerate it for a few minutes to firm up. If it’s too dry, you can add a small amount of shortening to help bind it together.
- Ingredient replacements: Always choose replacements that have a similar consistency and flavor profile to the original ingredient to ensure the best results.
- Over/undercooking signs: Since these peanut butter cups don’t require baking, the main concern is the chocolate. If the chocolate is overheated, it can become too thin and difficult to work with. Conversely, if it’s not heated enough, it won’t coat the peanut butter cups smoothly.
FAQs
- Can I freeze it? Yes, you can freeze the peanut butter cups for up to 3 months. Simply thaw at room temperature when you’re ready to serve.
- Is it gluten-free? Yes, this recipe is gluten-free, making it a great option for those with gluten intolerance or sensitivity.
- Can I double the recipe? Absolutely! Simply double all the ingredients and follow the same instructions. Keep in mind that you may need to work in batches when dipping the peanut butter cups in chocolate to avoid overcrowding.
Conclusion
Making irresistible homemade peanut butter cups is a fun and rewarding process that yields delicious results with minimal effort. Whether you’re a seasoned baker or a beginner in the kitchen, this recipe is perfect for anyone looking to create something special. Don’t be afraid to experiment with different flavors and toppings to make the recipe your own, and enjoy the process of sharing your creations with loved ones. With these simple steps and handy tips, you’re well on your way to becoming a peanut butter cup aficionado, capable of whipping up these tasty treats anytime the craving strikes.
Irresistible Homemade Peanut Butter Cups
A simple recipe for homemade peanut butter cups using everyday ingredients, perfect for satisfying your sweet tooth or as a gift for special occasions.
🥘 Ingredients
👩🍳 Instructions
-
1Combine peanut butter, powdered sugar, and salt in a bowl and mix until smooth.
-
2Add softened shortening to the peanut butter mixture and mix until fully incorporated.
-
3Refrigerate the peanut butter mixture for at least 30 minutes to firm up.
-
4Shape the firm peanut butter mixture into small balls and then flatten slightly into disks.
-
5Melt the chocolate chips and dip each peanut butter disk into the melted chocolate to coat.
-
6Place the chocolate-covered peanut butter cups on a parchment-lined baking sheet and refrigerate until the chocolate is set.