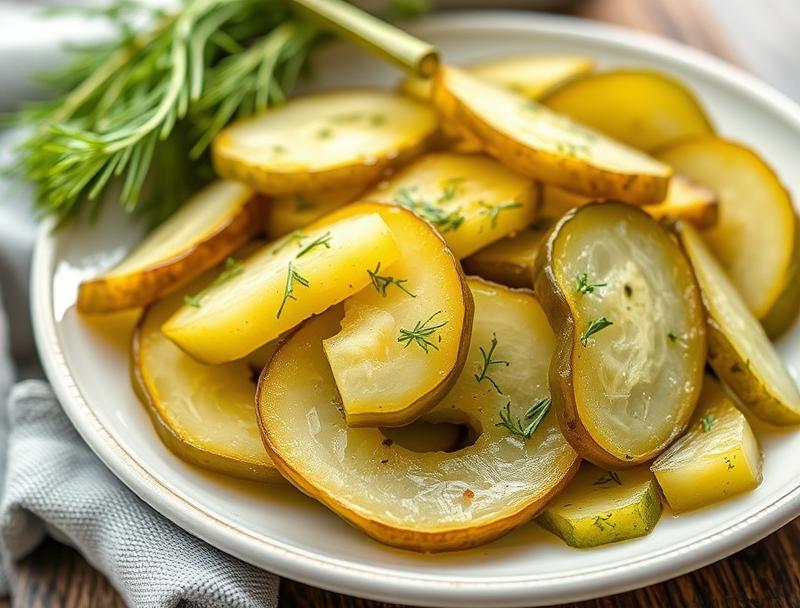
Homemade Dill Pickles – Crisp, Tangy and Flavor-Packed
Introduction
Making homemade dill pickles is a delightful journey that combines the simplicity of everyday ingredients with the excitement of creating something truly special. The process is not only easy but also incredibly rewarding, as you watch cucumbers transform into crisp, tangy, and flavor-packed treats that elevate any meal or snack. The beauty of homemade pickles lies in their customization; you can play with the level of sourness, the intensity of the dill flavor, and even experiment with additional spices or seasonings to create a unique taste that reflects your personality. Whether you’re a seasoned cook or just starting out, the world of homemade pickles is a creative outlet that promises impressive results with minimal effort.
Why This Works
- Flavor balance and ingredient accessibility: The combination of vinegar, salt, and fresh dill creates a perfect harmony of flavors, and these ingredients are readily available in most supermarkets.
- Ease of preparation: The process of making homemade dill pickles is straightforward and requires minimal cooking skills, making it accessible to everyone.
- Impressive results with minimal effort: Despite the simplicity of the recipe, the end product is remarkably delicious and visually appealing, perfect for impressing friends and family or simply enjoying as a healthy snack.
Ingredients
- 4 cups of thinly sliced cucumbers
- 1/4 cup of kosher salt
- 1/4 cup of granulated sugar
- 1/2 cup of white vinegar
- 1/4 cup of water
- 2 tbsp of fresh dill weed
- 1 tsp of whole black peppercorns
- 1/4 tsp of red pepper flakes (optional, for some heat)
- 1/4 tsp of pickling spice (optional)
- Fresh dill sprigs for garnish
Instructions
- Step 1: Begin by preparing the cucumbers. Slice them thinly and evenly, and place them in a large bowl. Sprinkle the kosher salt over the cucumbers and let them sit for about 30 minutes to draw out excess water. After 30 minutes, rinse the cucumbers thoroughly with cold water to remove the salt, and set them aside.
- Step 2: In a large saucepan, combine the sugar, vinegar, water, fresh dill weed, black peppercorns, red pepper flakes (if using), and pickling spice (if using). Bring the mixture to a boil over medium-high heat, stirring occasionally, until the sugar has dissolved. Reduce the heat to medium-low and simmer for about 10 minutes, allowing the flavors to meld together.
- Step 3: Pack the cucumber slices into a clean glass jar or container, leaving about 1/2 inch of space at the top. Pour the hot pickling liquid over the cucumbers, making sure that all of the cucumbers are covered. If necessary, add a bit more water or vinegar to achieve the right level.
- Step 4: Seal the jar and let it cool to room temperature. Once cooled, store the pickles in the refrigerator. The pickles will be ready to eat within a few hours and will keep in the fridge for several weeks. Before serving, garnish with fresh dill sprigs for an added touch of freshness and flavor.
Handy Tips
- For an extra crisp pickle, try adding a few slices of fresh bell pepper or a handful of ice cubes to the jar before sealing. The bell pepper will add a bit of sweetness, and the ice will help keep the pickles cool and crunchy.
- Experiment with different types of vinegar, such as apple cider vinegar or white wine vinegar, to change the flavor profile of your pickles.
- Always use fresh and high-quality ingredients, especially the dill, as it will significantly impact the flavor of your pickles.
Heat Control
When preparing the pickling liquid, it’s essential to monitor the heat to avoid burning the sugar or causing the vinegar to evaporate too quickly. Keep the saucepan over medium-high heat until the mixture boils, then reduce the heat to medium-low to simmer. This gentle heat will help extract the flavors from the spices and herbs without causing them to become bitter or overpowering.
Crunch Factor
The crunch factor in homemade dill pickles is largely dependent on the freshness of the cucumbers and the salting process before pickling. By drawing out excess water from the cucumbers with salt, you help them retain their crunchiness even after being submerged in the pickling liquid. Additionally, storing the pickles in the refrigerator will help maintain their texture, keeping them crisp and fresh for a longer period.
Pro Kitchen Tricks
- Use a mandoline to slice the cucumbers thinly and evenly, which will not only make them look more appealing but also help them pickle more consistently.
- For a quicker pickling process, you can use a water bath canner to heat the pickles to a high temperature, which will reduce the waiting time for them to be ready. However, this method requires proper canning techniques to ensure the pickles are safely sterilized and sealed.
- Keep the pickling liquid simmering while you pack the cucumbers into the jar to ensure that the liquid is still hot when poured over the cucumbers, which helps in achieving a better flavor penetration.
Storage Tips
- Store the pickles in a clean, glass jar with a tight-fitting lid in the refrigerator. This will keep them fresh for several weeks.
- Before storing, make sure the pickles have cooled to room temperature to prevent condensation from forming inside the jar, which can lead to spoilage.
- For longer storage, consider canning the pickles using a water bath canner. This method allows you to store the pickles at room temperature for up to a year, but it requires careful attention to canning procedures to ensure safety.
Gift Packaging Ideas
Homemade dill pickles make a wonderful gift, especially when packaged with thought and care. Consider filling decorative glass jars with the pickles and topping them with a fresh sprig of dill. You can then wrap the jar in a tea towel or place it in a gift basket filled with other homemade treats, such as jams, bread, or crackers. A handwritten note with the recipe and storage instructions adds a personal touch, making the gift even more special.
Flavor Variations
- Different spices: Try adding a pinch of cumin, coriander, or mustard seeds to give your pickles a unique flavor profile.
- Creative toppings: In addition to fresh dill, consider using other herbs like parsley, basil, or tarragon to garnish your pickles.
- Ingredient swaps: For a sweeter pickle, you can reduce the amount of vinegar and add a bit more sugar. For a spicier version, increase the amount of red pepper flakes or add sliced jalapeños to the pickling liquid.
Troubleshooting
- Texture problems: If your pickles turn out too soft, it might be due to insufficient salting before pickling or storing them at too warm a temperature. Conversely, if they are too crunchy, they might have been over-salted or not soaked long enough in the pickling liquid.
- Ingredient replacements: If you can’t find fresh dill, you can substitute it with dried dill weed, though the flavor will be less vibrant. For vinegar, you can experiment with different types, but keep in mind that the flavor will change accordingly.
- Over/undercooking signs: Since these pickles are made without actual cooking, the concern is more about the texture and flavor development. Always taste the pickles after they have chilled and adjust the seasoning if necessary. If they are too sour, you can try diluting the pickling liquid with a bit of water.
FAQs
- Can I freeze it? While you can freeze pickles, it’s not recommended as freezing can cause the pickles to become soft and lose their crunch. However, if you must freeze them, make sure they are in an airtight container or freezer bag, and they will keep for several months.
- Is it gluten-free? Yes, this recipe for homemade dill pickles is gluten-free, making it a great option for those with gluten intolerance or sensitivity.
- Can I double the recipe? Absolutely, you can easily double or triple this recipe if you’re planning to make a large batch of pickles. Just ensure that you have enough jars and storage space for the pickles once they’re made.
Conclusion
Making homemade dill pickles is a fun and rewarding experience that allows you to create delicious, crunchy, and flavorful snacks with minimal effort. With the flexibility to adjust spices and seasonings, you can tailor the recipe to your taste preferences, making it a versatile addition to your culinary repertoire. Whether you’re a fan of traditional dill pickles or want to experiment with unique flavor combinations, this recipe provides a solid foundation. So, don’t hesitate to give it a try, and enjoy the process of watching your pickles transform from simple cucumbers into a tangy, delicious treat that’s sure to please everyone who tries them.
Homemade Dill Pickles – Crisp, Tangy and Flavor-Packed
A simple and delicious recipe for homemade dill pickles that are crisp, tangy, and full of flavor, perfect for snacking or as a side dish.
🥘 Ingredients
👩🍳 Instructions
-
1Prepare the cucumbers by slicing them thinly and evenly, then salting them to draw out excess water.
-
2Combine the sugar, vinegar, water, fresh dill weed, black peppercorns, red pepper flakes (if using), and pickling spice (if using) in a saucepan and bring to a boil.
-
3Pack the cucumber slices into a clean glass jar and pour the hot pickling liquid over them.
-
4Seal the jar and let it cool to room temperature before storing it in the refrigerator.