Crispy Asian Glazed Chicken Fingers for Easy Dinner
Introduction
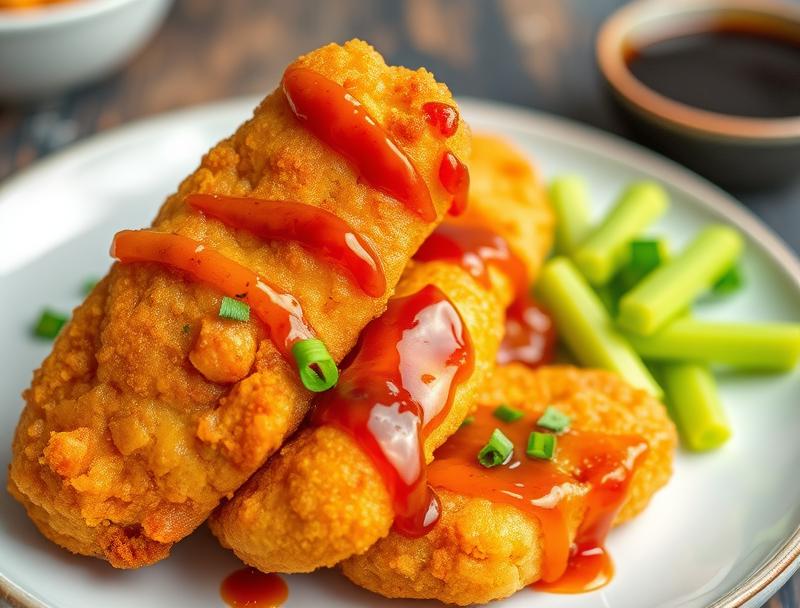
Are you looking for a quick, delicious, and impressive dinner idea that can be prepared with everyday ingredients? Look no further than these Crispy Asian Glazed Chicken Fingers, a perfect blend of Asian-inspired flavors and the comfort of crispy fried chicken. This recipe is not only easy to follow, but it also offers a creative twist on traditional chicken fingers, making it an excellent choice for both family dinners and special occasions. With the combination of soy sauce, honey, ginger, and garlic, these chicken fingers are packed with flavor, and the best part is that they can be ready in under 30 minutes.
Why This Works
- Flavor balance and ingredient accessibility: The Asian glaze made from honey, soy sauce, lemon juice, ginger, and garlic provides a perfect balance of sweet, savory, and spicy flavors, using ingredients that are easily found in most supermarkets.
- Ease of preparation: The recipe involves simple steps of marinating, coating, and frying, making it accessible to cooks of all skill levels.
- Impressive results with minimal effort: Despite the simplicity of the preparation, the end result is impressive, with crispy exterior and juicy interior, glazed with a rich Asian-inspired sauce.
Ingredients
- 1 pound boneless, skinless chicken breasts, cut into finger-shaped strips
- 1/2 cup all-purpose flour
- 1 teaspoon paprika
- 1/2 teaspoon garlic powder
- 1/2 teaspoon salt
- 1/4 teaspoon black pepper
- 1 cup panko breadcrumbs
- 2 tablespoons olive oil
- 1/4 cup honey
- 2 tablespoons soy sauce
- 1 tablespoon rice vinegar
- 1 teaspoon grated fresh ginger
- 1 clove garlic, minced
- Sesame seeds and chopped scallions, for garnish (optional)
Instructions
- Step 1: Preparation – In a shallow dish, mix together flour, paprika, garlic powder, salt, and pepper. In another dish, beat the eggs. In a third dish, place the panko breadcrumbs. Prepare the Asian glaze by whisking together honey, soy sauce, rice vinegar, ginger, and garlic in a small bowl.
- Step 2: Coating the Chicken – Dip each chicken strip into the flour mixture, coating lightly, then into the eggs, making sure they are fully coated, and finally into the panko breadcrumbs, pressing the crumbs gently onto the chicken to help them stick.
- Step 3: Frying the Chicken – Heat about 1/2 inch of olive oil in a large skillet over medium-high heat. When the oil is hot, add a few of the coated chicken strips (do not overcrowd) and fry until golden brown and cooked through, about 5-6 minutes per side. Repeat with the remaining chicken strips.
- Step 4: Glazing and Serving – Once the chicken fingers are fried, place them on a paper towel-lined plate to drain any excess oil. Then, brush the Asian glaze over the chicken fingers. Serve hot, garnished with sesame seeds and chopped scallions if desired.
Handy Tips
- For an extra crispy coating, you can chill the coated chicken strips in the refrigerator for 30 minutes before frying.
- Do not overcrowd the skillet when frying to ensure that the chicken cooks evenly and the coating does not come off.
- Adjust the amount of ginger and garlic in the glaze according to your taste preferences.
Heat Control
The ideal temperature for frying the chicken fingers is between 350°F and 375°F. It’s crucial to not overheat the oil, as it can lead to burnt exteriors before the chicken is fully cooked. The chicken is done when it reaches an internal temperature of 165°F. Always use a thermometer to ensure the oil has reached the correct temperature before frying.
Crunch Factor
To achieve the perfect crunch on your chicken fingers, it’s essential to not skip the step of coating them with panko breadcrumbs. Panko breadcrumbs are lighter and crisper than regular breadcrumbs, providing a superior crunch. Additionally, frying at the right temperature and not overcrowding the skillet will help maintain the crunchiness of the coating.
Pro Kitchen Tricks
- For easier cleanup, line your work surface with parchment paper before starting to coat the chicken.
- Use a cooling rack over a baking sheet to cool the fried chicken fingers, which helps keep them crispy by allowing air to circulate under them.
- Prepare the glaze ahead of time and store it in the refrigerator for up to a day to save time during cooking.
Storage Tips
- Leftover chicken fingers can be stored in an airtight container in the refrigerator for up to 2 days.
- To reheat, place the chicken fingers on a baking sheet lined with parchment paper and bake in a preheated oven at 400°F for about 10-12 minutes, or until heated through.
- It’s best to consume the chicken fingers fresh for the best texture and flavor.
Gift Packaging Ideas
While chicken fingers are typically considered a meal rather than a gift, if you’re looking to package them as part of a gift basket or care package, consider placing them in airtight, microwave-safe containers and including a side of your favorite dipping sauce. You could also include a recipe card with instructions on how to reheat them.
Flavor Variations
- Different spices: Experiment with adding cayenne pepper for a spicy kick or smoked paprika for a smoky flavor to the flour mixture.
- Creative toppings: Offer a variety of toppings such as diced scallions, toasted sesame seeds, grated carrots, or pickled ginger to add texture and flavor.
- Ingredient swaps: Replace chicken with tofu or tempeh for a vegetarian or vegan version, adjusting the cooking time as necessary.
Troubleshooting
- Texture problems: If the coating comes off during frying, it might be due to insufficient egg coating or overcrowding the skillet. Adjust your technique accordingly.
- Ingredient replacements: If you don’t have panko breadcrumbs, you can use regular breadcrumbs, though the crunch might not be as pronounced.
- Over/undercooking signs: Chicken that is undercooked will not reach the safe internal temperature of 165°F. Overcooked chicken will be dry and tough. Adjust your cooking time based on the thickness of your chicken strips and the heat of your oil.
FAQs
- Can I freeze it? – Yes, you can freeze the coated but unfried chicken strips on a baking sheet, then transfer them to a freezer-safe bag or container for up to 2 months. Fry them frozen, adjusting the cooking time as needed.
- Is it gluten-free? – The recipe can be adapted to be gluten-free by using gluten-free flour and ensuring the soy sauce and other ingredients are gluten-free.
- Can I double the recipe? – Yes, you can easily double or triple the recipe, just be sure to fry the chicken in batches to avoid overcrowding the skillet.
Conclusion
Crispy Asian Glazed Chicken Fingers are a versatile and delicious option for an easy dinner that can be customized to suit various tastes and dietary needs. With its balance of flavors, crispy texture, and the simplicity of preparation, this recipe is sure to become a favorite. Feel free to experiment with different seasonings and glazes to make it your own, and don’t hesitate to share your creations with friends and family. Happy cooking!
Crispy Asian Glazed Chicken Fingers for Easy Dinner
A quick and delicious dinner recipe featuring crispy chicken fingers glazed with an Asian-inspired sauce made from honey, soy sauce, ginger, and garlic.
🥘 Ingredients
👩🍳 Instructions
-
1Prepare the ingredients by cutting the chicken into strips and mixing the flour, paprika, garlic powder, salt, and pepper in a dish.
-
2Coat the chicken strips with the flour mixture, then the eggs, and finally the panko breadcrumbs.
-
3Fry the coated chicken strips in hot olive oil until golden brown and cooked through.
-
4Glaze the fried chicken fingers with the Asian glaze made from honey, soy sauce, rice vinegar, ginger, and garlic.