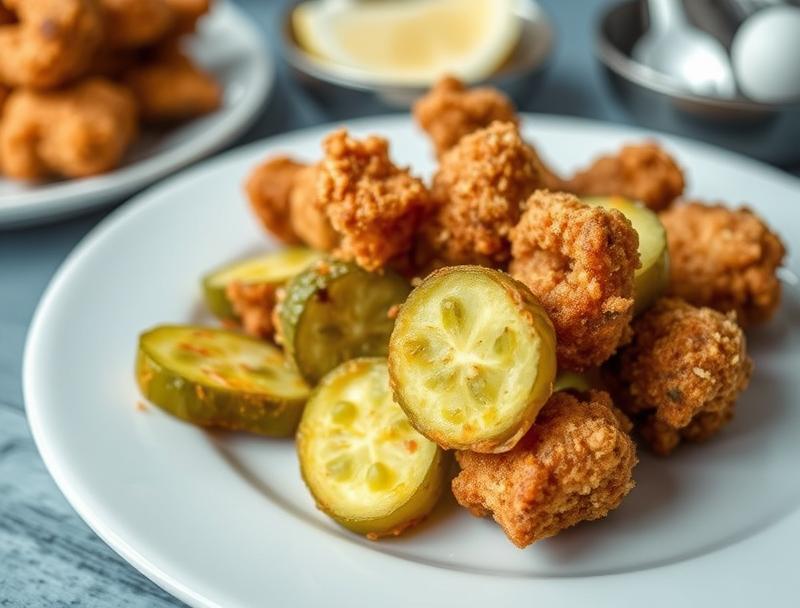
Irresistible Crispy Deep Fried Pickles
Introduction
Imagine sinking your teeth into a crispy, golden-brown delight that combines the tangy zip of a pickle with the satisfying crunch of a fried treat. Irresistible Crispy Deep Fried Pickles are not just a novelty; they’re a game-changer for any gathering, party, or simple snack craving. What makes them truly special is how they transform everyday ingredients into an extraordinary experience with minimal fuss. This recipe is all about ease, flavor, and creativity, proving that you don’t need exotic ingredients to impress. With just a few simple steps, you can turn ordinary dill pickle slices into an irresistible snack that will leave everyone wanting more.
Why This Works
- Flavor balance and ingredient accessibility: The combination of the sour pickles, the spiciness from any added seasonings, and the richness from the frying process creates a perfectly balanced flavor profile. Plus, the ingredients are easily found in most grocery stores.
- Ease of preparation: Despite the impressive outcome, the preparation is surprisingly straightforward. It involves basic steps like dredging pickle slices in flour, dipping them in a batter, and then frying until crispy.
- Impressive results with minimal effort: The transformation of simple pickle slices into a gourmet snack is quite dramatic, making this recipe perfect for surprising friends and family with your culinary skills without spending hours in the kitchen.
Ingredients
- 1 large jar of dill pickle slices
- 1 cup all-purpose flour
- 1 teaspoon paprika
- 1/2 teaspoon garlic powder
- 1/2 teaspoon onion powder
- 1/2 teaspoon salt
- 1/4 teaspoon black pepper
- 1 cup buttermilk
- Vegetable oil for frying
- Optional: Additional seasonings like cayenne pepper for extra spice
Instructions
- Step 1: Begin by preparing your pickle slices. Remove them from the jar and place them on a paper towel-lined plate to drain excess moisture. This step is crucial for helping the batter adhere evenly.
- Step 2: In a shallow dish, mix together the flour, paprika, garlic powder, onion powder, salt, and pepper. In a separate dish, pour the buttermilk. This setup will be your dredging station for the pickles.
- Step 3: Dredge each pickle slice first in the flour mixture, coating both sides evenly, then dip it in the buttermilk, making sure it’s fully coated. Finally, dredge the pickle slice in the flour mixture again. This double coating is key to achieving that perfect crunch.
- Step 4: Heat about 1/2-inch of vegetable oil in a large skillet over medium-high heat until it reaches 350°F. Fry the coated pickle slices in batches until they’re golden brown, about 2-3 minutes per side. Drain the fried pickles on paper towels.
Handy Tips
- For an extra crispy coating, you can chill the coated pickle slices in the refrigerator for 30 minutes before frying. This helps the coating set and adhere better to the pickles.
- Don’t overcrowd the skillet. Frying in batches ensures that each pickle slice has enough room to cook evenly and prevents the oil temperature from dropping too low.
- If you want to bake instead of fry, you can do so in a preheated oven at 400°F (200°C) for about 15-20 minutes, or until crispy and golden. However, frying yields the crispiest results.
Heat Control
Maintaining the right oil temperature is crucial for frying. The ideal temperature for frying pickles is between 350°F and 375°F. If the oil is too hot, the outside will burn before the inside is fully cooked. If it’s too cold, the pickles will absorb too much oil and be greasy. Use a thermometer to monitor the temperature, and adjust the heat as needed.
Crunch Factor
Achieving the perfect crunch is all about the double coating process and not overmixing the batter. The initial flour coating helps the buttermilk adhere, and the second flour coating provides the crunch. Frying at the right temperature also ensures that the outside is crispy while the inside remains tender.
Pro Kitchen Tricks
- For an added layer of flavor, you can spice up your flour mixture with additional seasonings like dried herbs, grated cheese, or a pinch of cayenne pepper.
- Keep your workspace clean and organized by having all ingredients measured and ready to go before starting. This makes the process smoother and less messy.
- Consider using a deep fryer if you have one. It makes controlling the temperature and frying process much easier and safer.
Storage Tips
- Fried pickles are best consumed immediately, but if you need to store them, place them in an airtight container in the refrigerator for up to a day. Reheat them in the oven at 350°F (175°C) for a few minutes to crisp them up again.
- Avoid storing fried pickles at room temperature for too long, as they can become soggy and unsafe to eat.
- For a make-ahead option, you can prepare the pickle slices up to the coating stage, then freeze them. When you’re ready, simply fry them frozen.
Gift Packaging Ideas
If you’re looking to share your crispy deep-fried pickles as a gift, consider packaging them in decorative jars or containers lined with paper towels to keep them crisp. You can add a ribbon around the jar and include a handwritten note with serving suggestions or your favorite dipping sauce recipe.
Flavor Variations
- Different spices: Experiment with various seasoning blends in your flour mixture, like Italian seasoning, smoked paprika, or lemon pepper, to give your pickles unique flavors.
- Creative toppings: Once fried, sprinkle your pickles with grated Parmesan cheese, chopped fresh herbs, or a drizzle of your favorite sauce for added flavor and texture.
- Ingredient swaps: While dill pickles are classic, you can also use sweet pickle slices or even pickle chips for a different twist.
Troubleshooting
- Texture problems: If your pickles turn out too greasy, it might be because the oil wasn’t hot enough. If they’re not crispy, the coating might not have adhered well, or the pickles might have been too moist.
- Ingredient replacements: If you don’t have buttermilk, you can make a substitute by mixing milk with vinegar or lemon juice and letting it sit for a few minutes.
- Over/undercooking signs: Pickles that are undercooked will be pale and soft, while overcooked ones will be dark brown and possibly bitter. Adjust your frying time based on the pickle slices’ size and the oil’s temperature.
FAQs
- Can I freeze them? Yes, you can freeze the coated pickle slices before frying. Simply place them on a baking sheet lined with parchment paper, making sure they don’t touch each other, and then transfer them to a freezer-safe bag or container. Fry them frozen when you’re ready.
- Is it gluten-free? This recipe can be adapted to be gluten-free by using gluten-free flour. Ensure that all additional ingredients, like spices and the buttermilk, are also gluten-free.
- Can I double the recipe? Absolutely. Just keep in mind that you’ll need to fry the pickles in more batches to avoid overcrowding the skillet. You might also need to adjust the frying time slightly based on the pickle slices’ size and the oil’s temperature.
Conclusion
Making Irresistible Crispy Deep Fried Pickles is a journey of discovery, from the initial preparation to the final, satisfying bite. It’s a recipe that encourages creativity and experimentation, whether you’re tweaking the seasoning blend or trying out different types of pickles. The best part? It’s incredibly accessible, requiring minimal special equipment and ingredients that are readily available. So, don’t be afraid to get creative, share your findings with friends and family, and enjoy the process of turning a simple snack into an unforgettable experience.
Irresistible Crispy Deep Fried Pickles
A crispy and flavorful snack made by deep-frying dill pickle slices in a spicy batter, perfect for parties or as a quick snack.
🥘 Ingredients
👩🍳 Instructions
-
1Prepare pickle slices by draining excess moisture.
-
2Mix flour, paprika, garlic powder, onion powder, salt, and pepper in a dish. Pour buttermilk in a separate dish.
-
3Dredge each pickle slice in the flour mixture, then in the buttermilk, and finally in the flour mixture again.
-
4Heat about 1/2-inch of vegetable oil in a large skillet over medium-high heat until it reaches 350°F. Fry the coated pickle slices in batches until golden brown, about 2-3 minutes per side.