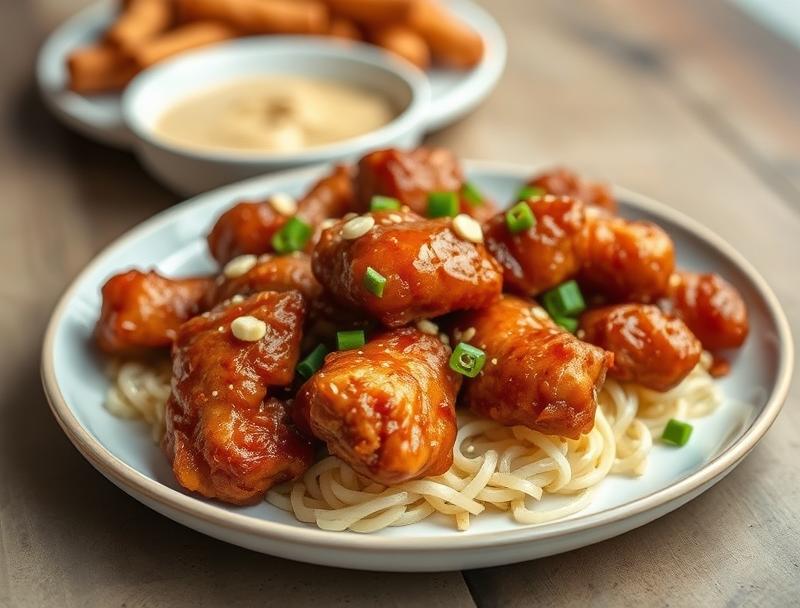
Better-Than-Takeout Easy Crispy Honey Garlic Chicken
Introduction
Imagine sinking your teeth into a succulent, crispy, and flavorful piece of chicken that rivals your favorite takeout joint, all from the comfort of your own kitchen. The Better-Than-Takeout Easy Crispy Honey Garlic Chicken recipe is a game-changer for anyone looking to elevate their meal prep or impress their family and friends with a dish that’s both easy to make and packed with flavor. Using everyday ingredients and requiring minimal effort, this recipe is a masterclass in balance and creativity, making it perfect for both beginners and seasoned cooks alike.
Why This Works
- Flavor balance and ingredient accessibility: The combination of honey, garlic, and soy sauce creates a deep, savory flavor profile that’s both familiar and exciting, using ingredients you likely already have in your pantry.
- Ease of preparation: With a simple marinade and a quick cooking process, this recipe can be ready in under 30 minutes, making it perfect for busy weeknights or last-minute dinner plans.
- Impressive results with minimal effort: The crispy exterior and juicy interior of the chicken, combined with the sticky, sweet, and savory sauce, will make you wonder how something so delicious can be so easy to make.
Ingredients
- 4 boneless, skinless chicken breasts (about 6 oz each)
- 3 tablespoons honey
- 2 tablespoons soy sauce
- 1 tablespoon fresh lemon juice
- 1 teaspoon grated fresh ginger
- 2 cloves garlic, minced
- 1 tablespoon olive oil
- Salt and pepper, to taste
- Fresh parsley or chives, chopped (for garnish)
- 1 cup all-purpose flour
- 1 teaspoon paprika
- 1/2 teaspoon garlic powder
- 1/2 teaspoon onion powder
Instructions
- Step 1: Begin by preparing your ingredients. In a large bowl, whisk together honey, soy sauce, lemon juice, ginger, and garlic to make the marinade. In a separate bowl, mix together flour, paprika, garlic powder, and onion powder. Season the chicken breasts with salt and pepper.
- Step 2: Add the chicken to the marinade, making sure each piece is fully coated. Let it marinate for at least 10 minutes, or up to 30 minutes in the refrigerator. Meanwhile, heat about 1/2 inch of olive oil in a large skillet over medium-high heat.
- Step 3: Remove the chicken from the marinade, letting any excess liquid drip off. Dredge the marinated chicken in the flour mixture, pressing gently to adhere. Place the coated chicken in the hot oil and cook until golden brown and crispy on both sides, about 5-6 minutes per side, or until the chicken reaches an internal temperature of 165°F.
- Step 4: Once the chicken is cooked, place it on a paper towel-lined plate to drain any excess oil. Serve hot, garnished with chopped parsley or chives, and enjoy with your favorite sides, such as steamed vegetables or fried rice.
Handy Tips
- For an extra crispy coating, chill the floured chicken in the refrigerator for 10 minutes before frying.
- Don’t overcrowd the skillet; cook the chicken in batches if necessary, to ensure each piece has enough room to cook evenly.
- For a lighter version, you can bake the chicken in a preheated oven at 400°F for about 20-25 minutes, or until cooked through, instead of frying.
Heat Control
Maintaining the right heat is crucial for achieving that perfect crispy exterior. Ideally, you want the oil to be between 350°F and 375°F. If you don’t have a thermometer, you can test the heat by dropping a small piece of chicken or a breadcrumb into the oil; if it sizzles and rises to the surface, the oil is ready. Be careful not to overheat the oil, as it can quickly reach the smoke point and become unusable.
Crunch Factor
The crunch factor in this recipe comes from the flour coating on the chicken, which, when fried, becomes crispy and golden. To enhance the crunch, make sure the chicken is fully coated in the flour mixture and that the oil is at the right temperature. For an extra crunchy coating, you can also try chilling the floured chicken in the refrigerator for about 10 minutes before frying.
Pro Kitchen Tricks
- To prevent the flour from becoming too dense and heavy, make sure to not overmix the flour coating, and gently press it onto the chicken to adhere.
- For less mess, place the flour mixture in a shallow dish and use one hand to coat the chicken, keeping the other hand clean to handle the chicken after coating.
- Use a thermometer to ensure the oil reaches the perfect frying temperature, and never leave frying oil unattended.
Storage Tips
- Leftover chicken can be stored in an airtight container in the refrigerator for up to 3 days. Reheat in the oven or microwave until warmed through.
- For longer storage, the cooked chicken can be frozen for up to 2 months. Simply thaw overnight in the refrigerator and reheat as desired.
- It’s best to store the chicken in a single layer to prevent moisture from accumulating and making the coating soggy.
Gift Packaging Ideas
If you’re looking to share this delicious dish with friends or family, consider packaging it in a decorative tin or a microwave-safe container with a clear lid, garnished with fresh herbs. You can also include a side of your favorite sauce or a simple green salad for a complete meal. For a more rustic touch, wrap the chicken in parchment paper or aluminum foil and tie with twine, perfect for a picnic or on-the-go meal.
Flavor Variations
- Different spices: Try adding a pinch of cayenne pepper for a spicy kick or some dried herbs like thyme or rosemary for a more aromatic flavor.
- Creative toppings: Serve the chicken with a variety of toppings such as diced onions, sliced bell peppers, or a dollop of sour cream to add texture and flavor.
- Ingredient swaps: For a gluten-free version, use gluten-free flour or cornstarch for the coating. You can also substitute the chicken with tofu or tempeh for a vegetarian option.
Troubleshooting
- Texture problems: If the coating becomes too dense, it might be due to overmixing the flour or not using the right type of flour. Try using a lighter hand when coating the chicken or switching to a different flour.
- Ingredient replacements: If you’re out of a particular ingredient, don’t be afraid to substitute. For example, you can use maple syrup instead of honey or apple cider vinegar instead of lemon juice.
- Over/undercooking signs: Make sure to check the chicken frequently while it’s cooking. If it’s undercooked, it will feel soft and squishy to the touch. If it’s overcooked, it will be dry and hard. The ideal internal temperature is 165°F.
FAQs
- Can I freeze it? Yes, you can freeze the cooked chicken for up to 2 months. Simply thaw overnight in the refrigerator and reheat as desired.
- Is it gluten-free? The recipe can be made gluten-free by substituting the all-purpose flour with gluten-free flour or cornstarch.
- Can I double the recipe? Yes, you can easily double or triple the recipe to feed a larger crowd. Just make sure to adjust the cooking time accordingly.
Conclusion
The Better-Than-Takeout Easy Crispy Honey Garlic Chicken is a versatile and delicious recipe that’s sure to become a staple in your kitchen. With its perfect balance of sweet, savory, and spicy flavors, and the satisfying crunch of the coating, this dish is perfect for any occasion. Don’t be afraid to experiment with different ingredients and flavor combinations to make the recipe your own, and enjoy the process of creating something truly special. Whether you’re a seasoned cook or just starting out, this recipe is a great way to impress your family and friends with a dish that’s both easy to make and packed with flavor.
Better-Than-Takeout Easy Crispy Honey Garlic Chicken
A simple and flavorful chicken recipe with a crispy coating and a sweet and savory honey garlic sauce, perfect for a quick and delicious meal.
🥘 Ingredients
👩🍳 Instructions
-
1Prepare the marinade by whisking together honey, soy sauce, lemon juice, ginger, and garlic in a large bowl.
-
2Add the chicken to the marinade, making sure each piece is fully coated. Let it marinate for at least 10 minutes, or up to 30 minutes in the refrigerator.
-
3Heat about 1/2 inch of olive oil in a large skillet over medium-high heat. Remove the chicken from the marinade, letting any excess liquid drip off.
-
4Dredge the marinated chicken in the flour mixture, pressing gently to adhere. Place the coated chicken in the hot oil and cook until golden brown and crispy on both sides, about 5-6 minutes per side, or until the chicken reaches an internal temperature of 165°F.
-
5Once the chicken is cooked, place it on a paper towel-lined plate to drain any excess oil. Serve hot, garnished with chopped parsley or chives.