Easy Green Velvet Cupcakes with Cream Cheese Frosting
Introduction
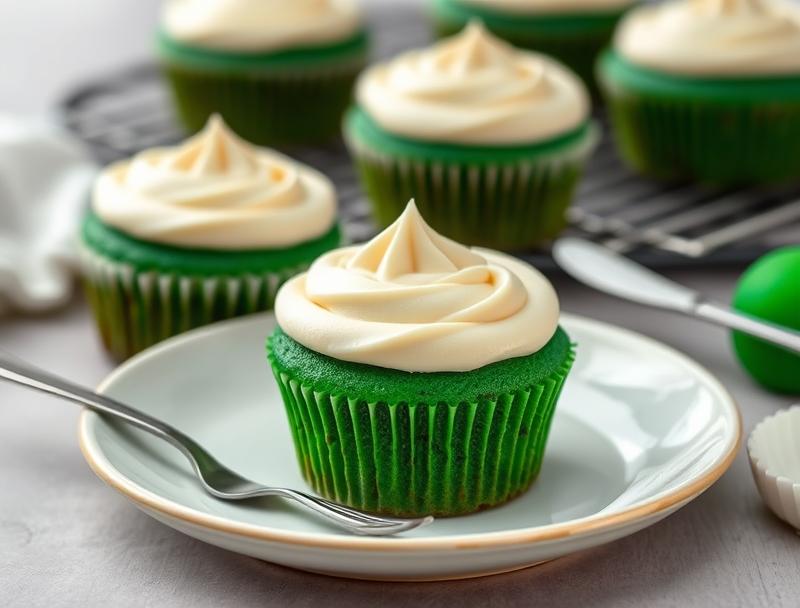
Indulge in the vibrant world of baking with our Easy Green Velvet Cupcakes, perfectly complemented by a rich Cream Cheese Frosting. This recipe is a masterclass in balance and flavor, utilizing everyday ingredients to create a culinary masterpiece that’s both visually stunning and delectable. The green velvet color adds a unique and creative twist, making these cupcakes ideal for special occasions or as a fun surprise for any day. With their ease of preparation and impressive results, these cupcakes are sure to become a favorite among bakers of all skill levels.
Why This Works
- The combination of green food coloring and cocoa powder achieves a beautiful, vibrant green velvet effect without compromising on flavor.
- The use of buttermilk ensures the cupcakes remain moist, while the cream cheese frosting adds a tangy and creamy contrast.
- The simplicity of the recipe allows for minimal effort, making it accessible to beginners, while the end result is impressive enough for experienced bakers to enjoy.
Ingredients
- 1 1/2 cups all-purpose flour
- 1 cup granulated sugar
- 2 teaspoons baking powder
- 1/2 teaspoon salt
- 1/2 cup unsalted butter, softened
- 2 large eggs
- 2 teaspoons vanilla extract
- 1 cup buttermilk
- 1 teaspoon green food coloring
- 1/4 cup cocoa powder
- For the frosting: 8 ounces cream cheese, softened
- 1/2 cup unsalted butter, softened
- 1 teaspoon vanilla extract
- 2 cups powdered sugar
Instructions
- Step 1: Preheat your oven to 350°F (180°C). Line a 12-cup muffin tin with cupcake liners.
- Step 2: In a medium bowl, whisk together the flour, sugar, baking powder, and salt. Set aside.
- Step 3: In a large bowl, using an electric mixer, beat the butter until creamy. Add the eggs one at a time, beating well after each addition. Beat in the vanilla extract.
- Step 4: With the mixer on low speed, gradually add the flour mixture to the butter mixture in three parts, alternating with the buttermilk, beginning and ending with the flour mixture. Beat just until combined.
- Step 5: Add the green food coloring and cocoa powder, mixing until the batter is evenly colored.
- Step 6: Divide the batter evenly among the cupcake liners.
- Step 7: Bake for 18-20 minutes or until a toothpick inserted in the center comes out clean. Let the cupcakes cool completely in the pan.
- Step 8: For the frosting, beat the cream cheese and butter until smooth. Add the vanilla extract and mix well. Gradually add the powdered sugar, beating until smooth and creamy.
- Step 9: Once the cupcakes are completely cool, frost each cupcake with the cream cheese frosting.
Handy Tips
- Ensure your ingredients are at room temperature for a better texture and easier mixing.
- Don’t overmix the batter, as this can lead to dense cupcakes.
- Adjust the amount of green food coloring to achieve your desired shade of green.
Heat Control
For baking the cupcakes, it’s crucial to maintain an oven temperature of 350°F (180°C). Overheating can cause the cupcakes to dry out or burn, while underheating might result in undercooked cupcakes. Use a toothpick to check for doneness; it should come out clean when inserted into the center of a cupcake.
Crunch Factor
These cupcakes are designed to be moist and tender. To maintain their texture, avoid overbaking. If you prefer a crunchier topping, you can toast some chopped nuts or sprinkles and gently press them onto the frosted cupcakes.
Pro Kitchen Tricks
- Use high-quality cocoa powder for the best flavor.
- Don’t open the oven door during the baking time, as this can cause the cupcakes to sink.
- For an extra creamy frosting, make sure the cream cheese and butter are at room temperature before mixing.
Storage Tips
- Store the cupcakes in an airtight container in the refrigerator for up to 3 days.
- Allow the cupcakes to come to room temperature before serving for the best flavor and texture.
- These cupcakes can be frozen without the frosting for up to 2 months. Thaw at room temperature or refrigerate overnight.
Gift Packaging Ideas
These cupcakes make wonderful gifts, especially for St. Patrick’s Day or spring-themed parties. Consider packaging them in green or clear cupcake boxes, adorned with ribbons or gift tags. You can also arrange them on a platter or cake stand for a beautiful presentation.
Flavor Variations
- Try adding a teaspoon of mint extract to the batter for a refreshing twist.
- Use different types of milk or yogurt to change the flavor profile of the cupcakes.
- Experiment with various toppings such as chopped nuts, sprinkles, or shaved chocolate for added texture and flavor.
Troubleshooting
- If your cupcakes turn out too dense, check if you overmixed the batter or if your leavening agents are old.
- For cupcakes that are too dry, consider if they were overbaked or if the ingredients were not at room temperature.
- If the frosting is too runny, refrigerate it for about 10 minutes to firm it up before re-beating.
FAQs
- Can I freeze the frosted cupcakes? It’s best to freeze them without the frosting, as the frosting can become too soft when thawed.
- Is this recipe gluten-free? No, this recipe contains all-purpose flour, which contains gluten. Consider substituting with a gluten-free flour mix for a gluten-free version.
- Can I double the recipe? Yes, you can double the recipe to make more cupcakes. Just ensure you have enough cupcake liners and adjust the baking time slightly if necessary.
Conclusion
With these Easy Green Velvet Cupcakes and their delicious Cream Cheese Frosting, you’re not just baking a dessert; you’re creating a memorable experience. Whether it’s for a special occasion or a cozy afternoon, these cupcakes are sure to delight. Feel free to experiment with the recipe, share your creations, and enjoy the process of baking something truly special.