Ultimate Charcuterie Board Idea
Introduction
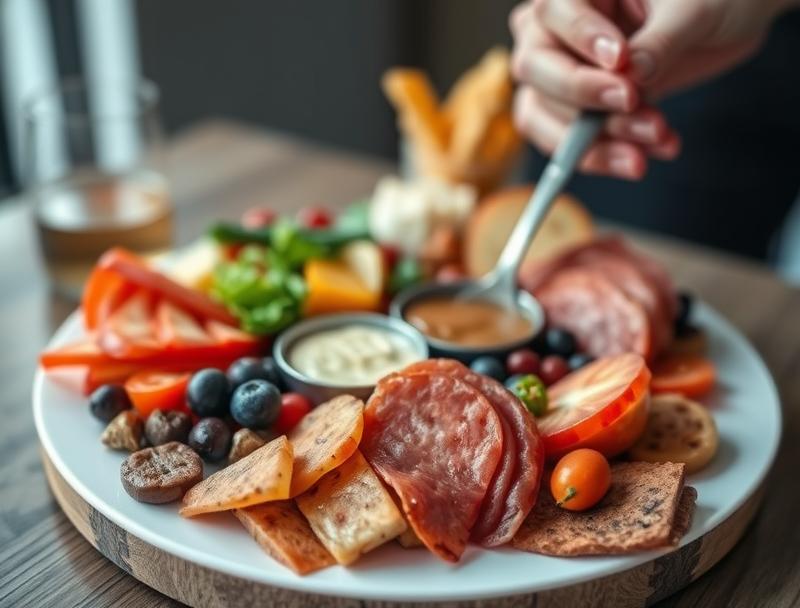
Creating the ultimate charcuterie board is an art that combines ease, flavor, and creativity, using everyday ingredients to impress your guests. Whether you’re hosting a party, a casual gathering, or just a relaxing evening with family, a well-crafted charcuterie board is the perfect centerpiece. It’s a canvas where you can express your creativity, mixing and matching a variety of meats, cheeses, fruits, nuts, and condiments to create a harmonious balance of flavors and textures. In this article, we’ll guide you through the process of creating your ultimate charcuterie board, from selecting the perfect ingredients to arranging them in a visually appealing way.
Why This Works
- Flavor balance and ingredient accessibility: The beauty of a charcuterie board lies in its ability to cater to a wide range of tastes. By selecting a variety of ingredients, you ensure that there’s something for everyone, making it a universally enjoyable experience.
- Ease of preparation: One of the most appealing aspects of a charcuterie board is how easy it is to prepare. Most of the work involves selecting and arranging the ingredients, which can be done in a matter of minutes.
- Impressive results with minimal effort: Despite the minimal effort required, a charcuterie board always looks impressive and elegant, making it perfect for special occasions or spontaneous gatherings.
Ingredients
- Assortment of cured meats (prosciutto, salami, ham)
- Variety of cheeses (brie, cheddar, gouda, blue cheese)
- Fresh fruits (grapes, berries, apples, pears)
- Nuts (almonds, walnuts, pecans)
- Crackers and bread (baguette slices, crostini, crackers)
- Spreads and jams (honey, mustard, fig jam)
- Pickled or marinated items (artichoke hearts, olives, peppers)
- Fresh herbs (rosemary, thyme, parsley)
- Chocolate or other sweet treats
Instructions
- Step 1: Begin by preparing your ingredients. Slice the meats and cheeses, wash and dry the fruits, and arrange the nuts and crackers in small bowls or on the board directly.
- Step 2: Lay out the base of your board with the largest items first, such as the cheeses, meats, and bowls of nuts or spreads. This will help you visualize the space and arrange the smaller items more efficiently.
- Step 3: Add the fruits, pickled items, and fresh herbs to the board, creating a pattern or design that appeals to you. Consider balancing colors, textures, and heights to create visual interest.
- Step 4: Finalize your board by adding any last-minute touches, such as drizzling honey over the cheeses or meats, or placing a few pieces of chocolate in strategic spots. Stand back and admire your work, making any necessary adjustments to achieve the perfect balance and appeal.
Handy Tips
- Consider your audience and their dietary restrictions when selecting ingredients. Offer gluten-free, vegetarian, or vegan options to ensure everyone can enjoy the board.
- Don’t overdo it – a charcuterie board should look abundant but not cluttered. Leave some space between items to create a clean and inviting display.
- Experiment with different themes or color schemes to match your occasion or decor. For example, a winter-themed board might feature darker colors and richer flavors, while a summer board could be lighter and fresher.
Heat Control
Since a charcuterie board typically consists of ready-to-eat items, heat control is not a significant concern. However, if you’re including items like warmed bread or cheese, ensure they’re heated to a safe temperature (usually around 145°F for cheese) and kept warm with a warming tray or thermally insulated container.
Crunch Factor
Achieving the right texture mix is crucial for a charcuterie board. Include a variety of crunchy elements like nuts, crackers, and fresh fruits, along with softer items like cheeses and meats. The combination of textures will add depth and interest to the board, making it more engaging for your guests.
Pro Kitchen Tricks
- Use a variety of heights on your board by incorporating stands, boxes, or stacks of ingredients to create visual interest.
- Keep it fresh by preparing as much as you can just before serving. This is especially important for fruits and cheeses that can dry out or become less appealing if left out for too long.
- Consider the flow of your board. Place items that are likely to be popular or need to be replenished, like meats and cheeses, in easy-to-access locations.
Storage Tips
- Store ingredients separately to maintain their freshness. Cheeses can be wrapped tightly in plastic wrap or aluminum foil, while meats should be sealed in airtight containers.
- Fruits and nuts are best stored at room temperature, away from direct sunlight. However, cut or prepared fruits should be refrigerated to prevent spoilage.
- Refrigerate any leftovers promptly and consume them within a day or two for optimal freshness and safety.
Gift Packaging Ideas
If you’re considering gifting a charcuterie board, think about packaging individual components in decorative jars, bags, or boxes. You could also assemble a smaller, portable board in a wooden crate or a decorative tray, complete with garnishes and spreads. Add a personal touch with a handwritten note or a ribbon around the gift, making it a thoughtful and unique present for any food lover.
Flavor Variations
- Different spices: Incorporate unique spices or seasonings into your meats or cheeses for an extra layer of flavor. For example, a smoked paprika can add a deep, smoky flavor to your meats.
- Creative toppings: Offer a range of toppings or spreads, such as chutneys, jams, or honey, to let guests customize their experience.
- Ingredient swaps: Experiment with different types of meats, cheeses, or fruits to create a board that reflects your personal taste or the occasion’s theme.
Troubleshooting
- Texture problems: If you find your board lacks texture, add more crunchy elements like nuts or crackers. Conversely, if it’s too crunchy, balance it out with softer items.
- Ingredient replacements: Don’t be afraid to substitute ingredients based on availability, dietary restrictions, or personal preferences. The key to a great charcuterie board is flexibility and creativity.
- Over/undercooking signs: Since most charcuterie items are pre-cooked or ready-to-eat, overcooking isn’t typically a concern. However, be mindful of the temperature and freshness of your items to ensure they’re served safely and at their best.
FAQs
- Can I freeze it? Most charcuterie board items can be frozen, but it’s best to freeze them separately and assemble the board just before serving to maintain freshness and texture.
- Is it gluten-free? Depending on the ingredients you choose, a charcuterie board can easily be made gluten-free by selecting gluten-free crackers, meats, and cheeses.
- Can I double the recipe? Since a charcuterie board is highly customizable, you can easily scale up or down based on your needs. Simply multiply the ingredients and adjust the board size accordingly.
Conclusion
Creating the ultimate charcuterie board is a fun and creative process that allows you to express your personality and cater to your guests’ tastes. With a little planning and imagination, you can turn a simple assortment of foods into a stunning and delicious display. Remember, the key to a great charcuterie board is balance, variety, and a willingness to experiment and adapt. So don’t be afraid to try new things, and most importantly, enjoy the process of creating something truly special for yourself and those around you.
Ultimate Charcuterie Board Idea
A guide to creating the perfect charcuterie board with a variety of meats, cheeses, fruits, and nuts, perfect for any occasion.
🥘 Ingredients
👩🍳 Instructions
-
1Prepare ingredients by slicing meats and cheeses, washing fruits, and arranging nuts and crackers.
-
2Lay out the base of the board with the largest items first.
-
3Add fruits, pickled items, and fresh herbs to the board, creating a visually appealing pattern.
-
4Finalize the board by adding any last-minute touches and making necessary adjustments for balance and appeal.