Easy Peanut Butter Cup Dump Cake Recipe for Dessert
Introduction
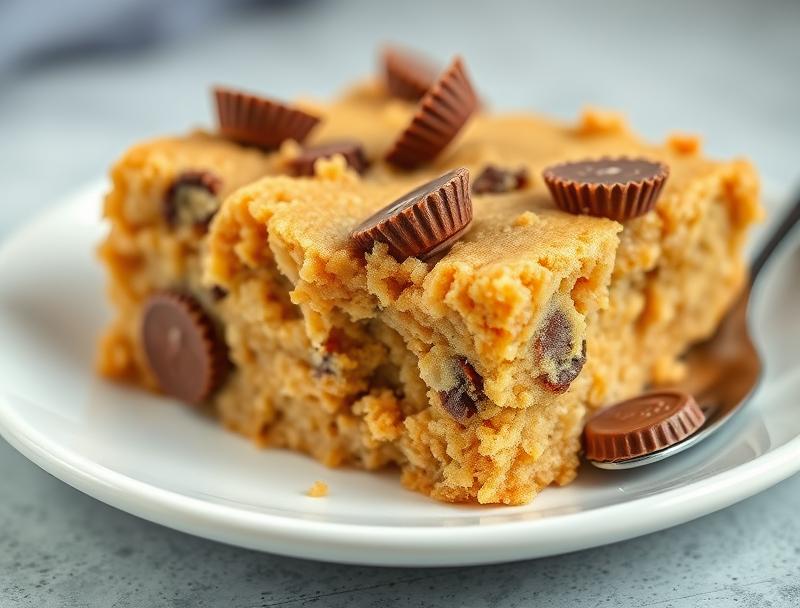
This Easy Peanut Butter Cup Dump Cake Recipe is a game-changer for dessert lovers. It’s incredibly easy to make, requiring minimal effort and ingredients that are probably already in your pantry. The combination of peanut butter cups and a moist cake is a match made in heaven, and the best part is that it’s ready in under an hour. Whether you’re a busy parent looking for a quick dessert to satisfy your family’s sweet tooth or an avid baker seeking a new recipe to add to your collection, this dump cake is sure to become a favorite. The ease of preparation, the balance of flavors, and the fun of using everyday ingredients to create something truly special make this recipe a standout.
Why This Works
- The balance of peanut butter and chocolate flavors, combined with the simplicity of the cake mix, creates a dessert that is both decadent and effortless.
- The accessibility of the ingredients, likely found in most kitchens, makes this recipe highly approachable for anyone looking to whip up a dessert without a special trip to the store.
- The impressive results, given the minimal effort required, make this dump cake a perfect choice for gatherings, potlucks, or as a sweet surprise for family and friends.
Ingredients
- 1 (15.25 oz) package of yellow cake mix
- 1/2 cup of melted butter
- 1 cup of peanut butter cups, chopped
- 1 teaspoon of vanilla extract
- 1 cup of powdered sugar (optional for dusting)
- 1/2 cup of chopped peanuts (optional for topping)
Instructions
- Step 1: Preheat your oven to 350°F (180°C). Prepare a 9×13-inch baking dish by lightly greasing it with cooking spray or butter.
- Step 2: In a large bowl, mix together the cake mix, melted butter, and vanilla extract until well combined. The mixture should still be slightly lumpy.
- Step 3: Fold in the chopped peanut butter cups. Ensure they are evenly distributed throughout the batter.
- Step 4: Pour the batter into the prepared baking dish and smooth the top. If desired, sprinkle additional chopped peanuts on top for extra crunch and flavor.
- Step 5: Bake for 35-40 minutes, or until a toothpick inserted into the center of the cake comes out clean. The top should be lightly golden brown.
- Step 6: Remove the cake from the oven and let it cool in the pan for 10 minutes before transferring it to a wire rack to cool completely. If desired, dust with powdered sugar before serving.
Handy Tips
- For an extra gooey peanut butter cup experience, don’t overmix the batter, and consider pressing a few extra peanut butter cups into the top of the batter before baking.
- Always check the cake for doneness by inserting a toothpick into the center. If it comes out with a few moist crumbs, it’s perfect. If not, bake for a few more minutes and check again.
- Consider using a variety of peanut butter cups, like mini ones or those with a different flavor profile, to mix things up.
Heat Control
Maintaining the right oven temperature is crucial. Ensure your oven is at 350°F (180°C) for the best results. Overbaking can lead to a dry cake, while underbaking might result in a cake that’s too moist or even raw in the center. Keep an eye on the cake after the 30-minute mark, and use the toothpick test to determine doneness.
Crunch Factor
The crunch factor in this dump cake comes from the peanuts and the peanut butter cups. To enhance this, you can sprinkle additional chopped peanuts on top of the cake before baking. This adds a satisfying crunch to the soft, moist cake. For an extra crunchy top, you can also broil the cake for 1-2 minutes after baking, watching carefully to avoid burning.
Pro Kitchen Tricks
- Use high-quality peanut butter cups for the best flavor. The difference between regular and high-end chocolate can be significant in the final taste of your cake.
- Don’t overbake. The cake should be moist and slightly tender in the center. Overbaking leads to dryness and loses the appeal of the dump cake.
- Experiment with different types of cake mix or add-ins, like chocolate chips or nuts, to create unique variations of the dump cake.
Storage Tips
- Store the cake in an airtight container at room temperature for up to 3 days. It can also be refrigerated for up to 5 days or frozen for up to 2 months. When freezing, it’s best to cut the cake into portions first for easier thawing and serving.
- For reheating, a few seconds in the microwave or a short time in the oven (at a low temperature) can restore the cake’s freshness and warmth.
- Consider using a vacuum sealer for longer storage without freezer burn. This method is especially useful if you plan to freeze the cake for an extended period.
Gift Packaging Ideas
This dump cake makes a wonderful gift, especially for coworkers, neighbors, or as a hostess gift. Consider packaging it in a decorative tin or a nicely wrapped box. You can also add a personal touch with a handwritten note or a small bag of gourmet coffee. For a more rustic look, wrap the cake in parchment paper and tie it with a twine, adding a few fresh flowers on top for a charming presentation.
Flavor Variations
- Try using different flavors of cake mix, like chocolate or red velvet, to change up the base flavor of the cake.
- Experiment with various types of candy or mix-ins, such as M&M’s, chopped candy bars, or dried fruits, to create unique flavor combinations.
- For a nutty twist, add some chopped walnuts or pecans to the batter along with the peanut butter cups.
Troubleshooting
- If the cake turns out too dry, it might have been overbaked. Try reducing the baking time in future attempts.
- If the cake is too moist or raw, it was likely underbaked. Increase the baking time, checking every few minutes until it’s done.
- For issues with the peanut butter cups not distributing evenly, try folding them into the batter more gently or pressing them into the top of the cake before baking.
FAQs
- Can I freeze it? Yes, the cake can be frozen for up to 2 months. It’s best to freeze it in portions for easier thawing and serving.
- Is it gluten-free? The cake mix used in this recipe typically contains gluten. For a gluten-free version, you would need to use a gluten-free cake mix.
- Can I double the recipe? Yes, you can double the recipe to make a larger cake. Just ensure you have a big enough baking dish and adjust the baking time accordingly.
Conclusion
This Easy Peanut Butter Cup Dump Cake Recipe is a delightful addition to any dessert menu. Its simplicity, combined with the richness of peanut butter and chocolate, makes it a crowd-pleaser. Feel free to experiment with different mix-ins and toppings to make the recipe your own. Whether you’re a seasoned baker or a beginner in the kitchen, this dump cake is sure to bring joy and satisfaction. So go ahead, give it a try, and enjoy the ooey-gooey goodness of peanut butter cups in every bite of your moist and delicious dump cake.
Easy Peanut Butter Cup Dump Cake Recipe for Dessert
A moist and delicious dump cake filled with peanut butter cups, perfect for any dessert occasion.
🥘 Ingredients
👩🍳 Instructions
-
1Preheat the oven to 350°F (180°C).
-
2Mix the cake mix, melted butter, and vanilla extract in a large bowl until well combined.
-
3Fold in the chopped peanut butter cups.
-
4Pour the batter into a prepared 9x13-inch baking dish and smooth the top.
-
5Bake for 35-40 minutes or until a toothpick inserted into the center comes out clean.
-
6Let the cake cool before serving. Dust with powdered sugar if desired.
-
7Optionally, sprinkle chopped peanuts on top before baking for extra crunch.