Classic Elvis Presley Cake – Pineapple Perfection in Every Bite
Introduction
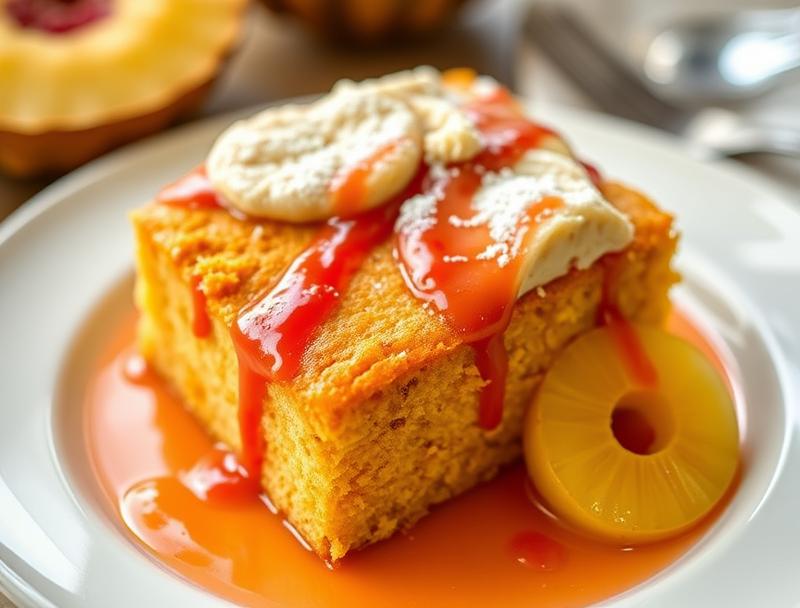
Imagine a moist and flavorful cake that combines the sweetness of pineapple with the richness of cream cheese frosting, all wrapped up in a delightful package that’s sure to impress your family and friends. The Classic Elvis Presley Cake is a masterpiece of culinary creativity, using everyday ingredients to create a truly extraordinary dessert. With its ease of preparation, impressive presentation, and unbeatable taste, this cake is perfect for special occasions or simply as a sweet treat to brighten up your day. In this article, we’ll take you through the steps to create this pineapple perfection, from preparation to presentation, and share some handy tips and tricks to make your baking experience even more enjoyable.
Why This Works
- The balance of flavors in this cake, with the sweetness of pineapple, the tanginess of cream cheese, and the richness of butter, creates a truly unforgettable taste experience.
- The ease of preparation is another significant advantage, as the cake requires minimal effort and time to prepare, making it perfect for busy home bakers.
- The impressive results, with the cake’s beautiful layers and creamy frosting, make it an ideal choice for special occasions or as a centerpiece for your next dinner party.
Ingredients
- 2 cups all-purpose flour
- 1 cup granulated sugar
- 2 teaspoons baking powder
- 1/2 teaspoon salt
- 1/2 cup unsalted butter, softened
- 1 cup whole milk
- 2 large eggs
- 1 cup crushed pineapple
- 1 teaspoon vanilla extract
- 1 cup cream cheese frosting (see below for recipe)
Instructions
- Step 1: Preheat your oven to 350°F (180°C) and grease two 9-inch (23cm) round cake pans. In a medium bowl, whisk together flour, sugar, baking powder, and salt.
- Step 2: In a large bowl, using an electric mixer, beat the butter until creamy, then add the dry ingredients mixture and milk, alternating between the two, beginning and ending with the dry ingredients mixture. Beat in the eggs one at a time, followed by the crushed pineapple and vanilla extract.
- Step 3: Divide the batter evenly between the prepared pans and smooth the tops. Bake for 30-35 minutes or until a toothpick inserted in the center comes out clean. Let the cakes cool in the pans for 10 minutes before transferring them to a wire rack to cool completely.
- Step 4: Once the cakes are completely cool, you can assemble the cake. Place one cake layer on a serving plate and spread a layer of cream cheese frosting on top. Place the second cake layer on top and frost the entire cake with the remaining frosting.
Handy Tips
- To ensure your cake is moist and fluffy, don’t overmix the batter, and make sure to not overbake.
- For an extra burst of pineapple flavor, you can add a layer of pineapple jam or preserves between the cake layers.
- If you find that your cream cheese frosting is too runny, you can refrigerate it for about 10 minutes to firm it up before using.
Heat Control
When baking the cake, it’s crucial to maintain the right temperature to ensure the cake cooks evenly and doesn’t dry out. Keep an eye on your cakes after 25 minutes of baking, and check for doneness by inserting a toothpick into the center. If the toothpick comes out clean, the cakes are done. If not, continue to bake in 5-minute increments until the toothpick comes out clean.
Crunch Factor
This cake is designed to be moist and tender, with a smooth cream cheese frosting. To achieve this texture, make sure to not overmix the batter and to not overbake the cakes. The crushed pineapple adds a nice texture contrast to the cake, providing a bit of crunch and freshness in each bite.
Pro Kitchen Tricks
- To ensure your cakes are perfectly level, you can use a cake leveler or a serrated knife to trim the tops once they’re completely cool.
- For a professional-looking finish, chill your cake in the refrigerator for about 30 minutes before serving to set the frosting.
- Consider using a turntable to display your cake, making it easier to serve and adding a touch of elegance to your presentation.
Storage Tips
- The cake can be stored at room temperature for up to 3 days, covered with plastic wrap or aluminum foil.
- For longer storage, you can refrigerate the cake for up to 5 days or freeze it for up to 2 months. When freezing, make sure to wrap the cake tightly in plastic wrap or aluminum foil and place it in a freezer-safe bag.
- When reheating, let the cake come to room temperature or warm it up in the microwave for a few seconds.
Gift Packaging Ideas
This cake makes a wonderful gift for friends and family, especially during the holidays or on special occasions. Consider packaging the cake in a beautiful cake box or a decorative tin, wrapped with a ribbon or a gift tag. You can also include a card with the recipe and a personal message, making the gift even more thoughtful and unique.
Flavor Variations
- Try adding different spices, such as cinnamon or nutmeg, to the batter for an extra boost of flavor.
- Consider using different types of milk, such as almond or soy milk, for a non-dairy version of the cake.
- For a chocolate twist, you can add cocoa powder to the batter or use chocolate cream cheese frosting instead of the traditional recipe.
Troubleshooting
- If your cake turns out too dense, it may be due to overmixing the batter. Try to mix the ingredients just until they come together, and avoid overbeating.
- If your frosting is too runny, you can refrigerate it for a few minutes to firm it up. If it’s too thick, you can add a bit more milk or cream to thin it out.
- If you notice that your cake is browning too quickly, you can cover the top with foil to prevent overbrowning.
FAQs
- Can I freeze the cake? Yes, you can freeze the cake for up to 2 months. Wrap it tightly in plastic wrap or aluminum foil and place it in a freezer-safe bag.
- Is the cake gluten-free? No, the cake contains all-purpose flour, which contains gluten. However, you can try substituting the flour with a gluten-free flour blend to make a gluten-free version.
- Can I double the recipe? Yes, you can double the recipe to make a larger cake. Just keep in mind that you may need to adjust the baking time accordingly.
Conclusion
In conclusion, the Classic Elvis Presley Cake is a must-try recipe for anyone who loves pineapple and cream cheese. With its ease of preparation, impressive presentation, and unbeatable taste, this cake is sure to become a favorite in your household. Don’t be afraid to experiment with different flavor variations and substitutions to make the recipe your own, and don’t hesitate to reach out if you have any questions or need further assistance. Happy baking, and enjoy every bite of this pineapple perfection!
Classic Elvis Presley Cake – Pineapple Perfection in Every Bite
A moist and flavorful cake that combines the sweetness of pineapple with the richness of cream cheese frosting.
🥘 Ingredients
👩🍳 Instructions
-
1Preheat the oven to 350°F (180°C) and grease two 9-inch (23cm) round cake pans.
-
2Prepare the batter by whisking together flour, sugar, baking powder, and salt, then beating in the butter, milk, eggs, crushed pineapple, and vanilla extract.
-
3Divide the batter evenly between the prepared pans and smooth the tops.
-
4Bake for 30-35 minutes or until a toothpick inserted in the center comes out clean.
-
5Let the cakes cool in the pans for 10 minutes before transferring them to a wire rack to cool completely.
-
6Assemble the cake by placing one cake layer on a serving plate, spreading a layer of cream cheese frosting on top, and placing the second cake layer on top.
-
7Frost the entire cake with the remaining frosting and decorate as desired.