Decadent Red Velvet Cheesecake Stuffed Cookies
Introduction
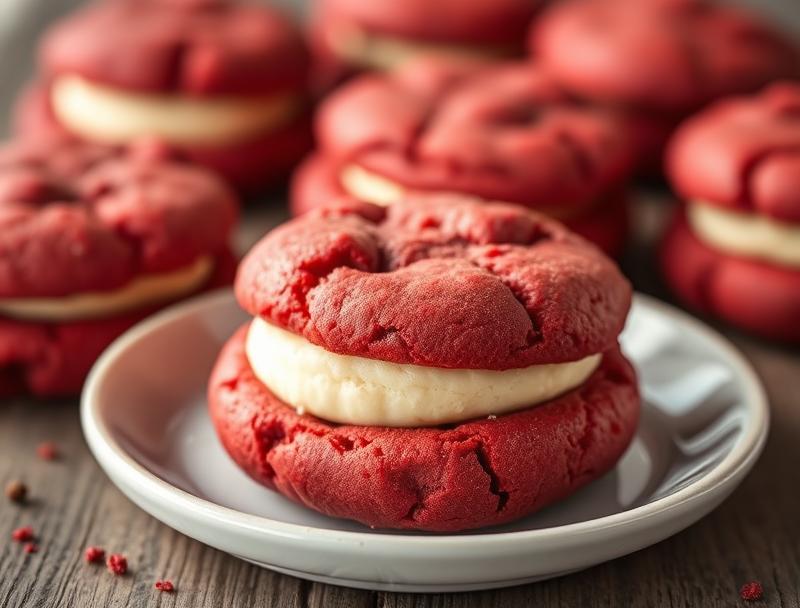
Imagine sinking your teeth into a warm, chewy cookie that reveals a rich, creamy cheesecake center, all wrapped in the vibrant flavor and color of red velvet. This Decadent Red Velvet Cheesecake Stuffed Cookies recipe combines the best of both worlds, bringing together the classic charm of red velvet with the indulgent delight of cheesecake, all in a single, decadent treat. The beauty of this recipe lies in its accessibility – using everyday ingredients and straightforward steps, anyone can create these stunning cookies that are sure to impress friends and family alike. Whether you’re a seasoned baker or just starting out, this recipe is a must-try for its unique flavor combination, ease of preparation, and the undeniable wow factor it brings to any gathering.
Why This Works
- Flavor balance and ingredient accessibility: The combination of red velvet and cheesecake creates a harmonious balance of flavors that is both familiar and exciting. The ingredients are easily found in most grocery stores, making this recipe accessible to everyone.
- Ease of preparation: Despite the impressive outcome, the steps involved are surprisingly simple. The dough comes together quickly, and the cheesecake filling is straightforward to prepare.
- Impressive results with minimal effort: The payoff of these cookies is immense. The vibrant red color and the surprise cheesecake center make them a showstopper at any event, with a level of effort that’s remarkably manageable.
Ingredients
- 2 1/4 cups all-purpose flour
- 1 tsp baking soda
- 1 tsp salt
- 1 cup unsalted butter, at room temperature
- 3/4 cup white granulated sugar
- 1 cup brown sugar
- 2 large eggs
- 2 tsp red food coloring
- 1 tsp vanilla extract
- 1 cup semi-sweet chocolate chips
- For the cheesecake filling: 8 oz cream cheese, softened, 1/2 cup granulated sugar, 1 large egg, 1 tsp vanilla extract
Instructions
- Step 1: Preheat your oven to 375°F (190°C). Line a baking sheet with parchment paper or a silicone mat.
- Step 2: In a medium bowl, whisk together the flour, baking soda, and salt. Set aside.
- Step 3: In a large bowl, use an electric mixer to cream together the butter and sugars until light and fluffy, about 2-3 minutes. Beat in the eggs one at a time, followed by the red food coloring and vanilla extract.
- Step 4: Gradually mix in the flour mixture until just combined, being careful not to overmix. Stir in the chocolate chips.
- Step 5: Prepare the cheesecake filling by beating the cream cheese and granulated sugar until smooth. Beat in the egg and vanilla extract until well combined.
- Step 6: To assemble the cookies, scoop a tablespoon of cookie dough into your hand, flatten it slightly, and place a small spoonful of the cheesecake filling in the center. Fold the dough over the filling, pressing the edges to seal, and place on the prepared baking sheet, leaving about 2 inches of space between each cookie.
- Step 7: Bake for 12-15 minutes or until the edges are lightly golden. Allow the cookies to cool on the baking sheet for 5 minutes before transferring them to a wire rack to cool completely.
Handy Tips
- Ensure your butter is at room temperature for the best results in the cookie dough.
- Don’t overbake – the cookies should be lightly golden and still slightly soft in the center.
- For an extra indulgent treat, drizzle the cooled cookies with melted chocolate or a glaze made from powdered sugar and milk.
Heat Control
The ideal baking temperature for these cookies is 375°F (190°C). It’s crucial to keep an eye on them after 10 minutes, as the baking time can vary depending on the size of the cookies and your oven’s performance. The cookies are done when they are lightly golden around the edges and still slightly soft to the touch in the center.
Crunch Factor
The exterior of these cookies should be lightly crisp, giving way to a chewy interior and a creamy cheesecake center. To achieve this texture, avoid overbaking and ensure that the cookies cool completely on a wire rack after baking.
Pro Kitchen Tricks
- Chill the cookie dough for 30 minutes to an hour before baking to help the cookies retain their shape and bake up with a better texture.
- Use high-quality chocolate chips for the best flavor.
- For a fun twist, add-ins like chopped nuts or dried cranberries can be folded into the cookie dough for added texture and flavor.
Storage Tips
- These cookies are best stored in an airtight container at room temperature for up to 3 days.
- For longer storage, they can be frozen for up to 2 months. Simply thaw at room temperature when you’re ready to enjoy them.
- It’s also possible to freeze the cookie dough balls before baking. Simply place them on a baking sheet lined with parchment paper and freeze until solid, then transfer to a freezer-safe bag or container for up to 2 months. Bake frozen cookies for an additional 2-3 minutes.
Gift Packaging Ideas
These decadent cookies make a wonderful gift, especially when packaged in a thoughtful way. Consider placing them in decorative tins, jars, or bags and tying with a ribbon. A handwritten note or a small card with the recipe can add a personal touch. For a more elaborate gift, pair the cookies with a bag of gourmet coffee or a selection of teas for a cozy treat.
Flavor Variations
- Different spices: Add a pinch of cinnamon or nutmeg to the cookie dough for a unique twist.
- Creative toppings: Top the cooled cookies with melted chocolate, chopped nuts, or a sprinkle of sea salt for added flavor and texture.
- Ingredient swaps: Use white chocolate chips instead of semi-sweet for a different flavor profile, or substitute the cream cheese with a similar soft cheese for a lighter cheesecake filling.
Troubleshooting
- Texture problems: If the cookies spread too much, they may have been too warm when baked. Chilling the dough before baking can help. If they’re too dense, overmixing might be the culprit – mix wet and dry ingredients separately and gently fold them together.
- Ingredient replacements: While the recipe is designed to work best with the ingredients listed, some substitutions can be made. For example, using browned butter instead of regular butter can add a nutty flavor, and different types of sugar can alter the flavor profile slightly.
- Over/undercooking signs: Keep an eye on the cookies after 10 minutes. They’re done when lightly golden and still slightly soft in the center. Overcooking will make them dry and hard.
FAQs
- Can I freeze it? Yes, both the baked cookies and the unbaked cookie dough can be frozen for up to 2 months.
- Is it gluten-free? No, this recipe contains wheat flour and is not suitable for a gluten-free diet without significant modifications.
- Can I double the recipe?
Yes, the recipe can be easily doubled or tripled to make more cookies. Just be sure to use a large enough bowl when mixing the dough and adjust the baking time slightly if the cookies are larger.
Conclusion
Decadent Red Velvet Cheesecake Stuffed Cookies are a game-changer for anyone looking to elevate their baking game without breaking a sweat. With their vibrant color, indulgent cheesecake center, and the perfect balance of crunch and chew, these cookies are sure to become a new favorite. Whether you’re baking for a special occasion or just because, the joy and satisfaction of creating something so delicious and visually appealing are hard to beat. So go ahead, get baking, and watch these cookies disappear in no time!
Decadent Red Velvet Cheesecake Stuffed Cookies
A recipe for decadent cookies filled with a cheesecake center, combining the flavors of red velvet and cheesecake in a unique and indulgent treat.
🥘 Ingredients
👩🍳 Instructions
-
1Preheat oven to 375°F (190°C).
-
2Prepare the cookie dough by creaming together butter and sugars, then beating in eggs and mixing in flour and chocolate chips.
-
3Prepare the cheesecake filling by beating cream cheese and sugar, then beating in an egg and vanilla extract.
-
4Assemble the cookies by placing a spoonful of cheesecake filling in the center of a flattened piece of cookie dough, then sealing the dough around the filling.
-
5Bake the cookies for 12-15 minutes or until lightly golden around the edges and still slightly soft in the center.