Loaded Brownie Cheesecake Cups (So Easy and Totally Addictive!)
Introduction
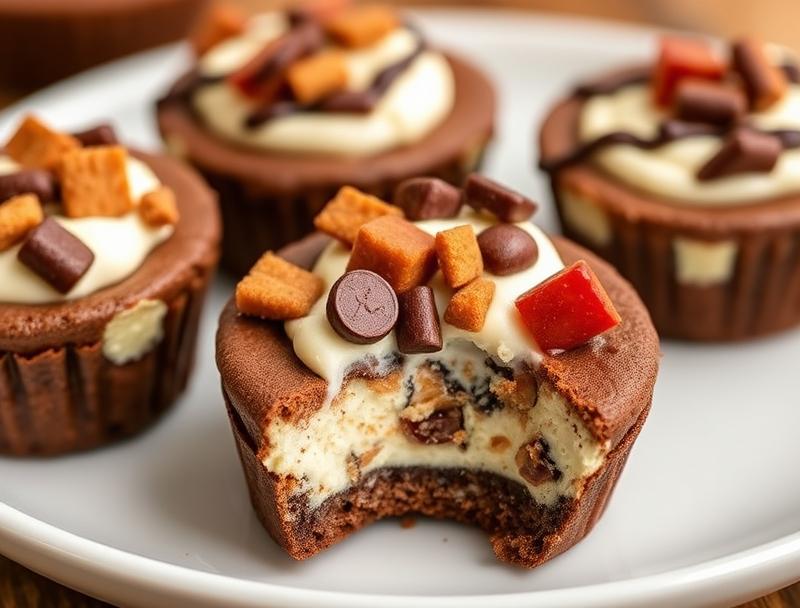
Imagine indulging in the richness of a brownie and the creaminess of a cheesecake, all in one delightful cup. Loaded Brownie Cheesecake Cups are a game-changer for anyone with a sweet tooth, offering an incredibly easy and addictive dessert experience. By combining everyday ingredients in a creative way, you can achieve a flavor balance that is both decadent and irresistible. Whether you’re a seasoned baker or a beginner in the kitchen, this recipe is sure to impress with its simplicity and the wow factor it brings to the table.
Why This Works
- Flavor balance and ingredient accessibility: The combination of brownie and cheesecake elements creates a perfect harmony of flavors, and the best part is that you likely have most of the ingredients already in your pantry.
- Ease of preparation: Despite the impressive outcome, the preparation is surprisingly straightforward, making it accessible to bakers of all skill levels.
- Impressive results with minimal effort: The Loaded Brownie Cheesecake Cups are not only delicious but also visually appealing, perfect for serving at gatherings or as a special treat for your loved ones.
Ingredients
- 1 and 1/2 sticks of unsalted butter, plus more for greasing
- 2 cups of sugar
- 4 large eggs
- 1/2 cup of unsweetened cocoa powder
- 1 teaspoon of vanilla extract
- 1 and 1/4 cups of all-purpose flour
- 1 teaspoon of salt
- 1 cup of semi-sweet chocolate chips
- 1 cup of cheesecake batter (see notes for recipe)
- Chopped nuts or chocolate shavings for garnish (optional)
Instructions
- Step 1: Preheat your oven to 350°F (180°C). Grease a 12-cup muffin tin with butter and line the bottoms with parchment paper for easy removal.
- Step 2: Prepare the brownie batter by melting the butter and sugar in a medium saucepan over low heat, stirring occasionally. Remove from heat and stir in the cocoa powder until well combined. Let it cool slightly.
- Step 3: Beat in the eggs one at a time, followed by the vanilla extract. In a separate bowl, whisk together the flour and salt, then add it to the saucepan, stirring until just combined. Stir in the chocolate chips.
- Step 4: Divide the brownie batter evenly among the muffin cups. Top each with a spoonful of cheesecake batter, leaving a small border around the edges to allow for even baking and a beautiful presentation.
- Step 5: Bake for about 25-30 minutes or until the edges are set, and the centers are just slightly jiggly. Let them cool completely in the pan before refrigerating for at least 4 hours or overnight.
Handy Tips
- For a cleaner removal, make sure the cheesecake is completely set before taking the cups out of the muffin tin. If the edges stick, you can warm the bottoms slightly with a hairdryer or by dipping the tin in hot water for a few seconds.
- Consider using different types of chocolate or nuts to change up the flavor profile of your brownies.
- Don’t overmix the batter, as this can lead to dense brownies. Stop mixing as soon as the ingredients are combined.
Heat Control
The ideal baking temperature for these Loaded Brownie Cheesecake Cups is 350°F (180°C). It’s crucial to not overbake, as this can cause the cheesecake to dry out. A good sign of doneness is when the edges are firm, and the centers are slightly soft to the touch. Keep an eye on them after the 20-minute mark, as oven times can vary.
Crunch Factor
To achieve a nice texture contrast, you can top your brownie cheesecakes with chopped nuts or chocolate shavings before baking. This adds a delightful crunch to the otherwise smooth and gooey dessert. Alternatively, a sprinkle of sea salt can enhance the flavors and add a satisfying crunch.
Pro Kitchen Tricks
- Use high-quality chocolate for the best flavor. While it might be tempting to use cheaper alternatives, the difference in taste is noticeable.
- Don’t skip the step of cooling the brownie batter slightly before adding the eggs. This helps prevent the eggs from scrambling when they meet the hot batter.
- For an extra creamy cheesecake, make sure all your ingredients, especially the eggs and cream cheese, are at room temperature before mixing.
Storage Tips
- These Loaded Brownie Cheesecake Cups can be stored in an airtight container in the refrigerator for up to 5 days. Let them come to room temperature before serving for the best taste and texture.
- For longer storage, they can be frozen for up to 2 months. Wrap each cup tightly in plastic wrap or aluminum foil and place them in a freezer-safe bag. Thaw overnight in the fridge before serving.
Gift Packaging Ideas
These individual desserts are perfect for gifting, especially during holidays or special occasions. Consider packaging them in decorative muffin liners or small gift boxes. You can also add a personal touch with a ribbon or a gift tag. For a more rustic look, place the cheesecakes in small mason jars and tie a ribbon around the lid.
Flavor Variations
- Different spices: Add a pinch of cinnamon, nutmeg, or cayenne pepper to the brownie batter for a unique twist.
- Creative toppings: Experiment with different nuts, chocolate types, or even caramel sauce to top your cheesecakes.
- Ingredient swaps: Use almond flour instead of all-purpose flour for a gluten-free version, or substitute the sugar with honey or maple syrup for a different flavor profile.
Troubleshooting
- Texture problems: If your brownies turn out too dense, it might be due to overmixing. If the cheesecake is too runny, it could be underbaked.
- Ingredient replacements: Always try to use the ingredients listed for the best results. However, if you need to make substitutions, ensure they are comparable in terms of texture and flavor.
- Over/undercooking signs: Keep an eye on your cheesecakes while they bake. If the edges start to brown too quickly, cover the tin with foil. If they’re not set after the recommended baking time, bake in additional 5-minute increments until done.
FAQs
- Can I freeze it? Yes, these Loaded Brownie Cheesecake Cups can be frozen for up to 2 months. Wrap each cup tightly and store them in a freezer-safe bag.
- Is it gluten-free? Not in its current form, but you can make it gluten-free by substituting the all-purpose flour with a gluten-free flour blend.
- Can I double the recipe? Yes, you can easily double or even triple the recipe if you’re serving a larger crowd. Just keep an eye on the baking time, as it might be slightly longer for larger batches.
Conclusion
Loaded Brownie Cheesecake Cups are a masterpiece of dessert engineering, combining the best of both worlds in a compact, indulgent package. With their ease of preparation, impressive presentation, and addictive flavor, they’re sure to become a favorite among both beginners and seasoned bakers. Feel free to experiment with different flavors and toppings to make the recipe your own, and don’t hesitate to share your creations with friends and family. Happy baking!
Loaded Brownie Cheesecake Cups (So Easy and Totally Addictive!)
A rich and creamy dessert combining brownies and cheesecake in individual cups, perfect for any occasion.
🥘 Ingredients
👩🍳 Instructions
-
1Preheat the oven to 350°F (180°C).
-
2Prepare the brownie batter and divide it among the muffin cups.
-
3Top each with a spoonful of cheesecake batter.
-
4Bake for 25-30 minutes or until the edges are set and the centers are slightly jiggly.
-
5Let cool and refrigerate for at least 4 hours or overnight.