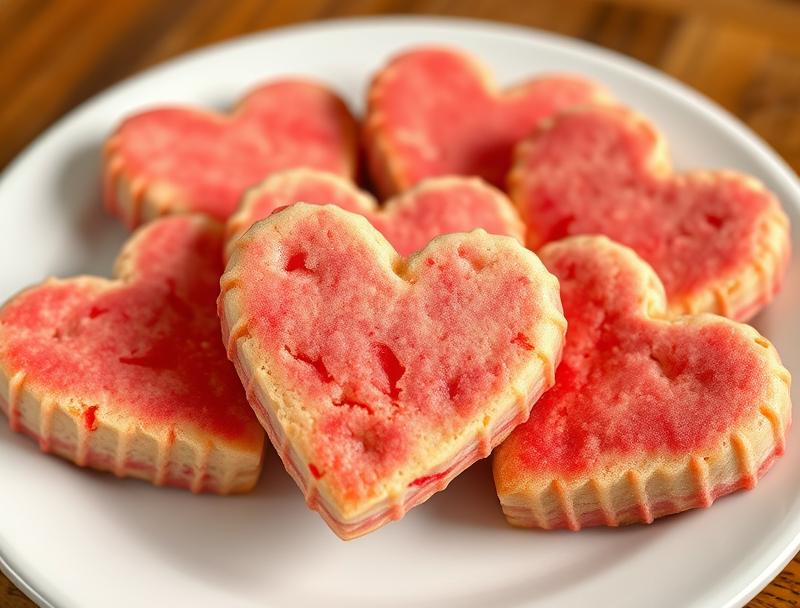
Heartfelt Slice and Bake Heart Cookies
Introduction
Imagine sinking your teeth into a tender, flavorful cookie that’s as easy to make as it is adorable. Our Heartfelt Slice and Bake Heart Cookies are the perfect treat for any occasion, from Valentine’s Day to a simple Tuesday pick-me-up. Using everyday ingredients and a straightforward method, these cookies are not only delicious but also incredibly easy to customize with your favorite colors and toppings. Whether you’re a seasoned baker or just starting out, this recipe is sure to bring a smile to your face and the faces of those you share them with.
Why This Works
- The balance of sugar and butter creates a rich, yet not overpowering flavor that appeals to both kids and adults.
- The simplicity of the recipe makes it accessible to bakers of all skill levels, requiring minimal preparation and effort.
- The slice and bake method allows for impressive results with minimal fuss, perfect for those short on time or looking for a fun project with the family.
Ingredients
- 2 1/4 cups all-purpose flour
- 1 tsp baking powder
- 1 tsp baking soda
- 1 tsp salt
- 1 cup unsalted butter, softened
- 3/4 cup granulated sugar
- 1 egg
- 1 tsp vanilla extract
- Colored sugar or sprinkles for decoration (optional)
Instructions
- Step 1: Preheat your oven to 375°F (190°C). Line a baking sheet with parchment paper or a silicone mat.
- Step 2: In a medium bowl, whisk together the flour, baking powder, baking soda, and salt. Set aside.
- Step 3: In a large bowl, use an electric mixer to cream the butter and sugar until light and fluffy. Beat in the egg and vanilla extract until well combined.
- Step 4: Gradually mix in the dry ingredients until a dough forms. Divide the dough in half and shape each half into a log. Wrap each log in plastic wrap and refrigerate for at least 30 minutes.
- Step 5: Slice each log into 1/2-inch thick rounds. Use a heart-shaped cookie cutter to cut out hearts from each round. Place the hearts on the prepared baking sheet, leaving about 1 inch of space between each cookie.
- Step 6: Bake for 12-15 minutes, or until the edges are lightly golden. Allow the cookies to cool on the baking sheet for 5 minutes before transferring them to a wire rack to cool completely.
- Step 7: If desired, decorate the cooled cookies with colored sugar or sprinkles.
Handy Tips
- For a crisper cookie, bake for 15-18 minutes. For a chewier cookie, bake for 10-12 minutes.
- Consider using a variety of colored sugars or sprinkles to match your occasion or theme.
- To ensure the cookies retain their heart shape, chill the dough thoroughly and handle the dough gently when slicing and placing on the baking sheet.
Heat Control
When baking, it’s crucial to keep an eye on the temperature and timing. The ideal temperature for baking these cookies is 375°F (190°C), and they should be baked for 12-15 minutes, or until the edges are lightly golden. Overbaking can lead to dry, hard cookies, so it’s better to err on the side of underbaking slightly, as the cookies will continue to cook a bit after being removed from the oven.
Crunch Factor
These cookies are designed to be tender and soft, with a slight crunch on the edges. To achieve this texture, make sure not to overbake them. If you prefer a crunchier cookie, you can bake them for an additional 2-3 minutes, but keep a close eye to prevent overcooking.
Pro Kitchen Tricks
- For an extra special touch, drizzle cooled cookies with melted chocolate or glaze made from powdered sugar and milk.
- Consider using different extracts (like almond or lemon) to give your cookies a unique flavor twist.
- To make the cookies more festive, use themed cookie cutters or decorate with edible images or writing.
Storage Tips
- Cookies can be stored in an airtight container at room temperature for up to 5 days.
- For longer storage, place the cookies in a single layer in a freezer-safe bag or container and freeze for up to 2 months. Thaw at room temperature when ready to serve.
- If decorating with perishable toppings (like whipped cream or fresh fruit), it’s best to decorate just before serving.
Gift Packaging Ideas
These heart-shaped cookies are perfect for gifting, especially during Valentine’s Day or for special occasions like weddings or baby showers. Consider packaging them in decorative tins, jars, or bags tied with ribbon. You could also create a cookie bouquet by arranging the cookies in a decorative pattern on a platter or tray, perfect for a centerpiece or gift.
Flavor Variations
- Add a teaspoon of cinnamon or nutmeg to the dough for a spicy twist.
- Use different colored sugars or sprinkles to match your occasion or theme.
- Swap the vanilla extract for almond or lemon extract for a different flavor profile.
Troubleshooting
- If your cookies spread too much during baking, it might be due to the butter being too soft or the oven temperature being off. Try chilling the dough longer or checking your oven’s temperature accuracy.
- If the cookies are too hard, they might have been overbaked. Try reducing the baking time in future batches.
- If you find the dough too sticky, add a bit more flour. If it’s too dry, add a bit more butter or egg.
FAQs
- Can I freeze the dough? Yes, you can freeze the dough for up to 2 months. Simply thaw in the refrigerator overnight and proceed with the recipe as instructed.
- Is this recipe gluten-free? No, this recipe uses all-purpose flour and is not gluten-free. However, you can experiment with gluten-free flours to adapt the recipe.
- Can I double the recipe? Yes, you can double the recipe. Just keep in mind that you’ll need to adjust the baking time slightly, as more cookies on the baking sheet can affect how quickly they bake.
Conclusion
Making Heartfelt Slice and Bake Heart Cookies is a delightful experience that’s sure to bring joy to both the baker and those who get to enjoy the fruits of their labor. With their tender texture, customizable decorations, and ease of preparation, these cookies are perfect for any occasion. Don’t be afraid to experiment with different flavors and decorations to make the recipe your own, and consider sharing your creations with friends and family to spread a little love and happiness. Happy baking!