Delicious & Healthy! Make These Strawberry Cheesecake Protein Balls
Introduction
Imagine biting into a deliciously healthy treat that combines the sweetness of strawberries, the creaminess of cheesecake, and the nutritional boost of protein, all in one convenient bite. These Strawberry Cheesecake Protein Balls are not just a tasty snack, but they’re also incredibly easy to make, requiring minimal ingredients and effort. The best part? They’re perfect for anyone looking for a guilt-free indulgence that can be enjoyed on the go. Whether you’re a fitness enthusiast, a busy professional, or simply a health-conscious individual, these protein balls are sure to become your new favorite snack.
Why This Works
- The balance of flavors from the strawberries and cheesecake elements, combined with the accessibility of the ingredients, makes this recipe a winner for anyone looking to try something new and exciting.
- The ease of preparation is a significant advantage, as it requires no cooking and can be ready in just a few minutes, making it perfect for a quick snack or as a post-workout treat.
- The impressive results with minimal effort are a testament to the simplicity and effectiveness of this recipe, allowing anyone to create a delicious and healthy snack with ease.
Ingredients
- 1 cup rolled oats
- 1/2 cup protein powder of your choice
- 1/4 cup cream cheese, softened
- 1/4 cup plain Greek yogurt
- 1 tablespoon honey
- 1/2 teaspoon vanilla extract
- 1/4 cup chopped fresh strawberries
- 1/4 cup shredded coconut (optional)
- Pink food coloring (a few drops, optional)
Instructions
- Step 1: In a large mixing bowl, combine the oats and protein powder. Mix well to ensure the ingredients are evenly distributed.
- Step 2: In a separate bowl, mix the cream cheese, Greek yogurt, honey, and vanilla extract until smooth and creamy. This will form the cheesecake part of your protein balls.
- Step 3: Add the cheesecake mixture to the oat mixture and stir until everything is well combined. The mixture should start to come together in a dough-like consistency.
- Step 4: Fold in the chopped strawberries. If the mixture becomes too sticky, you can add a bit more oats. If it’s too dry, a small amount of Greek yogurt can be added.
- Step 5: Use your hands to shape the mixture into small balls, about 1 inch in diameter. You should end up with around 12-15 protein balls.
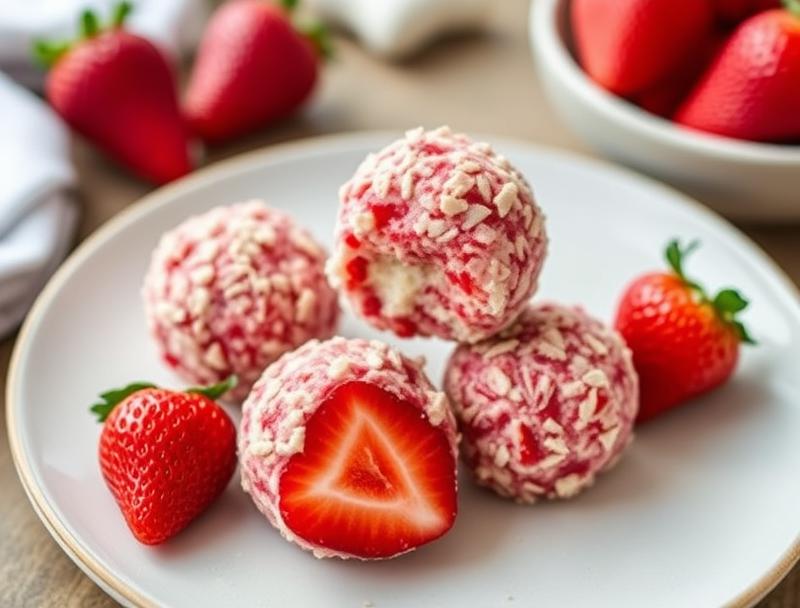
- Step 6: If desired, roll the protein balls in shredded coconut to give them a nice coating. A few drops of pink food coloring can also be added to the mixture before shaping to give the balls a pink hue, matching the strawberry theme.
- Step 7: Place the protein balls on a baking sheet lined with parchment paper and refrigerate for at least 30 minutes to set.
Handy Tips
- Make sure to use fresh strawberries for the best flavor. If strawberries are not in season, you can use dried strawberries or strawberry jam as a substitute, though the flavor and texture might slightly differ.
- For variations, you can swap the strawberries with other fruits like blueberries, raspberries, or mango, depending on your preference and what’s available.
- Keep in mind that the type of protein powder used can affect the flavor and texture of the protein balls. Unflavored or vanilla protein powder works best for this recipe.
Heat Control
Since these protein balls do not require baking or cooking, heat control is not a concern. However, refrigerating them for at least 30 minutes is crucial to allow them to set properly and maintain their shape.
Crunch Factor
The crunch factor in these protein balls comes from the oats and the optional shredded coconut coating. The interior remains soft and chewy due to the cheesecake mixture and the strawberries. To achieve the right texture, make sure not to overmix the ingredients, and refrigerate the balls long enough to set.
Pro Kitchen Tricks
- Using a small cookie scoop can help in making uniform protein balls, making them look more appealing and ensuring they are all the same size for even refrigeration.
- Experiment with different flavors of protein powder and extracts (like almond or coconut extract) to create unique variations of the protein balls.
- For a cleaner workspace, prepare all ingredients before starting to mix, and have a piece of parchment paper or a silicone mat ready for the shaped protein balls.
Storage Tips
- Store the protein balls in an airtight container in the refrigerator for up to 5 days.
- For longer storage, you can freeze the protein balls for up to 2 months. Simply place them in a freezer-safe bag or container and thaw at room temperature or in the refrigerator when you’re ready to eat them.
- It’s best to keep them away from direct sunlight and heat sources to preserve their texture and freshness.
Gift Packaging Ideas
If you’re considering gifting these protein balls, they can be packaged in decorative jars, gift tins, or even cellophane bags tied with a ribbon. Adding a personalized note or a small recipe card can make the gift even more special. Consider packaging them in smaller portions, like 3-4 protein balls per package, for a convenient and thoughtful gift.
Flavor Variations
- Different spices like cinnamon or nutmeg can add a warm and comforting flavor to the protein balls.
- Creative toppings such as chopped nuts, seeds, or dried fruits can provide additional texture and flavor.
- Ingredient swaps like using almond butter instead of cream cheese or adding a scoop of peanut butter can change the flavor profile entirely.
Troubleshooting
- Texture problems: If the mixture is too sticky, add a bit more oats. If it’s too dry, add a small amount of Greek yogurt.
- Ingredient replacements: Always try to replace ingredients with something similar in texture and flavor to maintain the integrity of the recipe.
- Over/under refrigeration: Make sure to refrigerate the protein balls for at least 30 minutes. If they’re too soft, they might need more refrigeration time. If they’re too hard, they might have been over-refrigerated.
FAQs
- Can I freeze them? Yes, you can freeze the protein balls for up to 2 months. Simply thaw them at room temperature or in the refrigerator when you’re ready to eat them.
- Is it gluten-free? Depending on the type of oats and protein powder used, these protein balls can be gluten-free. Make sure to choose gluten-free certified ingredients.
- Can I double the recipe? Yes, you can easily double or triple the recipe if you need more protein balls. Just ensure you have enough space in your refrigerator for the additional balls to set.
Conclusion
Making these Strawberry Cheesecake Protein Balls is a fun and rewarding experience that combines health, taste, and convenience. With their delicious flavor and nutritious ingredients, they’re perfect for snacking on the go, as a post-workout treat, or even as a healthy dessert option. Don’t hesitate to experiment with different ingredients and flavors to make the recipe your own, and enjoy the process of creating something delicious and healthy for yourself and your loved ones.
Delicious & Healthy! Make These Strawberry Cheesecake Protein Balls
A healthy and delicious snack combining strawberries, cheesecake flavor, and protein, perfect for on-the-go or post-workout.
🥘 Ingredients
👩🍳 Instructions
-
1Combine oats and protein powder in a bowl.
-
2Mix cream cheese, Greek yogurt, honey, and vanilla extract in a separate bowl.
-
3Combine the cheesecake mixture with the oat mixture and stir until well combined.
-
4Fold in chopped strawberries.
-
5Shape into small balls and refrigerate for at least 30 minutes to set.
-
6Optionally, roll in shredded coconut or add a few drops of pink food coloring for decoration.