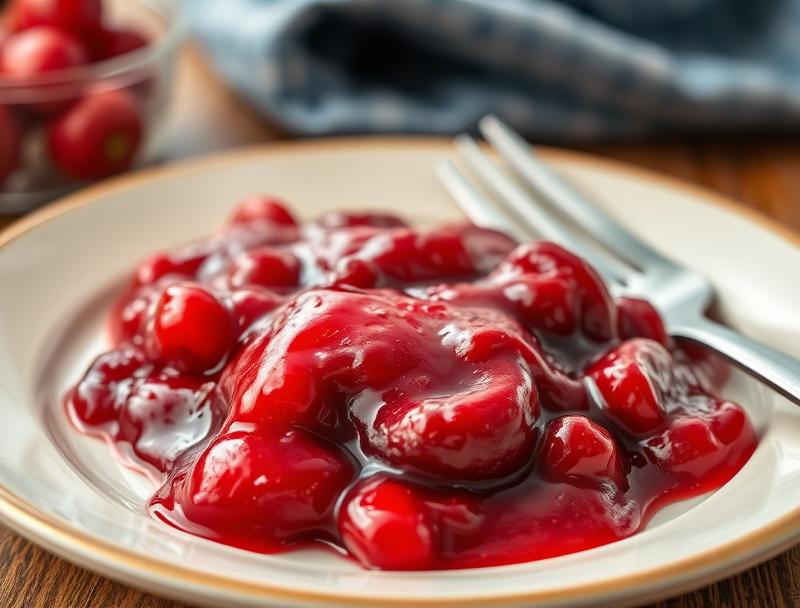
Cherry Pie Filling
Introduction
Imagine a warm, flaky pie crust overflowing with a rich, fruity, and tantalizingly sweet cherry filling. The essence of cherry pie filling is not just about the taste; it’s about the experience it brings to the table. With this simple yet elegant recipe, you can create a dessert that’s both a classic and a crowd-pleaser. The beauty of this cherry pie filling lies in its ease of preparation, the balance of flavors, and the creativity it allows with everyday ingredients. Whether you’re a seasoned baker or a beginner in the kitchen, this recipe is sure to delight and inspire.
Why This Works
- Flavor balance and ingredient accessibility: This recipe strikes a perfect balance between sweet and tart, using cherries, sugar, and lemon juice. The ingredients are readily available and can be easily substituted or adjusted to suit your taste preferences.
- Ease of preparation: The steps involved are straightforward and require minimal cooking skills, making it accessible to everyone. From washing the cherries to filling your pie crust, each step is designed to be simple and enjoyable.
- Impressive results with minimal effort: Despite its simplicity, the end result is a professional-looking and tasting cherry pie filling that’s sure to impress family and friends. The combination of fresh cherries, the right amount of sugar, and a touch of spice creates a filling that’s both traditional and innovative.
Ingredients
- 2 cups of fresh or frozen cherries, pitted
- 1/2 cup granulated sugar
- 2 tablespoons cornstarch
- 1 tablespoon lemon juice
- 1/4 teaspoon salt
- 1/4 teaspoon ground cinnamon (optional)
- 1/4 teaspoon almond extract (optional)
- 1 tablespoon butter
Instructions
- Step 1: Begin by preparing your cherries. If using fresh cherries, wash them thoroughly and remove the pits. If using frozen cherries, allow them to thaw and pat dry with a paper towel to remove excess moisture.
- Step 2: In a large saucepan, combine the cherries, granulated sugar, cornstarch, lemon juice, salt, cinnamon, and almond extract (if using). Let it sit for about 15 minutes, allowing the cherries to release their juice and the cornstarch to absorb the liquid.
- Step 3: Cook the mixture over medium heat, stirring constantly, until the mixture thickens and the cherries have broken down slightly. This should take about 10-15 minutes. Reduce heat if the mixture starts to boil vigorously.
- Step 4: Remove the saucepan from the heat and stir in the butter until it’s fully incorporated. Allow the filling to cool to room temperature before using it in your pie.
Handy Tips
- For a clearer filling, make sure to not overcook the mixture, as this can cause the cornstarch to break down and the filling to become cloudy.
- If using frozen cherries, be aware that they might release more liquid during cooking. Adjust the amount of cornstarch accordingly to achieve the desired thickness.
- Consider using a mix of sweet and tart cherries for a more complex flavor profile.
Heat Control
When cooking the cherry mixture, it’s crucial to control the heat to prevent the filling from becoming too thick or burning. Start with medium heat and adjust as needed. The ideal temperature is when the mixture is simmering gently, with small bubbles forming around the edges of the saucepan. This usually occurs between 180°F to 190°F (82°C to 88°C). The filling is done when it has thickened enough to coat the back of a spoon and the cherries are tender.
Crunch Factor
The texture of your cherry pie filling should be smooth with slight chunks of cherries, providing a nice contrast to the flaky pie crust. To achieve this, avoid overcooking the filling, which can make it too thick and jam-like. If you prefer a smoother filling, you can blend a portion of it in a blender or with an immersion blender before returning it to the saucepan and continuing with the recipe.
Pro Kitchen Tricks
- Use a candy thermometer to ensure the filling reaches the perfect consistency. The temperature should be around 215°F (102°C) for a firm, jam-like consistency.
- For an intense cherry flavor, use cherry juice or cherry extract in addition to the fresh or frozen cherries.
- To prevent the pie crust from becoming soggy, make sure the filling is completely cooled before filling the pie, and consider using a pie crust shield or covering the edges with foil during baking.
Storage Tips
- The cherry pie filling can be stored in an airtight container in the refrigerator for up to 3 days or frozen for up to 6 months. When freezing, consider dividing the filling into smaller portions for easier thawing and use.
- When reheating, do so gently over low heat, stirring frequently to prevent scorching. You can also reheat it in the microwave in short intervals, stirring between each heating until warmed through.
- For the best flavor and texture, use the filling within a day or two of making it. If you must store it, press plastic wrap directly onto the surface of the filling to prevent a skin from forming.
Gift Packaging Ideas
If you’re considering gifting your homemade cherry pie filling, presentation is key. Fill decorative jars with the cooled filling and top with a layer of wax paper or plastic wrap before screwing on the lid. Add a ribbon around the neck of the jar and a gift tag with baking instructions or a personal message. For a more rustic look, use mason jars and decorate with twine and a handwritten label. This thoughtful gift is perfect for friends, family, or as a unique contribution to potlucks and gatherings.
Flavor Variations
- Different spices: Experiment with ground ginger, nutmeg, or cardamom to add unique warmth to your filling.
- Creative toppings: Consider adding a sprinkle of sugar, a dollop of whipped cream, or a few fresh cherries on top of the pie before serving for added visual appeal and flavor contrast.
- Ingredient swaps: Use other types of fruit like blueberries, raspberries, or a mix of berries to create different flavor profiles. Adjust the amount of sugar according to the sweetness of the fruit.
Troubleshooting
- Texture problems: If the filling becomes too thick, thin it out with a little water or cherry juice. If it’s too thin, simmer it for a few more minutes or add a bit more cornstarch.
- Ingredient replacements: If you don’t have cornstarch, you can use flour or tapioca starch as a thickening agent, though you may need to adjust the amount and cooking time.
- Over/undercooking signs: The filling is undercooked if it’s still runny and not holding its shape when cooled. Overcooking results in a filling that’s too thick and possibly caramelized. Adjust your cooking time and heat accordingly to achieve the perfect consistency.
FAQs
- Can I freeze it? Yes, the cherry pie filling can be frozen for up to 6 months. Divide it into smaller portions for easier use.
- Is it gluten-free? This recipe is naturally gluten-free, making it suitable for those with gluten intolerance or sensitivity.
- Can I double the recipe? Yes, you can easily double or triple the recipe if you need more filling. Just be sure to use a larger saucepan to accommodate the increased volume.
Conclusion
Making your own cherry pie filling from scratch is a rewarding experience that allows you to control the ingredients, the flavor, and the fun. With this recipe, you’re not just making a dessert component; you’re creating memories and traditions. Feel free to experiment with different spices, fruits, and presentation ideas to make this recipe your own. Share your creations with loved ones, and enjoy the process of cooking and baking that brings people together. Happy baking, and don’t hesitate to reach out with your own tips and variations!
Cherry Pie Filling
A homemade cherry pie filling recipe made with fresh cherries, sugar, and spices. Perfect for pie making, with tips on storage, freezing, and flavor variations.
🥘 Ingredients
👩🍳 Instructions
-
1Prepare the cherries by washing and pitting them if fresh, or thawing and patting dry if frozen.
-
2Combine the cherries, sugar, cornstarch, lemon juice, salt, cinnamon, and almond extract in a saucepan. Let it sit for 15 minutes to allow the cherries to release their juice and the cornstarch to absorb the liquid.
-
3Cook the mixture over medium heat, stirring constantly, until it thickens and the cherries have broken down slightly. This should take about 10-15 minutes.
-
4Remove the saucepan from the heat and stir in the butter until fully incorporated. Allow the filling to cool to room temperature before using it in your pie.