Chocolate Lava Cookies – Easy Back-to-School Treat Kids Will Love!
Introduction
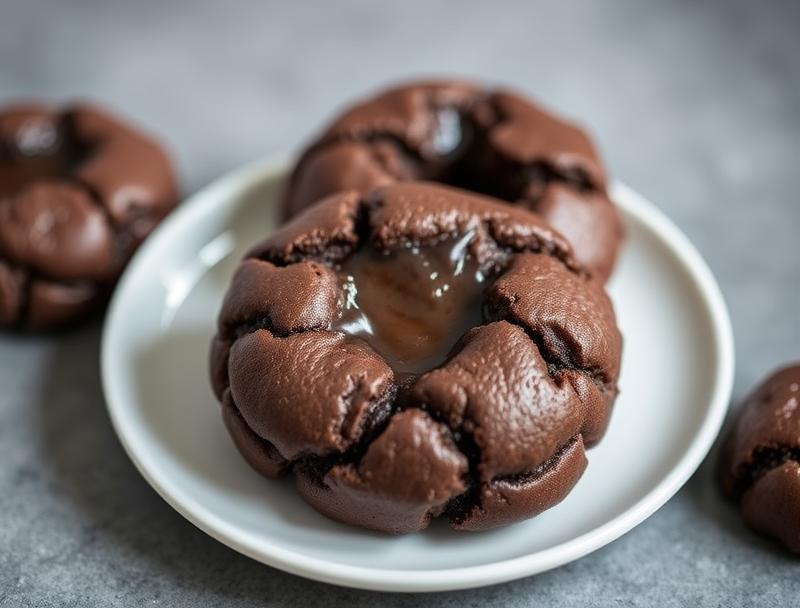
As the summer winds down and the back-to-school season approaches, finding the perfect treat to delight both kids and parents can be a challenge. However, with the simplicity and indulgence of Chocolate Lava Cookies, you’re about to discover a recipe that checks all the boxes. These cookies are not just easy to make but also packed with a rich, gooey chocolate center that kids will adore. The best part? You likely have most of the ingredients in your pantry already, making this a convenient and creative way to use everyday items. Whether you’re a busy parent looking for a quick dessert solution or a student seeking a sweet pick-me-up, these Chocolate Lava Cookies are sure to become a favorite.
Why This Works
- Flavor balance and ingredient accessibility: The combination of melted chocolate, sugar, and the slight crunch of cookie edges creates a perfect balance of flavors and textures. Moreover, the ingredients are readily available, making this recipe highly accessible.
- Ease of preparation: The simplicity of mixing wet and dry ingredients separately and then combining them makes the preparation process straightforward and quick. This is ideal for those short on time or new to baking.
- Impressive results with minimal effort: Despite the simplicity of the recipe, the end result is nothing short of impressive. The gooey chocolate center surrounded by a soft, lightly baked cookie is sure to impress both kids and adults alike.
Ingredients
- 2 1/4 cups all-purpose flour
- 1 tsp baking soda
- 1 tsp salt
- 1 cup unsalted butter, at room temperature
- 3/4 cup white granulated sugar
- 3/4 cup brown sugar
- 2 large eggs
- 2 teaspoons pure vanilla extract
- 2 cups semi-sweet chocolate chips
Instructions
- Step 1: Preheat your oven to 375°F (190°C). Line a baking sheet with parchment paper or a silicone mat.
- Step 2: Whisk together the flour, baking soda, and salt in a medium bowl. Set aside.
- Step 3: In a large bowl, use an electric mixer to cream together the butter and sugars until light and fluffy, about 2-3 minutes. Beat in the eggs one at a time, followed by the vanilla extract.
- Step 4: Gradually mix in the dry ingredients (flour mixture) until just combined, being careful not to overmix. Stir in the chocolate chips.
- Step 5: Use a cookie scoop or spoon to drop rounded balls of dough onto the prepared baking sheet, leaving about 2 inches of space between each cookie.
- Step 6: Bake for 12-14 minutes or until the edges are lightly golden brown and the centers are set.
- Step 7: Remove from the oven and let cool on the baking sheet for 5 minutes before transferring to a wire rack to cool completely.
Handy Tips
- Ensure your butter is at room temperature for easier mixing.
- Don’t overbake, as this can cause the cookies to lose their gooey center.
- Consider using high-quality chocolate for the best flavor.
Heat Control
Maintaining the right oven temperature is crucial. Bake the cookies at 375°F (190°C) for the recommended time. Keep an eye on them after 10 minutes, as oven temperatures can vary. If you prefer a chewier cookie, bake for 10-11 minutes. For a firmer cookie, bake for 14 minutes.
Crunch Factor
The perfect Chocolate Lava Cookie should have a crunchy edge and a soft, gooey center. To achieve this, avoid overmixing the dough and don’t overbake the cookies. The slight underbaking will ensure the center remains molten and delicious.
Pro Kitchen Tricks
- Chill the dough for 30 minutes to an hour before baking to help the cookies retain their shape better.
- Use a mixture of dark and semi-sweet chocolate chips for a deeper flavor profile.
- Press a few extra chocolate chips into the top of each cookie immediately after baking for an extra chocolatey treat.
Storage Tips
- Store cooled cookies in an airtight container at room temperature for up to 5 days.
- For longer storage, consider freezing the cookies. Place them in a single layer in a freezer-safe bag or container and freeze for up to 2 months. Reheat in the microwave for a few seconds to restore the gooey center.
Gift Packaging Ideas
These cookies are perfect for gifting, especially during the back-to-school season. Consider packaging them in decorative jars, wrap them individually in plastic wrap or aluminum foil and place in a gift bag, or arrange them in a cookie tin lined with parchment paper. Adding a ribbon or a handmade card can make the gift even more special.
Flavor Variations
- Different spices: Add a pinch of cinnamon or nutmeg to give the cookies a unique twist.
- Creative toppings: Press chopped nuts, sprinkles, or even candy pieces into the top of the cookies before baking for added texture and fun.
- Ingredient swaps: Replace some of the semi-sweet chocolate chips with peanut butter chips or caramel bits for a surprising flavor combination.
Troubleshooting
- Texture problems: If your cookies turn out too hard, they might have been overbaked. If they’re too soft, they might not have been baked long enough.
- Ingredient replacements: If you’re out of brown sugar, use an extra 1/4 cup of white granulated sugar as a substitute, though keep in mind the flavor might be slightly different.
- Over/undercooking signs: Cookies are done when they’re lightly golden brown on the edges and still slightly soft in the center. Avoid overcooking, as this will cause them to lose their lava center.
FAQs
- Can I freeze the dough? Yes, you can freeze the cookie dough for up to 2 months. Simply scoop the dough into balls, place them on a baking sheet lined with parchment paper, and freeze until solid. Then, transfer the frozen dough balls to a freezer-safe bag or container. Bake frozen cookies for an additional 1-2 minutes.
- Is this recipe gluten-free? No, this recipe contains all-purpose flour and is not gluten-free. However, you can experiment with gluten-free flour mixes as a substitute, though the texture might vary.
- Can I double the recipe? Yes, you can easily double or even triple this recipe if you’re planning for a larger group. Just remember to adjust the baking time slightly if you’re baking more than one tray of cookies at a time.
Conclusion
With the Chocolate Lava Cookies recipe, you’re not just making a dessert; you’re creating memories. Whether it’s a surprise after-school treat or a fun baking project with the kids, these cookies are sure to bring smiles and satisfaction. Feel free to experiment with different variations and share your creations with friends and family. The joy of baking is in the sharing, and with these Chocolate Lava Cookies, you have a treat that’s sure to be loved by all. So, go ahead, get baking, and make this back-to-school season a little sweeter!
Chocolate Lava Cookies – Easy Back-to-School Treat Kids Will Love!
A simple and indulgent recipe for Chocolate Lava Cookies, perfect for back-to-school treats. These cookies are easy to make, rich in flavor, and feature a gooey chocolate center that kids will love.
🥘 Ingredients
👩🍳 Instructions
-
1Preheat the oven to 375°F (190°C).
-
2Whisk together the flour, baking soda, and salt in a medium bowl.
-
3Cream together the butter and sugars until light and fluffy, then beat in the eggs and vanilla extract.
-
4Gradually mix in the dry ingredients until just combined, then stir in the chocolate chips.
-
5Scoop the dough into balls, place on a prepared baking sheet, and bake for 12-14 minutes.
-
6Let cool on the baking sheet for 5 minutes before transferring to a wire rack to cool completely.